
User's Manual

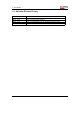
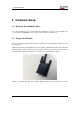
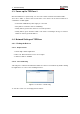
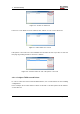
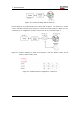
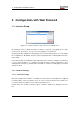
Table Of Contents

3. Configuration with Web Frontend
3. Configuration with Web Frontend
3.1. Interface Setup
Figure 3.1.: Visit the web front-end of the selected TCPConv 2
By clicking “Connect to TCPConv” while one device is selected, or by typing <ip of a TCP-
Conv 2>:81 in the browser, one can see the homepage of the TCPConv
By clicking “Setup” in Figure 3.2 and typing in the user name and password, one can change
the configurations. By default, both user name and password are “admin”(without the quo-
tation mark).
The actual settings are displayed on this page. One can for instance configure the TCPConv
to use a static IP address or configure it as TCP Server for USB communication. After
submitting the changes by pushing “Save and Reboot”, TCPConv 2 will apply the changes
and reboot itself.
3.1.1. Network Settings
3.1.1.1. Hostname Setting
One can configure the hostname of a TCPConv 2. If the device uses DHCP, this configured
hostname will be sent to the DHCP server. In order to reach the device via hostname, it is
necessary that the hostname is also registered in DNS server.
Please make sure a valid hostname is given, otherwise TCPConv 2 will ignore the sub-
mit.
Page 10 of 23