
- VIA!DJ_USERSGUIDE_REVB


ELAN HOME SYSTEMS
© ELAN Home Systems 2004 • All rights reserved. 02/04 Page 31
USER GUIDE
NEW FEATURES
Rear panel Digital IN, Digital Optical IN
and Analog IN now enabled for recording
. . . . . . . . . . . . . . . . . . . . . . . . . . .P 31
‘Quick Add’ . . . . . . . . . . . . . . . . . .P 33
Presets . . . . . . . . . . . . . . . . . . . . .P 34
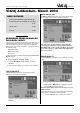
RECORDING FROM AN ANALOG
OR DIGITAL INPUT
Using the line-in connectors on the back of your VIA!dj you can
make recordings from sources such as Minidisc, vinyl record
and cassette. Before beginning a new recording make sure
that the device you wish to record from is connected to one of
the following inputs:
• Digital Optical input
• Digital Coaxial input
• Analog input
For more information on these connectors see the Rear Panel
Diagram on p.8.
To create a new line-in recording session
• From the Main Menu highlight Line-In, then press
✔Select.
A series of screens allows you to set up the new recording.
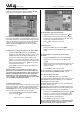
LINE-IN SOURCE
The Line-in Source menu lets you specify which input
connector to use for the new recording:
• Select the input your device is connected to, then press
✔Select.
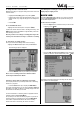
MONITOR OUTPUT
The Monitor Output menu allows you to select which output
you would like to use to listen to the line-in recording:
• Highlight an output then press
✔Select.
Note: Any music currently playing on this output will
continue to play but will no longer be audible while the
Line-In Record screen is visible. The None option allows
you to make a line-in recording without interrupting play-
back on any output.
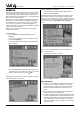
SOUND QUALITY
The Sound Quality menu allows you to specify the recording
quality:
• Choose between Maximum (no compression used) or
one of the MP3 compression options.
Note: The higher quality options use more space on your
VIA!dj Hard Disk.
In each case the display shows the total remaining recording
time available at the specified recording quality.
• Press the
✔Select key to confirm your selection.
VIA!dj Addendum, March 2004