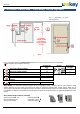
General OPERATING INSTRUCTIONS ekey home ID16/39: Version 2 dated 27.1.
General ENGLISH ENGLISH ........................................................................................................................................................................... 2 1. FOREWORD .............................................................................................................................................................. 4 2. MANUFACTURER´S WARRANTY ..............................................................................................................
General 8.2.2.9 RESETting to factory settings ..................................................................................................................................................... 34 8.2.2.10 Test mode .................................................................................................................................................................................. 35 8.2.2.11 LED INTENSITY ........................................................................................
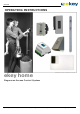
General 1. Foreword Congratulations on the purchase of this premium finger scanner system ekey home. It has been manufactured with highest accuracy and guarantees a maximum amount of recognition performance. Enjoy the convenience - no more lost keys and no longer memorizing complicated codes. From now on your finger is the key! We hope you will enjoy your product a lot! 2. Manufacturer´s warranty ekey biometric systems (‘ekey’) guarantees, under conditions which you can view on our website www.ekey.
General 4. Note on the operating instructions 4.1 Warning signs and symbols CAUTION! This symbol indicates a special notice, which you must pay attention to in the described feature. INFORMATION! This symbol indicates that you can find useful information and tips about the product in the adjoining text. STOP! This symbol indicates that you may under no circumstances carry out a given action. In the majority of cases, in order to carry out the given feature, you need first to make some specific settings.
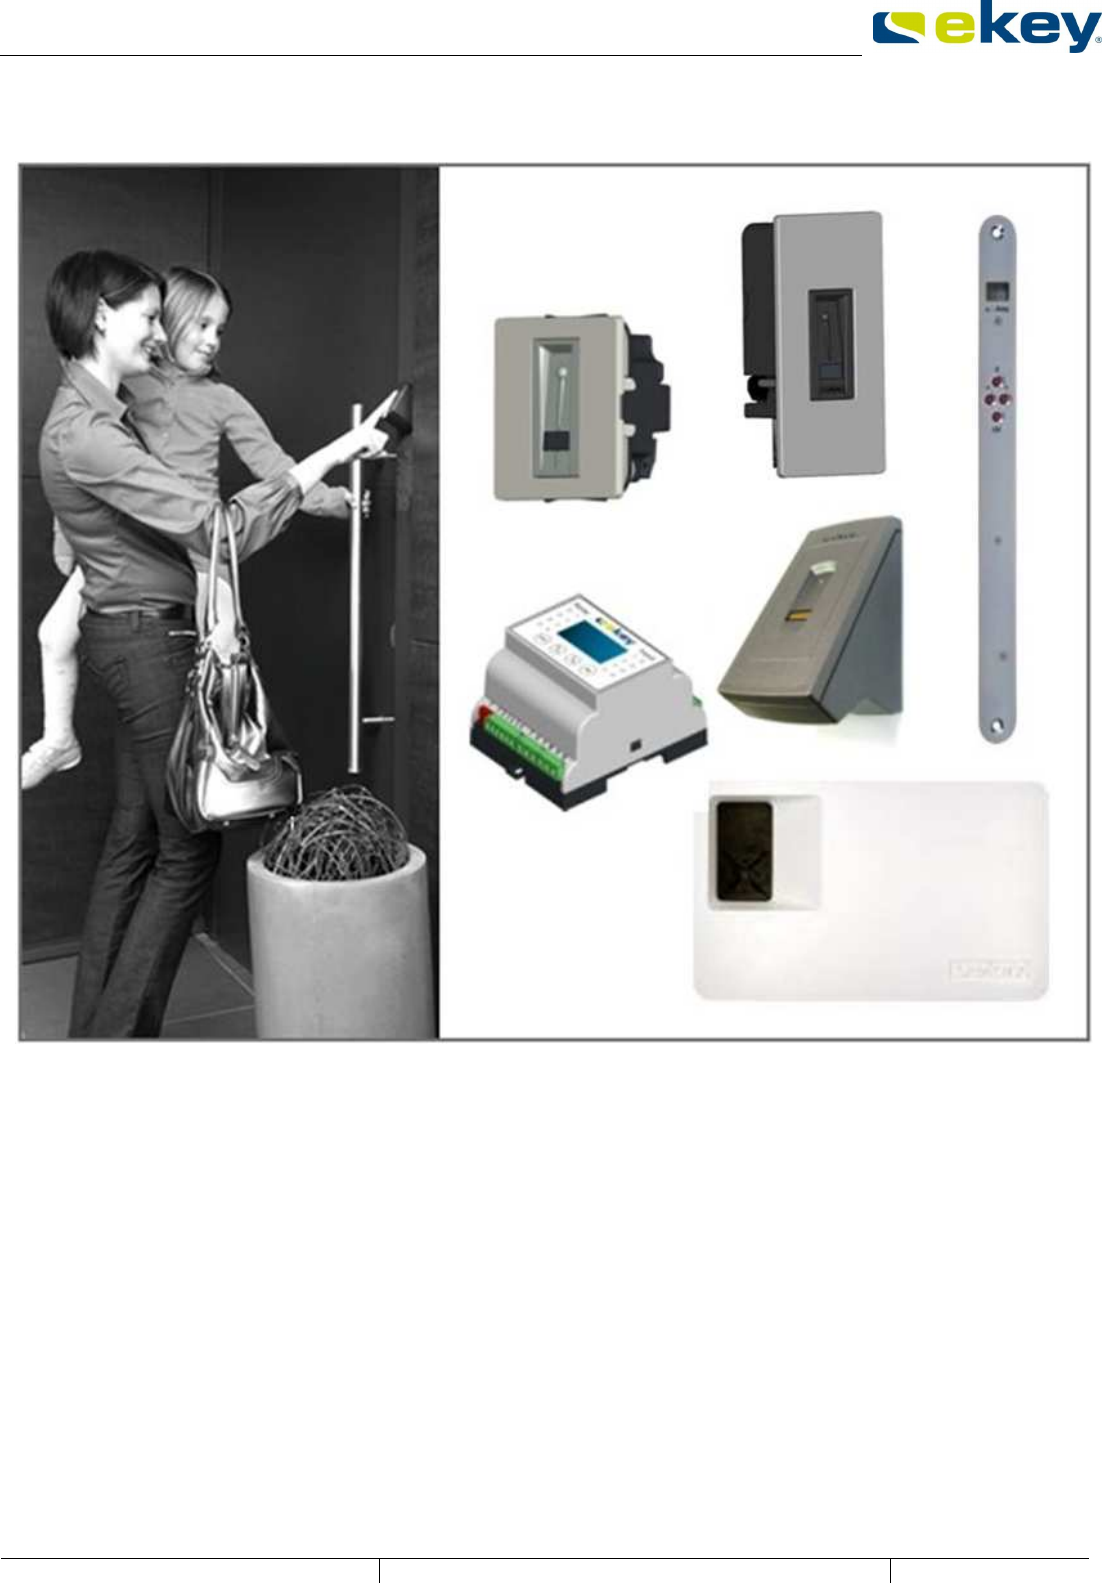
General 5. Product overview - the ekey home system min.
General ekey control panel versions The ekey home control panels are intended to directly control an electric motor lock. This is usually relay 1 for a door wiring.
General Please read carefully the provisions below before starting to wire the system: The connections of the devices are NOT protected against reverse polarity! Incorrect wiring of the devices can result in them being damaged beyond repair! Only trained and qualified electricians should carry out electrical wiring of the units and connection to the mains grid! Lay the connecting cable between the ekey home CP (control panel) and the ekey home FS (finger scanner) separately from any 230 V or 380 V mains
General 6.3 RISKS ASSOCIATED WITH INTENDED USE The sensor surface of the thermal line sensor, which is primarily used for the ekey home FS WM ekey home FS IN can become very hot (>50°C) when exposed to direct sunlight. In order to avoid burns and scalds of the fingertips, it is recommended to test the temperature by shortly touching the sensor. If needed, place your hand over the scanner making a cooling shade. Apart from that, there are no other known risks in normal use of the system. 6.
General 7. ekey home finger scanners 7.1 MODELS AND VERSIONS ekey home FS WM ekey home FS IN ekey home FS OM There are 3 different ekey home finger scanner models. ekey home FS WM 2.0 – wall-mounted ekey home FS IN 2.0 – integrable into doors and intercoms ekey home FS OM – outlet-mounted The individual finger scanners essentially differ in their method of installation. The method of operation, however, is identical for all models. 7.2 OPERATING THE FINGER SCANNERS 7.2.
General keeps fidgetting runs by and you try to make a picture of him at that exact moment hides half of his face behind a tree etc. What do you think these pictures will look like? On some of the pictures you will not even be able to recognize the person. The finger scanner works in the same way.
General Best results are achieved by using the middle finger and stretching out the index and ring finger at the same time.. (see the figure above). The correct operation of the fingerprint scanner is your guarantee of the successful functioning of this product. Below written recommendations apply for all hardware types: Please use the finger which has the best finger lines in your opinion.
General 7.3 OPTICAL SIGNALS ON THE EKEY HOME FINGER SCANNER Your ekey home finger scanner is equipped with LEDs that deliver information on the operational state and individual functions of your system. The optical signaling of the individual finger scanners will differ though. The two tables below will show you the corresponding signals and their meanings. The LEDs are named based on their purpose as Status LED – for details on the operational state (finger recognized, finger rejected, etc.
General RED GREEN flashing Left: OFF Right: OFF The sensor is dirty, smudgy or wet. Clean the sensor! During the boot procedure (power up) GREEN BLUE BLUE Left: off – BLUE flash - off Right: off – RED flash - off flash The module is booting (powering up). It takes about 1-2s counting from the moment when power supply is available. 7.4 ELECTRIC CONNECTION You can find further details such as the pin assignment wiring examples either on the accompanying ekey home wiring diagram, or on the DVD as a .
General 8.2 OPERATION 8.2.1 EKEY HOME CP IN 8.2.1.1 AND EKEY HOME CP WM OPERATING THE BUTTONS Four buttons are used for the operation: = OK button: is used to enter the menu and to confirm entries. < and > buttons: are used to change the values on the display or for navigating in the programming menu (see diagram in section 8.2.1.5) ESC button (X): is used to cancel the current entry. 8.2.1.
General 8.2.1.4 „E2“-Error code 30min lock after the security code has been entered incorrectly three times. Wait 30 minutes before entering the security code again. „E3“-Error code Devices connected incorrectly. Connect the devices again, as one of the devices has been manipulated. to Displays a number between “1” and “99” and the dot on Shows the user number of the recognized fingerprint. the right is lit up.
General 8.2.1.5 OVERVIEW OF THE PROGRAMMING MENU OF THE CONTROL PANEL You can access lower menu levels by pressing the OK button. You can move back up by pressing the ESC button. You can navigate by pressing the left < and right > buttons. You can choose a particular option by pressing OK.
General 8.2.1.6 ENTERING THE SECURITY CODE The security code allows you to avoid system manipulations by unauthorized people. Since the control panel is to be mounted in a secure area, an unauthorized person will have to get access to this secured area first. This security code can then be described as an additional hurdle. After 3 incorrect attempts, the device is blocked for 30 minutes and the control panel display shows error code .
General STA RT Enter security code DISPLAY KEY STROKE DISPLAY + SETTING KEY STROKE DISPLAY + SETTING KEY STROKE DISPLAY + SETTING Enter security code Select USER NUMBER 0-99 The red dot only flashes if this memory space has already been allocated (there already is a user or a finger on this position)! KEY STROKE DISPLAY Swipe USER FINGER Select FINGER NUMBER F1- Select RELAY o1-o3 or od F10 DISPLAY DISPLAY DISPLAY FINI SHED User finger recorded! 1.
General Once „EF“ appears on the display, you have 60 seconds time to swipe your finger, starting at the top knuckle downwards, over the sensor. The finger scanner status LED lights up orange = operation mode Enrollment. The device is waiting for a finger to enroll. The fingerprint should be recorded in the manner described in section 7.2.
General 2.) 3.) 4.) 5.) 6.) 7.) 8.) 9.) Press the > button until “Sc” is displayed Press the OK button Enter the left digit of the new security code using the < and > buttons Press the OK button Enter the right digit of the new security code using the < and > buttons Press the OK button “OK” is displayed for a short time. The device then returns to normal mode Memorize your security code, or write it down and keep it in a safe place, separately from the ekey home control panel. 8.2.1.
General 8.2.1.11 CHANGING THE RELAY SWITCHING TIMES The switching impulse times of the individual relays can be variably adjusted from 1s to 99s. This enables you to adjust the duration of the opening impulse of the door according to your application. All the relays on your ekey home control panel are preset at 3s impulse duration. Special feature relay time 0 If the value 0 is assigned to a relay in this menu, then a special function is active. In this case the relay is bi-stable.
General 8.2.1.12 RESETTING TO FACTORY SETTINGS If you carry out this procedure, then all the saved data will be irrecoverably deleted! If you reset the device to its factory settings, all the user data (user fingers) in the memory are deleted. The security code is reset to the standard value of 99, the control panel and the finger scanner are disconnected, and the relay switching times are set for all the relays at 3s.
General 8.2.2 EKEY HOME CP DRM 1 (2) 8.2.2.1 CONTROLS The ekey home CP DRM has 4 buttons and an LCD display for system operation and programming. It also features a sliding switch to switch on and off the bus termination, as well as 1 respectively 2 LEDs for relay status and digital input signaling. LCD display on ekey home CP DRM Displays information related to the programming procedure on the ekey home CP DRM.
General 8.2.2.
General 1.) Select a language using the buttons. It is now that you must define the language! After the initialization has been concluded, you CANNOT change the selected language anymore (except if you reset the system). 2.) Press the button. A time counter is displayed, which counts from 45 seconds to 0. You will be asked to press the [OK] button. 3.) Press . Now you will be asked to press the [ESC] button. 4.) Now press . 5.
General You can now start setting up the system and entering user data. 8.2.2.4 ENTERING THE SECURITY CODE The security code allows you to avoid system manipulations by unauthorized people. However, the control panel is normally mounted within the secured area (electric control cabinet), so for an unauthorized person to try to manipulate the system, must this person already be within this secured area. This security code is an additional hurdle, which the unauthorized person should override.
General Generally speaking, we recommend to: save at least 2 fingerprints per user (ideally from different hands) use index and middle fingers. From an ergonomic point of view, they are best suited for proper operation resulting in the highest level of recognition. avoid using thumbs and little fingers. stick to the suggested numbering of the respective fingerprints (see below). Before adding a fingerprint into the system, please read through section 7.
General 1.) First, enter the security code as per section 8.2.2.4 2.) Select “Enroll user” in the main menu. 3.) Press the button. 4.) Select the user: This is what the user / finger matrix looks like: The numbers show that these fingers for the corresponding user have already been allocated and which relay switches for each finger: 1 … Relay 1 2 … Relay 2 (only for ekey home CP DRM 2) D … Double relay (only for ekey home CP DRM 2) User number Each individual user is indexed through the user number.
General 7.) Now using the buttons, select the finger to be enrolled: This finger has already been enrolled R2 “R2” beside the finger means that this finger has already been enrolled and that it has been allocated to relay 2. You can however still select this finger and enroll it anew. The preceding finger image will then be automatically overwritten.
General If you press , the finger enrollment will be canceled, without any finger having been enrolled, and you will be back to the finger overview. The fingerprint should be recorded in the manner described in section 7.2. The finger scanner features a (LED) status display, which signalizes using two different colors, after you have swiped your finger over the sensor, if the enrollment was successful or not: Red: The finger could not be scanned successfully, Please repeat the enrollment process.
General 5.) Press the button. 6.) You will then be asked if you really wish to delete this user´s fingers. Press the button to delete all the fingers as well as the user name. Press the button to cancel the delete process. 7.) The relay numbers indicating the enrolled fingers for that one user disappear. This user number can therefore be used for another new user. The relay numbers and the user name beside “02USER” have disappeared. All the enrolled fingers have been deleted.
General 8.2.2.8 CHANGING THE RELAY SWITCHING TIMES The switching impulse times of the individual relays can be variably adjusted from 0.5s to 99.0s with intervals of 0.5s. This enables you to adjust the duration of the opening impulse of the door according to your application. The relay on your ekey home CP DRM is preset at 3s impulse duration. Special feature relay time 00.0 If the value 00.0 is assigned to a relay in this menu, then a special function is enabled.
General This relay time can only be set for the ekey home CP DRM 2. ZnR ... status after reset; Can only be modified if relay time 00.00 (toggle mode) has been selected. 7.) Press the button. 8.) You now are back to the main menu. The duration of the impulse or the switching feature has thus been defined for the selected relay. 8.2.2.
General 8.2.2.10 TEST MODE The test mode has been particularly designed to run functional tests after the initial installation and for trouble shooting the system in combination with a suitable locking system. In this mode, you can manually activate the relay output via the menu of the ekey home CP DRM. This way, you can verify in a simple manner if the locking system has been wired properly.
General 8.2.2.11 LED INTENSITY The ekey home CP DRM allows you to define the LED intensity of the status LED on the finger scanners in idle mode. The status LED is always preset on „On“ (factory setting) and lights up blue with maximum intensity. Some customers however wish to have it dimmed or even switched off, so that the finger scanner beside the front door does not attract too much attention. 3 different statuses can be set: LED on … The LED lights up with full intensity (factory setting).
General 8.2.2.12 LOGGING The ekey home CP DRM logs the last 50 accesses. Both the user name and the switched relay will be displayed on a list. DISPLA Y START Enter sec urity code DISPLA Y KEY STROKE DISPLA Y KEY STROKE DISPLA Y FINISHED Enter security code Scroll in the list 1.) First enter the current security code as per section 8.2.2.4. 2.) Select „Logging“ in the main menu using the buttons. 3.) Press the button. The list with the last 50 accesses will now be displayed.
General 8.2.3 ELECTRIC CONNECTION You can find further details such as the pin configuration wiring sketches either on the wiring diagram supplied with the product, or on the DVD (.pdf file). 8.2.4 MOUNTING You can find further information to be supplied either on the ekey mounting instructions supplied with the product, or on the DVD (.pdf file). 9.
General Error code „E2“ on the display The wrong security code has been entered three Wait 30 minutes before entering the security times. Device is locked for 30 minutes. code again. The system has to be permanently powered within those 30 min! Error code „E3“ on the display Device connected/coupled incorrectly Re-couple the devices = initialize devices. One of the devices has been manipulated. ekey home CP DRM The initialization process (= commissioning) cannot be carried out.
General 11. Maintenance 11.1 CARE Generally speaking, your system does not require any maintenance. Apart from cleaning the sensor surface occasionally when it is dirty, you are not required to do anything. 11.2 CLEANING Care of the sensor area Sensor areas The sensor area of the finger scanner is the most important element of your ekey home system and needs to be taken care of accordingly in order to function reliably and durably.
General 14. Accessories ekey supplies a wide range of accessories for its biometric systems. Please contact either your ekey partner, your ekey installer or ekey itself for accessories such as: power supplies pre-configured cables in-wall sets and mounting aids design elements milling samples etc. 15. Declarations of conformity The declaration of conformity for each product (ekey home finger scanner and ekey home control panel) can be found in the “Declarations of conformity” folder on the DVD. 16.