
User Manual


Welcome Page 27 of 54
file://C:\TEMP\~hhA856.htm 8/12/02
you to control programs, edit documents and add annotations.
Installation for Interactive Mode is complete. You can now use the system.
Connect for PC Whiteboard Mode
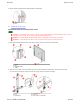
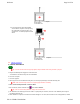
3. Using the USB cable, connect the SchoolBoard's USB port (A) to the computer's USB port (or to a port on a USB hub connected to the
computer).
or
Using the serial cable, connect the SchoolBoard's serial port (B) to the computer's serial port.
CAUTION: DO NOT connect both USB and serial cables at the same time.
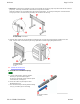
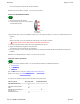
4. Connect the SchoolBoard power supply cable to the SchoolBoard's power port (C).
5. Plug the SchoolBoard power supply into an electrical outlet.
You should hear at least four beeps from the SchoolBoard.
6. Turn on the computer. If you are using a USB connection to the SchoolBoard, Windows will find the SchoolBoard and complete the
installation.
Installation for PC Whiteboard Mode is complete. You can now use the system.
Overview of basic operations
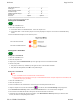
First, you need to launch InterWrite Software. You can launch Interactive Mode or PC Whiteboard Mode from:
n The SchoolBoard.
n A SchoolPad.
n The PC.
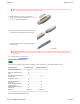
Next, review instructions for using the SchoolBoard pens and SchoolPad pens.
Finally, you are ready to use InterWrite Software.
The mode you use depends on what you want to do with the School Suite system.
1. Shut down and turn off the computer.
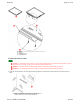
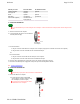
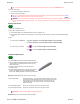
2. Locate and identify the ports on the SchoolBoard
controller (shown at right).
A USB port
B Serial port
C Power port
What can you do? Interactive Mode PC Whiteboard Mode
Write using electronic ink
ü
Write from a wireless remote
tablet
ü*
Write with dry erase markers in
electronic pens
ü
Annotate PC screens
ü