Multi-media Projector MODEL LC-XNB2 OWNER’S MANUAL OWNER’S MANUAL English GB BEDIENUNGSANLEITUNG Deutsch D MODE D'EMPLOI Français F MANUALE D'USO Italiano I MANUAL DE INSTRUCCIONES DEL USUARIO Español E
TO THE OWNER As the owner of a new Multimedia Projector, you are probably eager to try out your new projector. Before you do, we suggest that your spend a little time reading this manual to familiarize yourself with the operating procedures, so that you will receive maximum satisfaction from the many features included in your new projector. This owner's manual will acquaint you with your projector's features. Reading it will help us too.
IMPORTANT SAFETY INSTRUCTIONS All the safety and operating instructions should be read before the product is operated. Read all of the instructions given here and retain them for later use. Unplug this projector from AC power supply before cleaning. Do not use liquid or aerosol cleaners. Use a damp cloth for cleaning. Do not use attachments not recommended by the manufacturer as they may cause hazards. Do not place this projector on an unstable cart, stand, or table.
TABLE OF CONTENTS FEATURES AND DESIGN PREPARATION NAME OF EACH PART OF THE PROJECTOR SETTING-UP THE PROJECTOR POSITIONING THE PROJECTOR ADJUSTABLE FEET CONNECTING THE AC POWER CORD VENTILATION MOVING THE PROJECTOR CONNECTING THE PROJECTOR TERMINALS OF THE PROJECTOR CONNECTING TO THE VIDEO EQUIPMENT CONNECTING TO THE COMPUTER BEFORE OPERATION 6 6 7 7 7 8 8 9 10 10 11 12 14 OPERATION OF THE REMOTE CONTROL 14 LASER POINTER FUNCTION REMOTE CONTROL BATTERIES INSTALLATION 14 15 TOP CONTROLS AND INDICATO
FEATURES AND DESIGN This Multimedia Projector is designed with the most advanced technology for portability, durability, and ease of use. The projector utilizes built-in multimedia features, a palette of 16.77 million colours, and matrix liquid crystal display (LCD) technology. ◆ Compatibility This projector is compatible with many different types of personal computers and video devices, including; ● IBM-compatible computers, including laptops, up to 1280 x 1024 resolution.
PREPARATION NAME OF EACH PART OF THE PROJECTOR FRONT OF THE CABINET PROJECTION LENS PC CARD SLOT LENS COVER CARRY HANDLE INFRARED REMOTE RECEIVER SPEAKER (Monaural) BACK OF THE CABINET EXHAUST VENT HOT AIR EXHAUSTED ! Air blown from the exhaust vent is hot. When using or installing the projector, following attention should be taken. ● Do not put a flammable object near this part. Keep heat-sensitive objects away from the exhaust vent. ● Do not touch this part especially screws and metallic parts.
SETTING-UP THE PROJECTOR POSITIONING THE PROJECTOR ● This projector is basically designed to project on a flat projection surface. ● The projector can be focused from 1.4m ~ 10.8m. ● Refer to the figure below to adjust the screen size. 10.8m 7.3m 300” 5.5m 200” 3.6m 150” 1.
PREPARATION CONNECTING THE AC POWER CORD This projector uses nominal input voltages of 200 - 240 V AC. The projector automatically selects the correct input voltage. It is designed to work with single-phase power systems having a grounded neutral conductor. To reduce the risk of electrical shock, do not plug into any other type of power system. Consult your authorized dealer or service station if your are not sure of the type of power supply being in use.
PREPARATION MOVING THE PROJECTOR Use the Carry Handle when moving the Projector. When moving the projector, replace the lens cover and rotate the feet fully clockwise (to shorten the feet) to prevent from damage to the lens and the cabinet. When this projector is not used for the extended period, replace the lens cover, tuck the Adjustable Feet and apply the dust cover supplied to this projector.
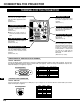
CONNECTING THE PROJECTOR TERMINALS OF THE PROJECTOR S-VIDEO INPUT JACK VIDEO INPUT JACK Connect the S-VIDEO output from the video equipment to this terminal. (Refer to P11.) Connect the video output from the video equipment to this terminal. (Refer to P11.) S-VIDEO AUDIO INPUT JACKS Connect the audio outputs from the video equipment to these terminals. (Refer to P11.) ● When the audio output is monaural, connect it to the Left jack.
CONNECTING TO THE VIDEO EQUIPMENT Video Source (example) Video Cassette Recorder Used cables for connection Video Disc Player Video / Audio Output S-VIDEO Output • VIDEO CABLE ✽ • S-VIDEO CABLE ✽ • AUDIO CABLE (stereo) ✽ ✽ These cables are not supplied with this projector. Video Audio Cable ✽ S-VIDEO Cable ✽ Use the either of VIDEO jack or S-VIDEO jack. When the both jacks are connected, the S-VIDEO jack has priority over the VIDEO jack.
CONNECTING THE PROJECTOR CONNECTING TO THE COMPUTER To connect with the computer, refer to the figure below. Used cables for connection • VGA CABLE • CONTROL CABLE FOR PS/2 PORT • CONTROL CABLE FOR SERIAL PORT,or ADB PORT ✽ • MAC ADAPTER ✽ • MONITOR CABLE ✽ • PC AUDIO CABLE (stereo) ✽ ✽ These cables are not supplied with this projector.
CONNECTING THE PROJECTOR S-VIDEO R-AUDIO-L(MONO) VIDEO AUDIO IN OUT COMPUTER IN MONITOR OUT CONTROL PORT COMPUTER IN MONITOR OUT CONTROL PORT AUDIO IN AUDIO OUT GB ◆ MAC ADAPTER (Not supplied) Use one of these Control Cables corresponding with the terminal of your computer. Set the switches as shown in the table below depend- ON ing on the RESOLUTION MODE that you want to use before your turn on the OFF projector and computer.
BEFORE OPERATION OPERATION OF THE REMOTE CONTROL Left Side VIDEO BUTTON POWER ON-OFF BUTTON COMPUTER/ VIDEO MCI Used to select VIDEO source. (P30) ZOOM ON-OFF FOCUS VOLUME ON COMPUTER/MCI BUTTON F ALL OF Used to select source either COMPUTER or MCI mode. (P23, 33) MUTE D.ZOOM PAGE POINT BUTTON MENU BUTTON Used to move the pointer on the MENU, to adjust the item, or to pan the image in DIGITAL ZOOM mode. (P29, 37) It is also used as a PC mouse in Wireless Mouse Operation.
BEFORE OPERATION VOLUME BUTTON COMPUTER/ VIDEO MCI ON-OFF ZOOM BUTTON Used to adjust zoom. (P21) FOCUS BUTTON ZOOM Used to adjust volume. (P22) FOCUS VOLUME D.ZOOM BUTTON MUTE D.ZOOM Used to turn the projector into DIGITAL ZOOM mode. (P29, 37) Operating Range Point the remote control toward the projector (Receiver Window) whenever pressing the buttons. Maximum operating range for the remote control is about 5m and 60° front and rear of the projector PAGE Used to adjust focus.
BEFORE OPERATION TOP CONTROLS AND INDICATORS NORMAL BUTTON Used to reset to normal picture adjustment preset by factory. (P27, 31, 36) AUTO IMAGE BUTTON PAGE BUTTONS Used to operate AUTO IMAGE function. (P28) POWER ON–OFF BUTTON Used to turn the projector on or off. (P20) NORMAL LAMP INDICATOR This indicator is lit in dim when the projector is turned on. And the light is brightened when the projector is in stand-by mode. PAGE VOLUME VOLUME BUTTONS Used to adjust volume.
BEFORE OPERATION OPERATING ON-SCREEN MENU HOW TO OPERATE ON-SCREEN MENU You can control and adjust this projector through ONSCREEN MENU. Refer to the following pages to operate the each adjustment on the ON-SCREEN MENU. WIRELESS REMOTE CONTROL POINT BUTTON Used to move the Pointer to UP/ DOWN/ RIGHT/ LEFT. 1 MOVING THE POINTER Move the pointer (see the NOTE below) by pressing POINT button(S) on the TOP CONTROL or the REMOTE CONTROL. 2 SELECT THE ITEM Select the item by pressing SELECT button.
BEFORE OPERATION MENU BAR MENU BAR IN COMPUTER MODE Press MENU BUTTON while being in Computer mode. MODE MENU SYSTEM MENU POSITION MENU Used to select the Computer input mode. (Refer to P23) Used to select a computer system. (Refer to P23) Used to adjust the position of the image. (Refer to P28) PC ADJUST MENU SETTING MENU Used to adjust the parameters to match with the input signal format. (Refer to P24, 25) Used to set the Display Menu and to reset Lamp Replacement Monitor Timer.
MENU BAR IN MCI MODE Press MENU BUTTON while being in MCI mode. IMAGE MENU MODE MENU Used to select the MCI input mode. (Refer to P33) Used to adjust the computer image. [Fine sync. / Total dots / White Balance / Contrast / Brightness] (Refer to P36) These icons have the same function as the Computer Mode. VIEW MENU POSITION MENU SCREEN MENU Used to display, read or write the image data in a memory card through the PC CARD SLOT. (Refer to P34, 35) Used to adjust the position of the image.
TURNING ON / OFF THE PROJECTOR TURNING ON THE PROJECTOR 1 Complete the peripheral connections (with Computer, VCR, and etc.) before turning on the projector. (Refer to "CONNECTING TO THE PROJECTOR" on Pages 10~13 for connecting those equipment. 2 Connect the projector's AC power cord into a wall outlet. The LAMP indicator lights RED, and the READY indicator lights GREEN. 3 Press the power ON-OFF button on the Remote Control Unit or on the Top Control to ON.
BASIC OPERATION ADJUSTING THE IMAGE ZOOM ADJUSTMENT 1 Press the ZOOM button on the Top Control or the ZOOM ▲/▼ button on the Remote Control Unit to turn into the ZOOM mode. 2 Press the POINT UP button or the ZOOM ▲ button to have the image larger, and press the POINT UP button or the ZOOM ▼ button to have the smaller. In the Computer mode, the image can be expanded, compressed, and panned with the Digital Zoom function. Refer to page 29, 37 for the Digital Zoom operation.
BASIC OPERATION NO SHOW FUNCTION Press the NO SHOW button on the Remote Control Unit to turn the picture into black image. This function is cancelled when the NO SHOW button is pressed again or any other function button is pressed. No show The message disappears after 4 seconds. PICTURE FREEZE FUNCTION Press the FREEZE button on the Remote Control Unit to turn the picture remained on-screen. This function is cancelled when the FREEZE button is pressed again or any other function button is pressed.
SELECTING COMPUTER MODE DIRECT OPERATION Select COMPUTER mode by pressing the MODE button on the Top Control or the COMPUTER / MCI button on the Remote Control Unit. MODE button COMPUTER / MCI button COMPUTER COMPUTER MCI MCI VIDEO MENU OPERATION Press the MENU button and the ON-SCREEN MENU will appear. Press the POINT LEFT/RIGHT buttons to select Computer and press the SELECT button. CURRENT MODE DISPLAY When selecting the Computer Mode, the Current Mode display appears.
COMPUTER MODE PC ADJUSTMENT This Projector can automatically tune to the display signals from most personal computers currently distributed. However, some computers employ the special signal formats which are different from the standard ones and may not be tuned by Multiscanning of this projector. If this happens, the projector cannot reproduce a proper image and the image is recognized as a flickering picture, a non-synchronized picture, a non-centered picture or a skewed picture.
Total lines The number of the total vertical lines. Adjust the number to match the image of your personal computer. Total dots The number of the total dots in one horizontal period. Adjust the number to match the image of your personal computer. Horizontal / Vertical Adjustment of the horizontal or vertical picture position. When the image is not centered on the screen, adjust each of those items. Clamp Adjustment of the clamp level. When the image has a dark bar(s), try this adjustment.
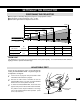
COMPATIBLE COMPUTER SPECIFICATIONS Basically this projector can accept the signal from all computers with the V, H-Frequency below mentioned and less than 140 MHz of Dot Clock. GB V-Freq. (Hz) 59.88 ON-SCREEN DISPLAY RESOLUTION 640 x 480 H-Freq. (kHz) 31.47 XGA 10 720 x 400 31.47 70.09 ON-SCREEN DISPLAY RESOLUTION VGA 1 VGA 2 1024 x 768 H-Freq. (kHz) 62.04 V-Freq. (Hz) 77.07 XGA 11 1024 x 768 61.00 75.70 35.522 43.48 VGA 3 640 x 400 31.47 70.
COMPUTER MODE PICTURE IMAGE ADJUSTMENT ADJUST PICTURE IMAGE MANUALLY 1 Press the MENU button and the ON-SCREEN MENU will appear. Press the POINT LEFT/RIGHT buttons to select IMAGE and press the SELECT button. Another dialog box PICTURE IMAGE ADJUSTMENT Menu will appear. 2 Press the POINT DOWN button and a red-arrow icon will appear. Move the arrow to the item that you want to change by pressing the POINT UP/DOWN buttons. To change the value, press either the POINT RIGHT button or the POINT LEFT button.
COMPUTER MODE AUTO IMAGE FUNCTION The Auto Image function is provided to automatically adjust Fine sync., Total dots, and Picture Position for most computers. 1 Press the MENU button and the ON-SCREEN MENU will appear. Press the POINT LEFT/RIGHT buttons to select AUTO IMAGE and press the SELECT button. Another dialog box AUTO IMAGE Menu will appear. 2 Move the arrow to an item that you want to adjust by pressing the POINT UP/DOWN button. Change the setting On or Off by pressing the SELECT button.
PICTURE SCREEN ADJUSTMENT This projector has a picture screen resize function, which enables you to display the image in desirable size. 1 Press the MENU button and the ON-SCREEN MENU will appear. Press the POINT LEFT/RIGHT buttons to select SCREEN and press the SELECT button. Another dialog box PICTURE SCREEN Menu will appear. 2 Press the POINT DOWN button and a red-arrow icon will appear. Move the arrow to the function that you want to select and then press SELECT button.
VIDEO MODE SELECTING VIDEO MODE DIRECT OPERATION MODE button COMPUTER Select VIDEO mode by pressing the MODE button on the Top Control or the VIDEO button on the Remote Control Unit. MCI VIDEO MENU OPERATION Press the MENU button and the ON-SCREEN MENU will appear. Press the POINT LEFT/RIGHT buttons to select Video and press the SELECT button. SELECTING COLOUR SYSTEM 1 Press the MENU button and the ON-SCREEN MENU will appear.
PICTURE IMAGE ADJUSTMENT ADJUSTING THE PICTURE IMAGE 1 Press the MENU button and the ON-SCREEN MENU will appear. Press the POINT LEFT/RIGHT buttons to select IMAGE and press the SELECT button. Another dialog box PICTURE IMAGE ADJUSTMENT Menu will appear. 2 Press the POINT DOWN button and a red-arrow icon will appear. Move the arrow to the item that you want to adjust by pressing the POINT UP/DOWN buttons. To change the value, press either the POINT RIGHT button or the POINT LEFT button.
OPERATING THE PC CARD SLOT This projector has PC CARD SLOT and the pictures in a memory card (SmartMedia with PC Card Adapter or PC card) can be displayed just by inserting the card into it. It is unnecessary to connect with other input equipment. Media Card Imager (supplied with CD-ROM) can edit the image data and record it into a memory card for projecting with the projector.
AVAILABLE DATA This projector can project the image data as follow through PC CARD SLOT. ● The data edited by “Media Card Imager.” ● The data of the resolution between VGA (640 X 480) and SXGA (1280 X 1024) in Bit Map type (BMP) or JPEG type (JPG), such as Digital Camera data, can be also displayed. (Some image data in XGA size may not be displayed properly. In that case, reset the resolution to the lower.) Refer to “SHOW THE DATA IN THE MEMORY CARD” on page 34 to display the image data.
MCI MODE SHOW THE DATA IN THE MEMORY CARD BASIC OPERATION 1 Insert the memory card and turn the projector into MCI mode. The image in the memory card is displayed. 2 To change the image to others, press the PAGE ▲ or ▼ button. (When the “Display Timer” is set in the image with the Media Card Imager, the image is changed to another automatically.) To select Index or Page in the table, follow the instructions of INDEX SELECTION and PAGE SELECTION.
WRITE DATA INTO THE MEMORY CARD The data edited by Media Card Imager in the computer can be written in or read from the memory card with the PC Card drive of your Personal Computer or the PC CARD Slot of this projector. The data edited by Media Card Imager is written in Bit Map type (BMP) or JPEG type (JPG). ACCESS TO THE MEMORY CARD THROUGH THE PROJECTOR If your computer doesn't have the PC card writing equipment, the data can be written or read by connecting with this projector.
PICTURE IMAGE ADJUSTMENT ADJUST THE PICTURE IMAGE MANUALLY 1 Press the MENU button and the ON-SCREEN MENU will appear. Press the POINT LEFT/RIGHT buttons to select IMAGE and press the SELECT button. Another dialog box PICTURE IMAGE ADJUSTMENT Menu will appear. 2 Press the POINT DOWN button and a red-arrow icon will appear. Move the arrow to the item by pressing the POINT UP/DOWN buttons. To change the value press either the POINT RIGHT button or the POINT LEFT button.
MCI MODE PICTURE SCREEN ADJUSTMENT This projector has a picture screen resize function, which enables you to display the image in desirable size. 1 Press the MENU button and the ON-SCREEN MENU will appear. Press the POINT LEFT/RIGHT buttons to select SCREEN and press the SELECT button. Another dialog box PICTURE SCREEN Menu will appear. 2 Press the POINT DOWN button and a red-arrow icon will appear. Move the arrow to the function that you want to select and then press SELECT button.
MCI MODE SMARTMEDIA AND PC CARD ADAPTER SmartMedia and PC Card Adapter are provided with this LCD projector. SmartMedia can be used as a PC card conforming to the PC Card Standard-ATA by combining with PC Card Adapter. INSTALL / REMOVE THE SMARTMEDIA INSTALL Insert SmartMedia fully into PC Card Adapter. Make sure EJECT button pops out. NOTE : The front side of SmartMedia has Contact Area on its surface. The front side of PC Card Adapter has Eject button on the left side of the slot.
MCI MODE PRECAUTIONS AND SPECIFICATIONS OF THE SMARTMEDIA ● SmartMedia is a precision device. Do not bend it, drop it, subject it to strong forces or shocks or place where strong static electrical charge can be generated. ● Do not touch the surface of the Contact Area with fingers or allow it to be stained with foreign materials. Store SmartMedia inside its protective case when it is not used. ● SmartMedia is a consumable item.
SETTING SETTING MENU 1 Press the MENU button and the ON-SCREEN MENU will appear. Press the POINT LEFT/RIGHT buttons to select SETTING and press the SELECT button. Another dialog box SETTING Menu will appear. 2 Press the POINT DOWN button and a red-arrow icon will appear. Move the arrow to the item that you want to set, and then press the SELECT button to set it "On" or "Off".
APPENDIX OPERATING WIRELESS MOUSE The Wireless Remote Control Unit is not only able to operate the projector but also usable as a wireless mouse for most Personal Computers. The POINT buttons and the two CLICK buttons are used for the wireless mouse operation. The wireless mouse is usable when PC mouse pointer is displayed on the screen. When the menu or the indicator of the projector is displayed on the screen instead of the PC mouse pointer, the wireless mouse cannot be used.
APPENDIX MAINTENANCE TEMPERATURE WARNING INDICATOR The TEMPERATURE WARNING Indicator flashes red when the internal temperature of the projector exceeds the normal temperature. The Indicator stops flashing when the temperature of the projector become normal. When the TEMPERATURE WARNING Indicator continues to flash, check the item listed below. 1 2 3 The Ventilation slots of the projector may be blocked. In such an event, reposition the appliance so that the ventilation slots are not obstructed.
APPENDIX LAMP REPLACEMENT INDICATOR When the life of the Lamp of this projector draws to an end, the LAMP REPLACEMENT indicator lights red. When the image becomes dark or the colour of the image become unnatural, replacement of the Lamp is required. LAMP REPLACEMENT CAUTION ● For continued safety, replace with a lamp assembly of the same type. ● Allow the projector to cool for at least 45 minutes before you open the lamp cover. The inside of the projector can become very hot.
APPENDIX TROUBLESHOOTING Before calling your dealer or service station for assistance, check the matters below once again. 1. Make sure you have connected the projector to your equipment a s described in section "CONNECTING THE PROJECTOR" on pages 10 ~ 13. 2. Check cable connection. Verify that all computer, video and power cord are properly connected. 3. Verify that all power is switched on. 4. If the projector still does not produce the image, re-start the computer. 5.
APPENDIX Problem: Try these Solution Remote Control Units dose not work. ● Check the batteries. ● Check the ALL-OFF switch on the Remote Control Unit is set to “ON.”. ● Make sure anything is blocking between the Remote Receiver and the Remote Control Units. ● Make sure you are not too far from the projector when using the Remote Control Units. Maximum operating range is 5m. Wireless Mouse function does not work. ● Check the cable connection between the projector and the computer.
TECHNICAL SPECIFICATIONS GB Projector Type Dimensions (W x H x D) Net Weight LCD Panel System Panel Resolution Number of Pixels Colour System Scanning Frequency Projection Image size (Diagonal) Horizontal Resolution Projection Lens Throw Distance Projection Lamp AV Input Jacks Computer Input Jacks Control Port Jack Monitor Output Jack Computer Audio Input Jack Audio Output Jack Internal Audio Amp Built-in Speaker Feet Adjustment Voltage Power Consumption Operating Temperature Storage Temperature Remote Co
OPTIONAL PARTS The parts listed below are optionally supplied. When ordering those parts, give the name and the Type No. of it to the sales dealer. ● Control Cable for Serial Type No. : POA-MCSRL ● Control Cable for ADB Type No. : POA-MCMAC ● MAC Adapter Type No.
An den Besitzer Als neuer Besitzer eines Multimedia-Projektors möchten Sie sicherlich den Projektor sofort in Betrieb nehmen. Wir empfehlen Ihnen aber zuvor die vorliegende Betriebsanleitung durchzulesen, um sich zuerst mit der Bedienung des Projektors vertraut zu machen. Damit sind Sie in der Lage die zahlreichen Funktionen des neuen Projektors optimal auszunutzen. In dieser Bedienungsanleitung werden die Funktionen des Projektors ausführlich erklärt.
WICHTIGE ANWEISUNGEN ZUR SICHERHEIT Lesen Sie vor der Inbetriebnahme dieses Gerätes alle Sicherheits- und Bedienungsanweisungen sorgfältig durch. Bewahren Sie die Bedienungsanleitung zum späteren Nachschlagen auf. Für die Reinigung des Projektors müssen Sie den Netzstecker aus der Steckdose ziehen. Verwenden Sie zum Reinigen keine Flüssig- oder Sprayreinigungsmittel. Verwenden Sie lediglich ein angefeuchtetes Tuch. Zubehör, das nicht vom Hersteller empfohlen wird, darf nicht verwendet werden.
INHALTSVERZEICHNIS BESONDERHEITEN UND DESIGN 5 VORBEREITUNGEN BEZEICHNUNG DER EINZELNEN TEILE AUFSTELLUNG DES PROJEKTORS Positionieren des projektors Einstellbare Füße Anschließen des Netzkabels Belüftung Transport des Projektors 6 6 7 7 7 8 8 9 ANSCHLUSS DES PROJEKTORS 10 PROJEKTORANSCHLUSSBUCHSEN ANSCHLUSS VON VIDEOGERÄTEN ANSCHLUSS EINES COMPUTERS 10 11 12 VOR DER INBETRIEBNAHME 14 FUNKTIONEN DER FERNBEDIENUNG 14 Laser-Zeigerfunktion Einsetzen der Fernbedienungsbatterien 14 15 BEDIENUNGSELEMENT
BESONDERHEITEN UND DESIGN Dieser Multimedia-Projektor wurde zur Gewährleistung einer kompakten Bauweise, einer langen Lebensdauer und eines hohen Bedienungskomforts mit modernsten Mitteln hergestellt. Im Projektor finden MultimediaFunktionen, eine Farbpalette von 16,77 Millionen Farben und eine Anzeigetechnik mit einer Flüssigkristallmatrix (LCD) Anwendung.
VORBEREITUNGEN BEZEICHNUNG DER EINZELNEN TEILE Vorderseite Projektionsobjektiv PC-Kartensteckplatz Objektivdeckel Tragegriff Fernbedienungssensor Lautsprecher (mono) Rückseite Luftauslaß AUSTRITT VON HEISSER LUFT! Die aus dem Auslaß austretende Luft ist sehr heiß. Beachten Sie für den Betrieb und die Aufstellung die folgenden Punkte: ● Es dürfen sich keine brennbaren und wärmeempfindlichen Gegenstände in der Nähe dieses Auslasses befinden.
VORBEREITUNGEN AUFSTELLUNG DES PROJEKTORS Positionieren des projektors ● Der Projektor ist für die Projektion auf eine flache Wand/Leinwand vorgesehen. ● Der Projektor kann in einem Abstand von 1,4 bis 10,8 m zur Leinwand verwendet werden. ● Für die Projektionsbildgröße wird auf die nachstehende Abbildung verwiesen.
VORBEREITUNGEN Anschließen des Netzkabels Der Projektor ist für den Betrieb mit Netzspannungen von 200-240V geeignet. Die richtige Eingangsspannung wird automatisch eingestellt. Als Stromquelle für den Projektor muß eine Einphasenstromquelle verwendet werden, deren neutraler Leiter an Masse geschlossen ist. Schließen Sie den Projektor nicht an andere Stromquellen an, weil ein elektrischer Schlag ausgelöst werden kann.
VORBEREITUNGEN Transport des Projektors Verwenden Sie zum Tragen des Projektors den Handgriff. Bringen Sie für den Transport des Projektors den Objektivdeckel an und drehen Sie die Füße ganz nach rechts, um sie zurückzustellen und den Projektor vor Beschädigung zu schützen. Falls Sie den Projektor für längere Zeit nicht verwenden, müssen Sie den Objektivdeckel anbringen, die Füße zurückstellen und die mitgelieferte Staubschutzabdeckung anbringen.
ANSCHLUSS DES PROJEKTORS PROJEKTORANSCHLUSSBUCHSEN VIDEO-Eingangsbuchse S-VIDEO-Eingangsbuchse Schließen Sie den Videoausgang des Videogerätes an dieser Buchse an. (Siehe Seite 11.) Schließen Sie den S-VIDEOAusgang des Videogerätes an dieser Buchse an. (Siehe Seite 11.) S-VIDEO Computeraudioeingangsbuchse Schließen Sie den Tonausgang eines Computers an dieser Buchse an. (Siehe Seiten 12, 13.) Audioeingangsbuchsen Schließen Sie den Audioausgänge des Videogerätes an diese Buchsen an. (Siehe Seite 11.
ANSCHLUSS DES PROJEKTORS ANSCHLUSS VON VIDEOGERÄTEN Videoquelle (Beispiel) Videorecorder Verwendete Verbindungskabel Videoplattenspieler Video/Audioausgang S-VIDEO-Ausgang • Videokabel* • S-VIDEO-Kabel* • Audiokabel (stereo)* * Diese Kabel werden nicht mit dem Projektor mitgeliefert. Video/Audiokabel* S-VIDEO-Kabel* Verwenden Sie entweder die VIDEO- oder die S-VIDEOBuchse. Falls an beiden Buchsen Kabel angeschlossen sind, so hat die S-VIDEO-Buchse Vorrang über die VIDEO-Buchse.
ANSCHLUSS DES PROJEKTORS ANSCHLUSS EINES COMPUTERS Für den Anschluß eines Computers wird auf die folgende Abbildung verwiesen. Verwendete Verbindungskabel · VGA-Kabel · Steuerkabel für PS/2-Anschluß · Steuerkabel für den seriellen Anschluß oder ADB-Anschluß* · MAC-Adapter* · Monitorkabel* · PC-Audiokabel (stereo)* * Diese Kabel werden nicht mit dem Projektor mitgeliefert.
ANSCHLUSS DES PROJEKTORS S-VIDEO R-AUDIO-L(MONO) VIDEO AUDIO IN OUT COMPUTER IN MONITOR OUT CONTROL PORT COMPUTER IN MONITOR OUT CONTROL PORT AUDIO IN AUDIO OUT ◆ MAC-Adapter (nicht mitgeliefert) Verwenden Sie das für die Buchse Ihres Computers geeignete Steuerkabel. Stellen Sie die Schalter entsprechend der zu ON verwendenden Bildauflösung wie in der nachstehenden Tabelle gezeigt ein, bevor Sie den Projektor und OFF den Computer einschalten.
VOR DER INBETRIEBNAHME FUNKTIONEN DER FERNBEDIENUNG Linke Seite VIDEO-Taste ON-OFF-Taste COMPUTER/ VIDEO MCI Für die Einstellung der Videoquelle (Seite 30). ZOOM ON-OFF FOCUS VOLUME ON COMPUTER/MCI-Taste F ALL OF Mit dieser Taste können Sie entweder die Quelle COMPUTER oder MCI einstellen (Seiten 23, 33). MUTE D.
VOR DER INBETRIEBNAHME VOLUME-Taste COMPUTER/ VIDEO MCI ON-OFF Zum Einstellen des Lautstärkepegels (Seite 22). ZOOM-Taste ZOOM Diese Taste dient zu Einstellen des Zooms (Seite 21). FOCUS-Taste FOCUS VOLUME MUTE D.ZOOM Mit dieser Taste kann die Bildschärfe eingestellt werden (Seite 21). PAGE Richten Sie die Fernbedienung beim Drücken von Tasten gegen den Projektor (Empfängerfenster).
VOR DER INBETRIEBNAHME BEDIENUNGSELEMENTE UND ANZEIGEN AN DER PROJEKTOROBERSEITE NORMAL-Taste Mit dieser Taste werden die Bildeinstellungen auf die bei der Auslieferung eingestellten Werte zurückgestellt (Seiten 27, 31, 36). AUTO IMAGE-Taste Diese Taste dient zum Einschalten der Autobildfunktion (Seite 28). PAGE-Tasten POWER-Taste Mit dieser Taste können Sie den Projektor ein- und ausschalten (Seite 20). Lampenanzeige Bei eingeschaltetem Projektor leuchtet die Anzeige schwach.
VOR DER INBETRIEBNAHME BILDSCHIRMMENÜS Bedienung der Bildschirmmenüs Der Projektor kann mit Hilfe der Bildschirmmenüs gesteuert und eingestellt werden. Für die Einstellungen mit Hilfe des Bildschirmmenüs wird auf die folgenden Seiten verwiesen. Kabellose Fernbedienung Zeigertaste Zum Bewegen des Zeigers nach oben, unten, rechts oder links. 1 Bewegen des Zeigers Bewegen Sie den Zeiger (siehe nachstehenden Hinweis) mit den Zeigertasten auf der Projektoroberseite oder der Fernbedienung.
VOR DER INBETRIEBNAHME Menüleiste Menüleiste (Computerbetriebsart) Drücken Sie bei eingeschalteter Computerbetriebsart die MENU-Taste. Betriebsartenmenü SYSTEM-Menü POSITION-Menü Zum Einstellen des Computereingangs. (Siehe Seite 23.) Zum Einstellen des Computer-systems. (Siehe Seite 23.) Für die Einstellung der Bildposition. (Siehe Seite 28.) PC-ANPASSUNGMenü Zum Einstellen der Parameter zur Anpassung an das Eingangssignal. (Siehe Seite 26.
VOR DER INBETRIEBNAHME Menüleiste in der MCI-Betriebsart Drücken Sie bei eingeschalteter MCI-Betriebsart die MENU-Taste. Betriebsartenmenü POSITION-Menü Zum Einstellen der MCIEingangsbetriebsart. (Siehe Seite 33.) Für die Einstellung der Bildposition. (Siehe Seite 36.) Diese Symbole haben die gleiche Funktion wie in der Computerbetriebsart. ANSICHT-Menü BILD-Menü SCREEN-Menü Für die Wiedergabe und zum Lesen und Schreiben von Bilddaten einer im PCKartensteckplatz eingesetzten Speicherkarte.
GRUNDBEDIENUNG EIN- UND AUSSCHALTEN DES PROJEKTORS Einschalten des Projektors 1 Schließen Sie vor dem Einschalten des Projektors alle Peripheriegeräte (Computer, Videorecorder usw.) richtig an. (Für den Anschluß wird auf den Abschnitt “Anschluß des Projektors” auf den Seiten 10 – 13 verwiesen. 2 Schließen Sie das Netzkabel des Projektors an einer Steckdose an. Die LAMP-Anzeige leuchtet rot und die READY-Anzeige leuchtet grün.
GRUNDBEDIENUNG BILDEINSTELLUNGEN Zoomeinstellung 1 Drücken Sie die ZOOM-Taste an der Projektoroberseite oder die ZOOM-Taste ▲/▼ der Fernbedienung, um die Zoom-Betriebsart einzuschalten. 2 Verwenden Sie die Zeigertaste auf oder die ZOOM-Taste ▲, um das Bild einzuzoomen und die Zeigertaste ab oder die ZOOMTaste ▼, um das Bild auszuzoomen. In der Computerbetriebsart läßt sich das Bild mit der Digitalzoomfunktion erweitern, komprimieren oder schwenken.
GRUNDBEDIENUNG Bildabschaltfunktion Drücken Sie die NO SHOW-Taste der Fernbedienung, um die Bildwiedergabe abzuschalten. Durch nochmaliges Drücken der Taste oder durch Drücken einer anderen Funktionstaste wird die Bildwiedergabe wieder eingeschaltet. Kein Bild Die Anzeige erlischt nach 4 Sekunden. Standbildfunktion Drücken Sie für eine Standbildwiedergabe die FREEZE-Taste der Fernbedienung.
COMPUTERBETRIEBSART EINSTELLEN DER COMPUTERBETRIEBSART Direkte Einstellung Stellen Sie die Computerbetriebsart durch Drücken der MODE-Taste auf der Projektoroberseite oder der COMPUTER/MCI-Taste der Fernbedienung ein. Einstellung mit Hilfe des Menüs COMPUTER/ MCI-Taste MODE-Taste Computer Computer MCI MCI Video Drücken Sie die MENU-Taste, um das Bildschirmmenü anzuzeigen. Stellen Sie den Zeiger mit den Zeigertasten links/rechts auf das Symbol Computer und drücken Sie die Einstelltaste.
COMPUTERBETRIEBSART PC-EINSTELLUNG Dieser Projektor ist in der Lage die Signale von den meisten auf dem Markt befindlichen Computern richtig zu erfassen. Es gibt jedoch auch Computer, die spezielle Signalformate verwenden, die vom normalen Format verschieden sind, und die durch das Multiscanning des Projektors nicht richtig erfaßt werden können. In diesem Fall kann die Bildwiedergabe flimmern oder das Bild wird nicht synchronisiert, nicht zentriert oder verzogen dargestellt.
COMPUTERBETRIEBSART Anzahl Linien Gesamtzahl der Vertikalzeilen. Stellen Sie die Zahl das Bild Ihres Computers ein. Tracking Gesamtzahl Bildpunkte in Horizontalrichtung. Stellen Sie die Zahl das Bild Ihres Computers ein. Horizontal/Vertikal Einstellung der horizontalen und vertikalen Bildposition. Nehmen sie die entsprechende Einstellung vor, wenn sich das Bild nicht in der Bildschirmmitte befindet. Clamp Einstellung des Clamp-Pegels.
COMPUTERBETRIEBSART Kompatible Computer Grundsätzlich ist dieser Projektor in der Lage die Signale von allen Computern mit den erwähnten Vertikalund Horizontalfrequenzen mit einem Zeilentakt von weniger als 140 MHz zu verarbeiten. D Horiz. Vert.
COMPUTERBETRIEBSART BILDEINSTELLUNG Manuelle Bildeinstellung 1 Drücken Sie die MENU-Taste, um das Bildschirmmenü anzuzeigen. Stellen Sie den Zeiger mit den Zeigertasten links/rechts auf das Symbol BILD und drücken Sie die Einstelltaste, so daß das Bildeinstellmenü aufgeklappt wird. 2 Drücken Sie die Zeigertaste ab, so daß ein roter Pfeil erscheint. Stellen Sie den Pfeil mit den Zeigertasten auf/ab auf den einzustellenden Gegenstand. Stellen Sie den Wert mit der Zeigertaste rechts oder links ein.
COMPUTERBETRIEBSART Auto-Bildeinstellfunktion Mit der Auto-Bildeinstellfunktion werden die Feinsynchronisierung, die Anzahl Bildpunkte und die Bildposition automatisch eingestellt. 1 Drücken Sie die MENU-Taste, um das Bildschirmmenü anzuzeigen. Stellen Sie den Zeiger mit den Zeigertasten links/rechts auf das Symbol AUTO BILD und drücken Sie die Einstelltaste, so daß das Auto-Bildeinstellmenü aufgeklappt wird. 2 Stellen Sie den Zeiger mit der Zeigertaste auf/ab auf den einzustellenden Gegenstand ein.
COMPUTERBETRIEBSART BILDFORMATEINSTELLUNG Dieser Projektor ist mit einer Bildformatfunktion ausgerüstet, mit welcher ein gewünschtes Bildformat eingestellt werden kann. 1 Drücken Sie die MENU-Taste, um das Bildschirmmenü anzuzeigen. Stellen Sie den Zeiger mit den Zeigertasten links/rechts auf das Symbol SCREEN und drücken Sie die Einstelltaste, so daß das Bildformatmenü aufgeklappt wird. 2 Drücken Sie die Zeigertaste ab, so daß ein roter Pfeil erscheint.
VIDEOBETRIEBSART EINSTELLEN DER VIDEOBETRIEBSART MODE-Taste Computer Direkte Einstellung Stellen Sie die Videobetriebsart durch Drücken der MODE-Taste an der Projektoroberseite oder der VIDEO-Taste der Fernbedienung ein. MCI Einstellung mit Hilfe des Menüs Video Drücken Sie die MENU-Taste, um das Bildschirmmenü anzuzeigen. Stellen Sie den Pfeil mit den Zeigertasten links/rechts auf das Symbol Video und drücken Sie die Einstelltaste.
VIDEOBETRIEBSART BILDEINSTELLUNG Einstellen des Wiedergabebildes 1 Drücken Sie die Menu-Taste, um das Bildschirmmenü anzuzeigen. Stellen Sie den Pfeil mit den Zeigertasten links/rechts auf das Symbol BILD und drücken Sie die Einstelltaste, so daß das Bildeinstellmenü aufgeklappt wird. 2 Drücken Sie die Zeigertaste ab, so daß ein roter Pfeil erscheint. Stellen Sie den Pfeil mit den Zeigertasten auf/ab auf den einzustellenden Gegenstand. Stellen Sie den Wert mit der Zeigertaste rechts oder links ein.
MCI-BERIEBSART PC-KARTENSTECKPLATZ Dieser Projektor besitzt einen PC-Kartensteckplatz. Auf einer Speicherkarte (SmartMedia mit PC-Kartenadapter oder PC-Karte) abgespeicherte Bilder lassen sich einfach wiedergeben, wenn die Karte in den Kartensteckplatz eingeschoben wird. Anschlüsse zu anderen Geräten sind nicht notwendig. Mit Media Card Imager (auf der mitgelieferten CD-ROM) lassen sich Bilddaten editieren und auf einer Speicherkarte für die Wiedergabe mit dem Projektor aufzeichnen.
MCI-BERIEBSART Daten Dieser Projektor eignet sich für die Wiedergabe der folgenden Bilddaten von einer PC-Karte. ● Die Daten lassen sich mit “Media Card Imager” editieren. ● Bitmapdaten (BMP) oder JPEG-Daten (JPG) mit einem Bildformat zwischen VGA (640 x 480) und SXGA (1280 x 1024), wie von einer Digitalkamera, lassen sich ebenfalls wiedergeben. (Gewisse Daten im Bildformat SXGA können nicht richtig wiedergegeben werden. In diesem Fall müssen Sie eine geringere Bildauflösung einstellen.
MCI-BERIEBSART WIEDERGABE VON DATEN AUF DER SPEICHERKARTE Grundbedienung 1 2 Stecken Sie die Speicherkarte in den Projektor und schalten Sie in die MCI-Betriebsart um. Die Daten von der Speicherkarte werden wiedergegeben. Um ein Bild auf eine andere Seite zu verschieben, können Sie die PAGE-Taste ▲ oder ▼ drücken. (Falls mit dem Media Card Imager ein Anzeigeintervall festgelegt wurde, so wird die Wiedergabe automatisch umgeschaltet.
MCI-BERIEBSART ABSPEICHERN VON DATEN AUF EINER SPEICHERKARTE Die mit Media Card Imager bearbeiteten Daten lassen sich mit dem PC-Kartensteckplatz Ihres Computers oder mit dem PC-Kartensteckplatz dieses Projektors auf einer Speicherkarte abspeichern oder aus der Speicherkarte lesen. Die mit Media Card Imager bearbeiteten Daten werden im Datenformat Bitmap oder JPEG abgespeichert.
MCI-BERIEBSART BILDEINSTELLUNG Manuelle Bildeinstellung 1 Drücken Sie die Menu-Taste, um das Bildschirmmenü anzuzeigen. Stellen Sie den Zeiger mit den Zeigertasten links/rechts auf das Symbol BILD und drücken Sie die Einstelltaste, so daß das Bildeinstellmenü aufgeklappt wird. 2 Drücken Sie die Zeigertaste ab, so daß ein roter Pfeil erscheint. Stellen Sie den Pfeil mit der Zeigertaste auf/ab auf die einzustellende Funktion und stellen Sie den Wert mit der Zeigertaste links/rechts ein.
MCI-BERIEBSART BILDFORMATEINSTELLUNG Dieser Projektor ist mit einer Bildformatfunktion ausgerüstet, mit welcher ein gewünschtes Bildformat eingestellt werden kann. 1 Drücken Sie die MENU-Taste, um das Bildschirmmenü anzuzeigen. Stellen Sie den Zeiger mit den Zeigertasten links/rechts auf das Symbol SCREEN und drücken Sie die Einstelltaste, so daß das Bildformatmenü aufgeklappt wird. 2 Drücken Sie die Zeigertaste ab, so daß ein roter Pfeil erscheint.
MCI-BERIEBSART SMARTMEDIA UND PC-KARTENADAPTER Eine SmartMedia-Speicherkarte und ein PC-Kartenadapter werden mit diesem Projektor mitgeliefert. SmartMedia läßt sich zusammen mit dem PC-Kartenadapter als PC-Karte des ATA-Standards verwenden. Einsetzen/Entfernen von SmartMedia Einsetzen Schieben Sie SmartMedia vollständig in den PC-Kartenadapter. Kontrollieren Sie, ob die Auswurftaste nach außen gedrückt wird. HINWEIS : Auf der Oberseite von SmartMedia sind die Anschlußkontakte vorhanden.
MCI-BERIEBSART Vorsichtshinweise und technische Daten von SmartMedia ● SmartMedia ist ein Präzisionsspeichermedium. Es darf nicht gebogen, fallen lassen, mit Gewalt behandelt oder starken Stößen ausgesetzt werden oder an Orten mit statischen elektrischen Feldern aufbewahrt werden. ● Die Kontaktstelle darf nicht mit den Fingern berührt oder verschmutzt werden. SmartMedia muß immer in der Schutzbox aufbewahrt werden, wenn es nicht verwendet wird. ● SmartMedia unterliegt einem gewissen Verschleiß.
ANDERE EINSTELLUNGEN EINSTELLMENÜ 1 Drücken Sie die MENU-Taste, um das Bildschirmmenü anzuzeigen. Stellen Sie den Zeiger mit den Zeigertasten links/rechts auf das Symbol EINSTELLUNG und drücken Sie die Einstelltaste, so daß das Einstellmenü aufgeklappt wird. 2 Drücken Sie die Zeigertaste ab, so daß ein roter Pfeil erscheint. Stellen Sie den Zeiger auf den gewünschten Gegenstand und drücken Sie die Einstelltaste, um die Einstellung “Ein” oder “Aus” zu wählen.
ANHANG BEDIENUNG DER KABELLOSEN MAUS Die kabellose Fernbedienung dient nicht nur zur Bedienung des Projektors, sie läßt auch als eine kabellose Maus zur Steuerung der meisten Computer verwenden. Für die Verwendung als kabellose Maus sind eine Zeigertaste und zwei Klicktasten vorhanden. Die kabellose Maus kann verwendet werden, wenn auf dem Bildschirm der Mauszeiger angezeigt wird. Bei der Anzeige eines Menüs oder bei einer Projektoranzeige läßt sich die kabellose Maus nicht verwenden.
ANHANG WARTUNG Temperaturwarnanzeige Die Temperaturwarnanzeige blinkt rot auf, wenn die Temperatur des Projektors zu hoch angestiegen ist. Sobald die Temperatur auf den normalen Wert abgesunken ist, hört die Warnleuchte auf zu blinken. Falls die Temperaturwarnanzeige nicht aufhört zu blinken, können die folgenden Gründe dafür vorliegen: 1 Die Entlüftungsschlitze sind blockiert. Stellen Sie in diesem Fall den Projektor so auf, daß eine unbehinderte Luftzufuhr sichergestellt ist.
ANHANG Lampenaustauschanzeige Wenn die normale Lebensdauer der Lampe erreicht ist, leuchtet die Lampenaustauschanzeige gelb und die Bildwiedergabe wird dunkler und Wiedergabefarben werden unnatürlich. In diesem Fall muß die Lampe ausgetauscht werden. Austausch der Lampe VORSICHT ● Die Lampe darf nur gegen eine Lampe des gleichen Typs ausgetauscht werden. ● Vor dem Öffnen der Lampenabdeckung muß der Projektor während mindestens 45 Minuten abgekühlt werden lassen.
ANHANG FEHLERSUCHE Überprüfen Sie bei einem autretenden Problem zuerst, ob Sie die Störung anhand der nachstehenden Fehlersuchtabelle beheben können, bevor Sie Ihren Händler oder einen Kundendienst anrufen. 1. Kontrollieren Sie, ob der Projektor und die anderen Geräte richtig wie im Abschnitt “Anschluß des Projektors” auf Seite 10 – 13 beschrieben angeschlossen sind. 2. Überprüfen Sie die Kabelanschlüsse. Kontrollieren Sie, ob der Computer, die Videogeräte und das Netzkabel richtig angeschlossen ist. 3.
ANHANG Problem: Mögliche Lösung Keine Funktion der Fernbedienung ● Die Batterien prüfen. ● Kontrollieren, ob der ALL-OFF-Schalter der Fernbedienung auf “ON” gestellt ist. ● Kontrollieren, ob sich zwischen der Fernbedienung und dem Projektor kein Hindernis befindet. ● Kontrollieren, ob die Fernbedienung nicht außerhalb des Betriebsbereichs von 5 m betätigt wurde. Kabellose Maus funktioniert nicht ● Die Kabelanschlüsse zwischen dem Projektor und dem Computer überprüfen.
ANHANG TECHNISCHE DATEN Typ Abmessungen (B x H x T) Gewicht LCD-Panel Auflösung Pixelanzahl Farbsystem Abtastfrequenz Projektionsbildgröße (Diagonale) Horizontalauflösung Projektionsobjektiv Projektionsabstand Projektionslampe AV-Eingänge Computereingangsbuchsen Steuerbuchse Monitorausgang Computer-Audioeingang Audioausgangsbuchse Interner Audioverstärker Eingebauter Lautsprecher Einstellbare Füße Betriebsspannung Stromverbrauch Betriebstemparatur Aufbewahrungstemparatur Fernbedienung Zubehör D ● Änderun
ANHANG Sonderzubehör Die nachstehend aufgeführten Teile sind Sonderzubehör. Für die Bestellung dieser Teile müssen Sie die Bezeichnung und die Nummer angeben. ● Steuerkabel für seriellen Anschluß Nr. POA-MCSRL ● Steuerkabel für ADB-Anschluß Nr. POA-MCMAC ● MACINTOSH-Adapter Nr.
MESSAGE AU PROPRIETAIRE Vous êtes maintenant propriétaire d’un nouveau Projecteur Multimédia, et vous êtes sûrement impatient d’essayer votre nouveau projecteur. Avant cet essai, nous vous conseillons de lire ce manuel pour vous familiariser avec les méthodes d’utilisation, afin que vous puissiez profiter au maximum de toutes les possibilités de votre nouveau projecteur. Ce mode d’emploi vous indiquera les caractéristiques du projecteur. Sa lecture nous aidera aussi.
INSTRUCTIONS DE SECURITE IMPORTANTES Lisez toutes les instructions de sécurité et d’utilisation avant la mise en service du projecteur. Lisez toutes les instructions données ici et conservez-les pour référence ultérieure. Débranchez le projecteur de la prise secteur avant de le nettoyer. N’utilisez pas de nettoyant liquide ou en aérosol. Pour le nettoyage, utilisez un chiffon humide. N’utilisez pas d’accessoires non recommandés par le fabricant, car ils peuvent être dangereux.
TABLE DES MATIERES FONCTIONS ET PRESENTATION 5 PREPARATIFS 6 NOM DES COMPOSANTS DU PROJECTEUR 6 INSTALLATION DU PROJECTEUR 7 POSITIONNEMENT DU PROJECTEUR PIEDS REGLABLES BRANCHEMENT DU CORDON D’ALIMENTATION SECTEUR VENTILATION DEPLACEMENT DU PROJECTEUR 7 7 8 8 9 BRANCHEMENT DU PROJECTEUR 10 BORNES DU PROJECTEUR BRANCHEMENT A L’EQUIPEMENT VIDEO BRANCHEMENT A L’ORDINATEUR 10 11 12 AVANT D’UTILISER L’APPAREIL 14 FONCTIONNEMENT DE LA TELECOMMANDE 14 FONCTION DE POINTEUR LASER INSTALLATION DES PILES DE LA
FONCTIONS ET PRESENTATION La technologie extrêmement sophistiquée utilisée pour ce projecteur multimédia lui donne d’excellentes qualités de portabilité, de solidité et de facilité d’utilisation. Le projecteur utilise des fonctions multimédia incorporées, une palette de 16,77 millions de couleurs, et une technologie d’affichage à cristaux liquides (LCD) à matrice active.
PREPARATIFS NOM DES COMPOSANTS DU PROJECTEUR AVANT DU COFFRET LENTILLE DE PROJECTION FENTE DE CARTE PC CAPUCHON DE LENTILLE POIGNEE DE TRANSPORT RECEPTEUR INFRAROUGE DE TELECOMMANDE HAUT-PARLEUR (mono) ARRIERE DU COFFRET OUVERTURES DE VENTILATION SORTIE D’AIR CHAUD! L’air soufflé par les ouvertures de ventilation est chaud. Lors de l’utilisation ou de l’installation du projecteur, prenez les précautions suivantes. ● Ne placez pas un objet inflammable près de cette zone.
PREPARATIFS INSTALLATION DU PROJECTEUR POSITIONNEMENT DU PROJECTEUR ● Ce projecteur est conçu pour projeter une image sur une surface plane. ● La mise au point peut être faite de 1,4 m à 10,8 m. ● Reportez-vous à l’illustration ci-dessous pour régler la taille de l’écran.
PREPARATIFS BRANCHEMENT DU CORDON D’ALIMENTATION SECTEUR Ce projecteur utilise une tension nominale d’entrée de 200-240 V CA. Le projecteur fera automatiquement la sélection de la tension d’entrée correcte. Il est conçu pour fonctionner avec des systèmes d’alimentation monophase avec conducteur neutre de prise de terre. Pour réduire les risques de décharge électrique, ne branchez pas le projecteur dans un autre type de système d’alimentation.
PREPARATIFS DEPLACEMENT DU PROJECTEUR Lorsque vous déplacez le projecteur, tenez-le par sa poignée de transport. Lorsque vous déplacez le projecteur, remettez le cache de lentille en place et tournez les pieds à fond dans le sens des aiguilles d’une montre (pour raccourcir les pieds) afin d’éviter d’endommager la lentille et le coffret de l’appareil.
BRANCHEMENT DU PROJECTEUR BORNES DU PROJECTEUR CONNECTEUR D’ENTREE S-VIDEO CONNECTEUR D’ENTREE VIDEO Branchez la sortie S-VIDEO de l’appareil vidéo à cette borne. (Reportez-vous à la page 11.) Branchez la sortie vidéo de l’appareil vidéo à ce connecteur. (Reportez-vous à la page 11.) S-VIDEO CONNECTEUR D’ENTREE AUDIO D’ORDINATEUR CONNECTEURS D’ENTREE AUDIO R-AUDIO-L(MONO) Branchez les sorties audio de l’appareil vidéo à ces bornes. (Reportez-vous à la page 11.
BRANCHEMENT DU PROJECTEUR BRANCHEMENT A L’EQUIPEMENT VIDEO Source vidéo (exemple) Magnétoscope à cassette Utilisez des câbles pour la connexion Lecteur de disques vidéo Sortie vidéo/audio Sortie S-VIDEO · CABLE VIDEO* · CABLE S-VIDEO* · CABLE AUDIO (stéréo)* * Ces câbles ne sont pas fournis avec ce projecteur. Câble audio vidéo* Câble S-VIDEO* Utilisez soit la prise VIDEO, soit la prise SVIDEO. Lorsque les deux prises sont raccordées, la prise S-VIDEO a priorité sur la prise VIDEO.
BRANCHEMENT DU PROJECTEUR BRANCHEMENT A L’ORDINATEUR Pour brancher l’ordinateur, référez-vous à l’illustration ci-dessous. Utilisez des câbles pour la connexion · CABLE VGA · CABLE DE SOURIS POUR PORT PS/2 · CABLE DE SOURIS POUR PORT SERIE ou PORT ADB* · ADAPTATEUR MAC* · CABLE DE MONITEUR* · CABLE AUDIO PC (stéréo)* * Ces câbles ne sont pas fournis avec ce projecteur.
BRANCHEMENT DU PROJECTEUR S-VIDEO R-AUDIO-L(MONO) VIDEO AUDIO IN OUT COMPUTER IN MONITOR OUT CONTROL PORT COMPUTER IN MONITOR OUT CONTROL PORT AUDIO IN AUDIO OUT ◆ ADAPTATEUR MAC (non fourni) Utilisez l’un de ces câbles de commande correspondant au connecteur de votre ordinateur. Réglez les interrupteurs comme indiqué dans le tableau cidessous en fonction du MODE DE RESOLUTION que vous voulez utiliser avant d’allumer le projecteur et l’ordinateur.
AVANT D’UTILISER L’APPAREIL FONCTIONNEMENT DE LA TELECOMMANDE Côté gauche TOUCHE VIDEO (VIDEO) COMPUTER/ VIDEO MCI Utilisée pour sélectionner la source vidéo. (p.30) ON TOUCHE D’ORDINATEUR/MCI (COMPUTER/MCI) F ALL OF Utilisée pour sélectionner la source du mode ordinateur ou du mode MCI. (p.23, 33) ZOOM ON-OFF FOCUS VOLUME MUTE D.
AVANT D’UTILISER L’APPAREIL TOUCHE DE VOLUME (VOLUME) COMPUTER/ VIDEO MCI ON-OFF TOUCHE DE ZOOM (ZOOM) ZOOM Utilisée pour régler le zoom. (p.21) TOUCHE DE MISE AU POINT (FOCUS) Utilisée pour sélectionner le réglage de la mise au point. (p.21) FOCUS VOLUME MUTE D.ZOOM PAGE TOUCHE DE ZOOM NUMERIQUE (D.ZOOM) Utilisée pour mettre le projecteur en mode de Zoom numerique. (p.29, 37) Pointez la télécommande vers le projecteur (fenêtre de réception) lorsque vous appuyez sur les touches.
AVANT D’UTILISER L’APPAREIL COMMANDES ET TEMOINS SUR LE PROJECTEUR TOUCHE DE NORMAL (NORMAL) Utilisée pour remettre tous les réglages de l’image aux réglages par défaut de l’usine. (p.27, 31, 36) TOUCHE D’IMAGE AUTO (AUTO IMAGE) Utilisée pour activer la fonction d’IMAGE AUTO. (p.28) TOUCHES DE PAGE (PAGE) Utilisées pour passer à la page suivante/précédente des données de la carte mémoire branchée dans la fente de carte PC.
AVANT D’UTILISER L’APPAREIL OPERATION PAR MENU A L’ECRAN UTILISATION DE L’OPERATION PAR MENU A L’ECRAN Vous pouvez commander et régler ce projecteur par MENU A L’ECRAN. Pour utiliser chacun des réglages sur le MENU A L’ECRAN, reportez-vous aux pages suivantes. TELECOMMANDE SANS FIL TOUCHE DE POINTAGE Utilisé pour déplacer le pointeur dans les directions HAUT/BAS/DROITE/ GAUCHE. 1 DEPLACEMENT DU POINTEUR Déplacez le pointeur (Reportez-vous à la REMARQUE cidessous.
AVANT D’UTILISER L’APPAREIL BARRE DE MENU BARRE DE MENU EN MODE D’ORDINATEUR MENU DE MODE Utilisé pour sélectionner le mode d’entrée d’ordinateur. (Reportez-vous à la page 23.) Appuyez sur la TOUCHE MENU en mode d’ordinateur. MENU DE SYSTEME MENU DE POSITION Utilisé pour sélectionner un système d’ordinateur. (Reportez-vous à la page 23.) Utilisé pour régler la position de l’image. (Reportez-vous à la page 28.
AVANT D’UTILISER L’APPAREIL BARRE DE MENU EN MODE MCI Appuyez sur la TOUCHE MENU en mode MCI. MENU DE MODE MENU DE POSITION Utilisé pour sélectionner le mode d’entrée MCI. (Reportez-vous à la page 33.) Utilisé pour régler la position de l’image. (Reportez-vous à la page 36.) Ces icônes ont la même fonction que le mode d’ordinateur. MENU AFFICHAGE MENU D’IMAGE MENU D’ECRAN Utilisé pour faire apparaître, lire ou écrire les données d’images d’une carte mémoire par la fente de carte PC.
OPERATIONS DE BASE MISE SOUS/HORS TENSION DU PROJECTEUR MISE SOUS TENSION DU PROJECTEUR 1 Accomplir tous les branchements périphériques (avec l’ordinateur, le magnétoscope, etc.) avant d’allumer le projecteur. (Pour plus de détails concernant le branchement de ces appareils, reportez-vous à la section “BRANCHEMENT DU PROJECTEUR” aux pages 10 à 13.) 2 Branchez le cordon d’alimentation secteur du projecteur dans la prise secteur. Le témoin LAMP s’allume en rouge, et le témoin READY s’allume en vert.
OPERATIONS DE BASE REGLAGE DE L’IMAGE REGLAGE DU ZOOM 1 Appuyez sur la touche ZOOM du projecteur ou sur la touche ZOOM ▲/▼ de la télécommande pour mettre l’appareil en mode de zoom. 2 Appuyez sur la touche de POINTAGE (HAUT) ou sur la touche ZOOM ▲ pour obtenir une image plus grande, et appuyez sur la touche de POINTAGE (HAUT) ou sur la touche ZOOM ▼ pour obtenir une image plus petite.
OPERATIONS DE BASE FONCTION SANS IMAGE Appuyez sur la touche NO SHOW de la télécommande pour faire apparaître une image entièrement noire. Cette fonction est annulée lorsque vous appuyez à nouveau sur la touche NO SHOW ou sur n’importe quelle autre touche de fonction. Suppression Non Le message disparaît après 4 secondes. FONCTION D’ARRET SUR IMAGE Appuyez sur la touche FREEZE de la télécommande pour immobiliser l’image sur l’écran.
MODE D’ORDINATEUR SELECTION DU MODE D’ORDINATEUR OPERATION DIRECTE Sélectionnez le mode d’Ordinateur en appuyant sur la touche MODE du projecteur ou sur la touche COMPUTER/MCI de la télécommande. Touche COMPUTER/MCI Touche MODE Ordinateur Ordinateur MCI MCI Vidéo OPERATION PAR MENU Appuyez sur la touche MENU; le MENU A L’ECRAN apparaît. Appuyez sur les touches de POINTAGE (GAUCHE/DROITE) pour sélectionner Ordinateur , puis appuyez sur le bouton de SELECTION.
MODE D’ORDINATEUR REGLAGE D’ORDINATEUR Ce projecteur peut s’adapter automatiquement à la majorité des signaux d’affichage des ordinateurs actuellement disponibles sur le marché. Cependant, certains ordinateurs utilisent un format de signal spécial qui est différent des formats standards et peut ne pas être adapté par le système de multi-balayage de ce projecteur. Dans un tel cas, le projecteur ne pourra pas projeter une image correcte.
MODE D’ORDINATEUR Total de lignes Nombre total de lignes verticales. Réglez le nombre correspondant à l’image de votre ordinateur personnel. Total de points Nombre total de points dans une période horizontale. Réglez le nombre correspondant à l’image de votre ordinateur personnel. Horiz. / Vert. Réglage de la position d’image horizontale ou verticale. Lorsque l’image n’est pas centrée sur l’écran, réglez chacun de ces éléments. Clamp Réglage du niveau de serrage.
MODE D’ORDINATEUR SPECIFICATIONS DES ORDINATEURS COMPATIBLES Ce projecteur accepte les signaux de tous les ordinateurs de fréquences V et H mentionnés ci-dessous, et inférieures à 140 MHz d’horloge de points.
MODE D’ORDINATEUR REGLAGE D’IMAGE REGLAGE MANUEL DE L’IMAGE 1 Appuyez sur la touche MENU; le MENU A L’ECRAN apparaît alors. Appuyez sur les touches de POINTAGE (GAUCHE/DROITE) pour sélectionner IMAGE , puis appuyez sur le bouton de SELECTION. Une autre zone de dialogue du menu REGLAGE D’IMAGE apparaît alors. 2 Appuyez sur la touche de POINTAGE (BAS); un icône à flèche rouge apparaît alors. Placez la flèche sur l’élément que vous voulez changer en appuyant sur les touches de POINTAGE (HAUT/BAS).
MODE D’ORDINATEUR FONCTION D’IMAGE AUTOMATIQUE La fonction d’image automatique permet de régler automatiquement la synchronisation précise, les points totaux et la position d’image pour la plupart des ordinateurs. 1 Appuyez sur la touche MENU; le MENU A L’ECRAN apparaît alors. Appuyez sur les touches de POINTAGE (GAUCHE/DROITE) pour sélectionner AUTO IMAGE , puis appuyez sur le bouton de SELECTION. Une autre zone de dialogue du menu IMAGE AUTO apparaît alors.
MODE D’ORDINATEUR REGLAGE DE L’ECRAN D’IMAGE Ce projecteur possède une fonction de modification de taille de l’écran d’image permettant de faire apparaître l’image dans la taille désirée. 1 Appuyez sur la touche MENU; le MENU A L’ECRAN apparaît alors. Appuyez sur les touches de POINTAGE (GAUCHE/DROITE) pour sélectionner ECRAN , puis appuyez sur le bouton de SELECTION. Une autre zone de dialogue du menu ECRAN D’IMAGE apparaît alors.
MODE VIDEO SELECTION DU MODE VIDEO OPERATION DIRECTE Touche MODE Ordinateur Sélectionnez le mode Vidéo en appuyant sur la touche MODE du projecteur ou sur la touche VIDEO de la télécommande. MCI MISE HORS TENSION DU PROJECTEUR Vidéo Appuyez sur la touche MENU; le MENU A L’ECRAN apparaît alors. Appuyez sur les touches de POINTAGE (GAUCHE/DROITE) pour sélectionner Vidéo , puis appuyez sur le bouton de SELECTION. Une autre zone de dialogue du menu VIDEO MODE apparaît alors.
MODE VIDEO REGLAGE D’IMAGE REGLAGE DE L’IMAGE 1 Appuyez sur la touche MENU; le MENU A L’ECRAN apparaît alors. Appuyez sur les touches de POINTAGE (GAUCHE/DROITE) pour sélectionner IMAGE , puis appuyez sur le bouton de SELECTION. Une autre zone de dialogue du menu REGLAGE D’IMAGE apparaît alors. 2 Appuyez sur la touche de POINTAGE (BAS); un icône à flèche rouge apparaît alors. Placez la flèche sur l’élément que vous voulez changer en appuyant sur les touches de POINTAGE (HAUT/BAS).
MODE MCI UTILISATION DE LA FENTE DE CARTE PC Ce projecteur est équipé d’une fente de carte PC sur son côté. Il est possible de faire apparaître les images de la carte mémoire (SmartMedia avec un adaptateur de carte PC ou une carte PC), simplement en introduisant la carte dans la fente de carte PC. Il n’est pas nécessaire d’effectuer de branchement à un autre équipement d’entrée.
MODE MCI DONNEES UTILISABLES Ce projecteur peut projeter les données d’image suivantes en utilisant la fente de carte PC. ● Les données éditées par l’“Imageur à carte média”. ● Les données de la résolution entre VGA (640 x 480) et SXGA (1280 x 1024) en type Bit Map (BMP) ou en type JPEG (JPG), telles que les données d’appareil photo numérique, peuvent aussi être affichées. (Il est possible que certaines donnés d’image en format SXGA n’apparaissent pas correctement.
MODE MCI AFFICHAGE DES DONNEES DE LA CARTE MEMOIRE FONCTIONNEMENT DE BASE 1 2 Insérez la carte mémoire et faites passer le projecteur au mode MCI. L’image de la carte mémoire s’affiche alors. Pour passer à d’autres images, appuyez sur la touche de PAGE ▲ ou ▼. (Lorsque la “Minuterie d’affichage” est établie dans l’image avec l’imageur à carte média, l’image est changée automatiquement.
MODE MCI ECRITURE DE DONNEES DANS LA CARTE MEMOIRE Il est possible d’écrire ou de lire les données éditées avec l’imageur à carte média dans l’ordinateur à partir de la carte mémoire avec le lecteur de carte PC de votre ordinateur personnel ou la fente de carte PC de ce projecteur. Les données éditées par l’imageur de carte média sont écrites en type Bit Map (BMP) ou JPEG (JPG).
MODE MCI REGLAGE D’IMAGE REGLAGE MANUEL DE L’IMAGE 1 Appuyez sur la touche MENU; le MENU A L’ECRAN apparaît alors. Appuyez sur les touches de POINTAGE (GAUCHE/DROITE) pour sélectionner IMAGE , puis appuyez sur le bouton de SELECTION. Une autre zone de dialogue du menu REGLAGE D’IMAGE apparaît alors. 2 Appuyez sur la touche de POINTAGE (BAS); un icône à flèche rouge apparaît alors. Placez la flèche sur l’élément voulu en appuyant sur les touches de POINTAGE (HAUT/BAS).
MODE MCI REGLAGE DE L’ECRAN D’IMAGE Ce projecteur possède une fonction de modification de taille de l’écran d’image permettant de faire apparaître l’image dans la taille désirée. 1 Appuyez sur la touche MENU; le MENU A L’ECRAN apparaît alors. Appuyez sur les touches de POINTAGE (GAUCHE/DROITE) pour sélectionner ECRAN , puis appuyez sur le bouton de SELECTION. Une autre zone de dialogue du menu ECRAN D’IMAGE apparaît alors.
MODE MCI ADAPTATEUR DE CARTE PC ET SMARTMEDIA L’adaptateur de carte PC et SmartMedia sont fournis avec le projecteur à cristaux liquides. La SmartMedia peut être utilisé comme carte PC conforme à la norme de carte PC-ATA, en combinaison avec l’adaptateur de carte PC. POSE/DEPOSE DE LA SMARTMEDIA POSE Introduisez la SmartMedia bien à fond dans l’adaptateur de carte PC. Vérifiez que la touche d’éjection sorte bien. REMARQUE : Le côté face de SmartMedia possède une zone de contact sur sa surface.
MODE MCI PRECAUTIONS ET SPECIFICATIONS DE LA CARTE SMARTMEDIA ● La SmartMedia est un dispositif de haute précision. Evitez absolument de la plier, de la laisser tomber, de la manipuler avec une force excessive ou de la cogner, ou de la placer à des endroits sujets à une forte charge d’électricité statique. ● Ne touchez pas la surface de la zone de contact avec les doigts, et veillez à ce qu’elle ne soit pas souillée par des corps étrangers.
REGLAGE MENU DE REGLAGE 1 Appuyez sur la touche MENU; le MENU A L’ECRAN apparaît alors. Appuyez sur les touches de POINTAGE (GAUCHE/DROITE) pour sélectionner REGLAGES , puis appuyez sur le bouton de SELECTION. Une autre zone de dialogue du menu REGLAGE apparaît alors. 2 Appuyez sur la touche de POINTAGE (BAS); une flèche rouge apparaît alors. Déplacez la flèche sur l’élément que vous voulez régler, puis appuyez sur le bouton de SELECTION pour le régler sur “On” ou “Off”.
ANNEXE UTILISATION DE LA SOURIS SANS FIL La télécommande sans fil permet non seulement de faire fonctionner le projecteur, mais peut aussi être utilisée comme souris sans fil pour la plupart des ordinateurs personnels. Les touches de POINTAGE et les deux boutons de CLIC sont utilisés pour l’opération comme souris sans fil. La souris sans fil est utilisable lorsque le pointeur de souris de l’ordinateur apparaît sur l’écran.
ANNEXE ENTRETIEN TEMOIN D’ALARME DE TEMPERATURE (WARNING TEMP.) Le témoin WARNING TEMP. clignote en rouge lorsque la température interne du projecteur est supérieure à la température normale. Le témoin arrête de clignoter quand la température du projecteur redevient normale. Si le témoin WARNING TEMP. continue à clignoter, vérifiez les points ci-dessous. 1 Les fentes de ventilation du projecteur sont obstruées.
ANNEXE TEMOIN DE REMPLACEMENT DE LAMPE Lorsque la durée de vie de la lampe de ce projecteur arrive à son terme, le témoin LAMP REPLACE s’allume en jaune. Lorsque l’image devient sombre ou que les couleurs de l’image perdent leur apparence naturelle, il faut changer la lampe. REMPLACEMENT DE LA LAMPE ATTENTION ● Pour assurer un fonctionnement sûr, remplacez la lampe par une lampe du même type.
ANNEXE GUIDE DE DEPANNAGE Avant de faire appel à votre revendeur ou à un centre de service, veuillez vérifier les points suivants. 1. Assurez-vous que le projecteur est branché à l’équipement comme indiqué dans la section “BRANCHEMENT DU PROJECTEUR” aux pages 10 à 13. 2. Vérifiez les branchements des câbles. Vérifiez que le cordon d’alimentation, l’ordinateur ou la source vidéo sont bien branchés. 3. Vérifiez que tous les appareils sont allumés. 4.
ANNEXE Problème Solutions Les télécommandes ne fonctionnent pas. ● Vérifiez les piles. ● Assurez-vous que l’interrupteur ALL-OFF de la télécommande est mis sur “ON”. ● Assurez-vous que rien ne bloque la transmission des télécommandes au récepteur de signal de télécommande. ● Assurez-vous que vous n’êtes pas placé trop loin du projecteur lorsque vous utilisez les télécommandes. La plage d’utilisation maximale est de 5 m. ● Vérifiez le branchement du câble entre le projecteur et l’ordinateur.
ANNEXE SPECIFICATIONS TECHNIQUES Type de projecteur Dimensions (L x H x P) Poids net Système d’affichage à cristaux liquides Résolution d’affichage Nombre de pixels Système de couleur Fréquence de balayage Taille d’image de projection (Diagonale) Résolution horizontale Lentille de projection Distance de jet Lampe de projection Connecteurs d’entrée audio/vidéo Prises d’entrée d’ordinateur Connecteur de port de commande Connecteur de sortie de moniteur Connecteur d’entrée d’audio d’ordinateur Prise de sortie
ANNEXE PIECES EN OPTION Les pièces mentionnées ci-dessous sont fournies en option. Si vous commandez ces pièces, indiquez le type et le numéro du type au revendeur.
ALL’UTILIZZATORE Come possessori del nuovo Proiettore Multimediale, probabilmente siete impazienti di provare il nuovo apparecchio. Prima di farlo, vi consigliamo di dedicare un po’ del vostro tempo alla lettura di questo manuale, per familiarizzare con le procedure di funzionamento e poter sfruttare appieno le molteplici caratteristiche del nuovo proiettore. Questo manuale vi informerà sulle caratteristiche del proiettore. Inoltre leggendolo aiuterete anche noi.
ISTRUZIONI IMPORTANTI PER LA SICUREZZA Prima di mettere in funzione il prodotto, è necessario leggere tutte le istruzioni di funzionamento e sicurezza. Leggere attentamente tutte le istruzioni riportate di seguito e conservarle per l’uso successivo. Prima di pulire il proiettore disinserire la spina dalla presa della rete c.a. Non usare detergenti liquidi o spray. Per la pulizia, utilizzare un panno umido.
INDICE FORMA E CARATTERISTICHE PREPARAZIONE NOME DELLE PARTI DEL PROIETTORE MESSA A PUNTO DEL PROIETTORE POSIZIONARE IL PROIETTORE PIEDINI REGOLAZIONE COLLEGAMENTO DEL CAVO DI ALIMENTAZIONE IN C.A.
FORMA E CARATTERISTICHE Questo proiettore multimediale si avvale delle più avanzate tecnologie che lo rendono portatile, durevole e di facile utilizzo. Il proiettore è dotato di funzioni multimediali incorporate, di una tavolozza di 16,77 milioni di colori e di un display a cristalli liquidi a matrice attiva (LCD).
PREPARAZIONE NOME DELLE PARTI DEL PROIETTORE DAVANTI DELL’INVOLUCRO ESTERNO OBIETTIVO DI PROIEZIONE SLOT PC CARD COPRIOBIETTIVO MANIGLIA DA TRASPORTO RICEVITORE A RAGGI INFRAROSSI ALTOPARLANTE (Mono) RETRO DELL’INVOLUCRO ESTERNO APERTURA D’USCITA ARIA EMISSIONE DI ARIA MOLTO CALDA! L’aria soffiata dall’apertura d’uscita aria è molto calda. Quando si utilizza o si installa il proiettore, osservare le seguenti precauzioni. ● Non avvicinare a questa parte nessun oggetto infiammabile.
PREPARAZIONE MESSA A PUNTO DEL PROIETTORE POSIZIONARE IL PROIETTORE ● Il proiettore fondamentalmente è stato progettato per proiettare su superfici di proiezione piatte. ● Il proiettore può essere messo a fuoco da 1,4 m a 10,8 m. ● Per regolare le dimensioni dello schermo, far riferimento alla figura sotto.
PREPARAZIONE COLLEGAMENTO DEL CAVO DI ALIMENTAZIONE IN C.A. Il vostro proiettore usa normalmente una tensione di alimentazione di 200-240 V c.a. Il proiettore seleziona automaticamente il corretto voltaggio in ingresso. É progettato per lavorare con un sistema di alimentazione monofase con filo neutro messo a terra. Per evitare folgorazioni non utilizzare altri tipi di alimentazione.
PREPARAZIONE SPOSTAMENTO DEL PROIETTORE Usare la maniglia da trasporto per trasportare il proiettore. Prima di spostare il proiettore, per evitare i rischi di danneggiare l’obiettivo e il guscio esterno del proiettore, installare il copriobiettivo e ruotare i piedini completamente in senso orario (in modo da accorciarli).
COLLEGAMENTO DEL PROIETTORE TERMINALI DEL PROIETTORE PRESA DI INGRESSO VIDEO PRESA DI INGRESSO S-VIDEO Collegare l’uscita video dell’apparecchio video a questa presa. (Vedere a pagina 11.) A questo terminale collegare l’uscita S-VIDEO dell’apparecchio video. (Vedere a pagina 11.) PRESA DI INGRESSO AUDIO COMPUTER S-VIDEO A questo terminale collegare l’uscita audio del computer. (Vedere le pagine 12, 13.) PRESE DI INGRESSO AUDIO Collegare le uscite audio dell’apparecchio video a questi terminali.
COLLEGAMENTO DEL PROIETTORE COLLEGAMENTO CON UN APPARECCHIO VIDEO Sorgente video (esempio) Videoregistratore a cassetta Lettore di Video Disc Uscita video/audio Cavi utilizzati per i collegamenti Uscita S-VIDEO • CAVO VIDEO* • CAVO S-VIDEO* • CAVO AUDIO (stereo)* * Questi cavi non sono forniti in dotazione a questo proiettore. Cavo audiovideo* Utilizzare la presa VIDEO o la presa S-VIDEO. Quando entrambe le prese sono collegate, la presa S-VIDEO ha la priorità rispetto alla presa VIDEO.
COLLEGAMENTO DEL PROIETTORE COLLEGAMENTO CON UN COMPUTER Per collegare un computer, far riferimento alla figura sotto. Cavi utilizzati per i collegamenti · CAVO VGA · CAVO DI COMANDO PER PORTA PS/2 · CAVO DI COMANDO PER PORTA SERIALE o PORTA ADB* · ADATTATORE MAC* · CAVO MONITOR* · CAVO AUDIO PC (stereo)* * Questi cavi non sono forniti in dotazione a questo proiettore. Computer compatibili IBM o computer Macintosh (VGA/SVGA/XGA/SXGA) Tipo desktop Tipo portatile Monitor Altoparlanti audio (stereo) Amp.
COLLEGAMENTO DEL PROIETTORE S-VIDEO R-AUDIO-L(MONO) VIDEO AUDIO IN OUT COMPUTER IN MONITOR OUT CONTROL PORT COMPUTER IN MONITOR OUT CONTROL PORT AUDIO IN AUDIO OUT ◆ ADATTATORE MAC (non fornito in dotazione) Utilizzare uno dei cavi di comando corrispondenti collegandolo al terminale del computer. Prima di accendere il computer e il proiettore impostare gli ON interruttori come indicato nella tabella sotto a seconda della MODALITÀ RISOLUZIONE OFF che si desidera utilizzare.
OPERAZIONI PRELIMINARI USO DEL TELECOMANDO Lato sinistro TASTO VIDEO Serve per selezionare la sorgente VIDEO. (P30) COMPUTER/ VIDEO MCI ON-OFF Serve per accendere e spegnere il proiettore. (P20) ZOOM FOCUS VOLUME ON TASTO COMPUTER/MCI F ALL OF Serve per selezionare la sorgente tra modalità COMPUTER o MCI. (P23, 33) MUTE D.
OPERAZIONI PRELIMINARI COMPUTER/ VIDEO MCI TASTO ZOOM (ZOOM) ON-OFF Serve per regolare il volume. (P22) ZOOM FOCUS VOLUME Serve per regolare lo zoom. (P21) TASTO MESSA A FUOCO (FOCUS) Serve per regolare la messa a fuoco.(P21) TASTO DEL VOLUME (VOLUME) TASTO ZOOM DIGITALE (D.ZOOM) MUTE D.ZOOM PAGE Serve per attivare la modalità ZOOM DIGITALE del proiettore. (P29, 37.) Raggio d’azione Ogni volta che vengono premuti i tasti, puntare il telecomando verso il proiettore (apertura del ricevitore).
OPERAZIONI PRELIMINARI COMANDI E INDICATORI DEL PANNELLO SUPERIORE TASTO NORMALIZZAZIONI (NORMAL) TASTO DI REGOLAZIONE AUTOMATICA DELL’IMMAGINE (AUTO IMAGE) Serve per ripristinare la regolazione normale predefinita in fabbrica dell’immagine. (Vedere le pagine 27, 31, 36.) Serve a comandare la funzione di REGOLAZIONE AUTOMATICA DELL’IMMAGINE. (Vedere a pagina 28.) TASTI PAGINA (PAGE) TASTO DI ACCENSIONE/ SPEGNIMENTO (ON-OFF) Serve ad accendere o spegnere il proiettore. (Vedere a pagina 20.
OPERAZIONI PRELIMINARI UTILIZZO DEL MENU SU SCHERMO COME OPERARE CON IL MENU SU SCHERMO Il proiettore si può controllare e regolare con il MENU SU SCHERMO. Per eseguire tutte le regolazioni con il MENU SU SCHERMO, far riferimento alle pagine seguenti. TELECOMANDO TASTO PUNTATORE Serve per spostare il puntatore in ALTO, BASSO, DESTRA e SINISTRA. 1 SPOSTAMENTO DEL PUNTATORE Spostare il puntatore (vedere la nota sotto) premendo i tasti PUNTATORE sul pannello dei comandi o sul telecomando.
OPERAZIONI PRELIMINARI BARRA DEI MENU BARRA DEI MENU IN MODALITÀ COMPUTER Premere il tasto MENU mentre è attiva la modalità computer. MENU MODALITÀ MENU SISTEMA MENU POSIZIONE MENU DI REGOLAZIONE PC Serve per selezionare la modalità di ingresso computer. (Vedere a pagina 23.) Serve per selezionare il sistema del computer. (Vedere a pagina 23.) Serve per regolare la posizione dell’immagine. (Vedere a pagina 28.) Serve per regolare i parametri e adattarli al formato del segnale in ingresso.
OPERAZIONI PRELIMINARI BARRA DEI MENU IN MODALITÀ MCI Premere il tasto MENU in modalità MCI. MENU MODALITÀ MENU POSIZIONE Serve per selezionare la modalità di ingresso MCI. (Vedere a pagina 33.) Serve per regolare la posizione dell’immagine. (Vedere a pagina 36.) Queste icone svolgono la stessa funzione che svolgono in modalità computer. MENU VISUALIZZA MENU IMMAGINE MENU SCHERMO Serve per visualizzare, leggere o scrivere i dati di immagine nella scheda di memoria tramite lo SLOT PC CARD.
OPERAZIONI PRINCIPALI ACCENSIONE E SPEGNIMENTO DEL PROIETTORE ACCENSIONE DEL PROIETTORE 1 Prima di accendere il proiettore, collegare tutte le periferiche (computer, videoregistratore, ecc.). (Per collegare questi apparecchi, far riferimento a “COLLEGAMENTO DEL PROIETTORE” alle pagine 10 ~ 13.) 2 Inserire la spina del cavo di alimentazione in c.a. del proiettore in una presa di corrente. L’indicatore LAMP si illumina ROSSO e l’indicatore READY si illumina VERDE.
OPERAZIONI PRINCIPALI REGOLAZIONE DELL’IMMAGINE REGOLAZIONE DELLO ZOOM 1 Premere il tasto ZOOM sul pannello dei comandi o il tasto ZOOM ▲/▼ sul telecomando per attivare la modalità ZOOM. 2 Premere il tasto PUNTATORE ALTO o il tasto ZOOM ▲ per ingrandire l’immagine, e premere il tasto PUNTATORE ALTO o il tasto ZOOM ▼ per ridurne le dimensioni. In modalità computer, l’immagine può essere ingrandita, compressa e estesa a panoramica con la funzione zoom digitale.
OPERAZIONI PRINCIPALI FUNZIONE CANCELLAZIONE IMMAGINE Premere il tasto NO SHOW sul telecomando per cambiare l’immagine in immagine tutta nera. Questa funzione viene disattivata quando si preme di nuovo il tasto NO SHOW, o un altro tasto di funzione. Oscuramento Proiezione Il messaggio scompare dopo 4 secondi. FUNZIONE FERMO IMMAGINE Premere il tasto FREEZE sul telecomando per fermare l’immagine presente sullo schermo.
MODALITÀ COMPUTER SELEZIONE DELLA MODALITÀ COMPUTER OPERAZIONE DIRETTA Selezionare la modalità COMPUTER premendo il tasto MODE sul pannello dei comandi o il tasto COMPUTER/MCI sul telecomando. Tasto MODE Computer Tasto COMPUTER/MCI Computer MCI USO DEL MENU MCI Video Premere il tasto MENU per richiamare il MENU SU SCHERMO. Premere i tasti PUNTATORE SINISTRA/DESTRA per selezionare Computer e premere il tasto SELEZIONE.
MODALITÀ COMPUTER REGOLAZIONE DEL PC Questo proiettore si regola automaticamente in base ai segnali video della maggior parte dei computer in commercio. Tuttavia, alcuni computer utilizzano formati di segnale speciali, diversi da quelli standard che potrebbero non essere rilevati dal scansione mulipla di questo proiettore.
MODALITÀ COMPUTER Linee totali Il numero di linee verticali totali. Selezionare il numero pari alla risoluzione dell’immagine sul proprio personal computer. Punti totali Il numero di punti totali in un periodo orizzontale. Selezionare il numero pari alla risoluzione dell’immagine sul proprio personal computer. Posizione oriz./Posizione vert. Regolazione della posizione d’immagine orizzontale o verticale. Quando l’immagine non è centrata sullo schermo, regolare ciascuna di queste voci.
MODALITÀ COMPUTER CARATTERISTICHE DEI COMPUTER COMPATIBILI Fondamentalmente questo proiettore può accettare segnali da tutti i computer con la frequenza verticale e orizzontale menzionata sotto e con sincronizzazione inferiore a 140 MHz. I DISPLAY SU SCHERMO RISOLUZIONE Freq. orizz. (kHz) Freq. vert. (Hz) DISPLAY SU SCHERMO RISOLUZIONE Freq. orizz. (kHz) Freq. vert.
MODALITÀ COMPUTER REGOLAZIONE DELLA FOTOGRAFIA DELL’IMMAGINE REGOLAZIONE MANUALE DELLA FOTOGRAFIA DELL’IMMAGINE 1 Premere il tasto MENU per richiamare il MENU SU SCHERMO. Premere i tasti PUNTATORE SINISTRA/DESTRA per selezionare IMMAGINE e premere il tasto SELEZIONE. Appare l’altra finestra di dialogo del menu REGOLAZIONE FOTOGRAFIA DELL’IMMAGINE. 2 Premere il tasto PUNTATORE GIÙ, appare l’icona a freccia rossa.
MODALITÀ COMPUTER FUNZIONE DI REGOLAZIONE AUTOMATICA DELL’IMMAGINE La funzione di regolazione automatica dell’immagine esegue automaticamente la regolazione della sincronizzazione fine, dei punti totali e della posizione dell’immagine per la maggior parte dei computer. 1 Premere il tasto MENU, appare il MENU SU SCHERMO. Premere i tasti PUNTATORE SINISTRA/DESTRA per selezionare AUTO IMAGE e premere il tasto SELEZIONE. Appare un’altra casella di dialogo del menu AUTO IMMAGINE.
MODALITÀ COMPUTER REGOLAZIONE DELLO SCHERMO DELL’IMMAGINE Questo proiettore è dotato della funzione di ridimensionamento dello schermo dell’immagine che permette di visualizzare le immagini nel formato desiderato. 1 Premere il tasto MENU per richiamare il MENU SU SCHERMO. Premere i tasti PUNTATORE SINISTRA/DESTRA per selezionare SCHERMO e premere il tasto SELEZIONE. Appare l’altra finestra di dialogo del menu SCHERMO DELL’IMMAGINE. 2 Premere il tasto PUNTATORE BASSO ed appare un’icona a freccia rossa.
MODALITÀ VIDEO SELEZIONE DELLA MODALITÀ VIDEO OPERAZIONE DIRETTA Tasto MODE Computer Selezionare la modalità VIDEO premendo il tasto MODE sul pannello comandi o il tasto VIDEO sul telecomando. MCI USO DEL MENU Video Premere il tasto MENU per richiamare il MENU SU SCHERMO. Premere i tasti PUNTATORE SINISTRA/DESTRA per selezionare Video e premere il tasto SELEZIONE. Appare l’altra finestra di dialogo del menu MODALITÀ VIDEO.
MODALITÀ VIDEO REGOLAZIONE DELLA FOTOGRAFIA DELL’IMMAGINE REGOLAZIONE DELLA FOTOGRAFIA DELL’IMMAGINE 1 Premere il tasto MENU per richiamare il MENU SU SCHERMO. Premere i tasti PUNTATORE SINISTRA/DESTRA per selezionare IMMAGINE e premere il tasto SELEZIONE. Appare l’altra finestra di dialogo del menu REGOLAZIONE FOTOGRAFIA DELL’IMMAGINE. 2 Premere il tasto PUNTATORE BASSO, appare l’icona a freccia rossa. Premendo i tasti PUNTATORE ALTO/BASSO, spostare la freccia sulla voce che si desidera modificare.
MODALITÀ MCI FUNZIONAMENTO DELLO SLOT PC CARD Questo proiettore è dotato dello SLOT PC CARD. Le immagini contenute in una scheda di memoria (SmartMedia con adattatore PC card per SmartMedia o PC card) possono essere visualizzate semplicemente inserendo la scheda in esso. Non è necessario realizzare il collegamento con un’altra apparecchiatura di ingresso. Il Media Card Imager (fornito con CD-ROM) può modificare dati immagini e registrarli in una scheda di memoria per la proiezione con il proiettore.
MODALITÀ MCI DATI DISPONIBILI Utilizzando lo SLOT PC CARD questo proiettore può proiettare i dati immagini come indicato di seguito. ● Dati modificati con “Media Card Imager”. ● Possono anche essere visualizzati dati in una risoluzione tra VGA (640 x 480) e SXGA (1280 x 1024) in formato bitmap (BMP) o JPEG (JPG), quali i dati di una videocamera digitale. (Alcuni dati di immagine alla risoluzione SXGA potrebbero non essere visualizzati correttamente. In questo caso, adottare una risoluzione inferiore.
MODALITÀ MCI VISUALIZZAZIONE DEI DATI DELLA SCHEDA DI MEMORIA OPERAZIONI PRINCIPALI 1 Inserire la scheda di memoria e attivare la modalità MCI. Viene visualizzata l’immagine nella scheda di memoria. 2 Per cambiare l’immagine in un’altra, premere il tasto PAGE ▲ o ▼ . (Quando il “Timer di visualizzazione” è impostato nell’immagine con Media Card Imager, l’immagine viene cambiata in un’altra automaticamente.
MODALITÀ MCI REGISTRARE I DATI IN SCHEDA DI MEMORIA I dati modificati con Media Card Imager nel computer possono essere registrati nella scheda di memoria o letti dalla scheda di memoria usando il lettore di scheda PC Card del personal computer o lo slot per PC CARD di questo proiettore. I dati modificati con Media Card Imager sono registrati in tipo Bit Map (BMP) o tipo JPEG (JPG).
MODALITÀ MCI REGOLAZIONE DELLA FOTOGRAFIA DELL’IMMAGINE REGOLAZIONE MANUALE DELLA FOTOGRAFIA DELL’IMMAGINE 1 Premere il tasto MENU per richiamare il MENU SU SCHERMO. Premere i tasti PUNTATORE SINISTRA/DESTRA per selezionare IMMAGINE e premere il tasto SELEZIONE. Appare l’altra finestra di dialogo del menu REGOLAZIONE FOTOGRAFIA DELL’IMMAGINE. 2 Premere il tasto PUNTATORE BASSO, appare l’icona a freccia rossa. Spostare la freccia sulla voce premendo i tasti PUNTATORE ALTO/BASSO.
MODALITÀ MCI REGOLAZIONE DELLO SCHERMO DELL’IMMAGINE Questo proiettore è dotato della funzione di ridimensionamento dello schermo dell’immagine che permette di visualizzare le immagini nel formato desiderato. 1 Premere il tasto MENU per richiamare il MENU SU SCHERMO. Premere i tasti PUNTATORE SINISTRA/DESTRA per selezionare SCHERMO e premere il tasto SELEZIONE. Appare l’altra finestra di dialogo del menu SCHERMO DELL’IMMAGINE. 2 Premere il tasto PUNTATORE BASSO ed appare un’icona a freccia rossa.
MODALITÀ MCI SMARTMEDIA E ADATTATORE PC CARD SmartMedia e adattatore PC card vengono forniti con questo proiettore LCD. SmartMedia può essere utilizzato come PC card in conformità con lo standard ATA in combinazione con l’adattatore PC card. INSTALLARE/RIMUOVERE SMARTMEDIA INSTALLARE Adattatore PC card (in dotazione) Inserire SmartMedia completamente nell’adattatore PC card. Accertare che il tasto di espulsione venga fuori.
MODALITÀ MCI PRECAUZIONI E CARATTERISTICHE A SMARTMEDIA ● SmartMedia è un dispositivo di precisione. Non va piegato, non deve cadere, non deve prendere forti colpi né essere messo dove possa ci sia carica elettrostatica. ● Non toccare la superficie dell’area di contatto con le dita né permettere che si sporchi. Conservare SmartMedia nel suo astuccio, quando non deve essere utilizzato. ● SmartMedia è un oggetto soggetto a consumo.
REGOLAZIONE MENU DI REGOLAZIONE 1 Premere il tasto MENU per richiamare il MENU SU SCHERMO. Premere i tasti PUNTATORE SINISTRA/DESTRA per selezionare REGOLAZIONE e premere il tasto SELEZIONE. Appare l’altra finestra di dialogo del menu REGOLAZIONE. 2 Premere il tasto PUNTATORE BASSO, appare l’icona a freccia rossa. Spostare la freccia sulla voce che si desidera impostare e poi premere il tasto SELEZIONE per impostare “On” o “Off”.
APPENDICE FUNZIONAMENTO DEL MOUSE VIA RADIO Il telecomando non solo serve per comandare il proiettore ma può anche essere usato come mouse via radio per la gran parte dei personal computer. I tasti PUNTATORE e i due tasti CLICK servono per il funzionamento come mouse senza filo. Il mouse senza filo può essere utilizzato quando sullo schermo appare il puntatore del mouse del PC.
APPENDICE MANUTENZIONE INDICATORE DI ALLARME PER TEMPERATURA (WARNING TEMP.) Quando la temperatura interna del proiettore supera la temperatura normale, l’indicatore WARNING TEMP. lampeggia rosso. L’indicatore smette di lampeggiare quando la temperatura del proiettore ritorna normale. Quando l’indicatore WARNING TEMP. continua a lampeggiare, controllare quanto segue. 1 Che le aperture di ventilazione del proiettore non siano ostruite. In tal caso, spostare l’apparecchio per liberare le aperture.
APPENDICE INDICATORE DI SOSTITUZIONE LAMPADA Quando la lampada del proiettore è prossima alla fine della sua durata, l’indicatore LAMP REPLACE si illumina giallo. Quando l’immagine diventa scura o i colori dell’immagine diventano innaturali, è necessario sostituire la lampada. SOSTITUZIONE DELLA LAMPADA ATTENZIONE ● Per preservare le condizioni di sicurezza, sostituire con un gruppo lampada dello stesso tipo.
APPENDICE GUIDA E RIMEDI IN CASO DI PROBLEMI DI FUNZIONAMENTO Prima di richiedere l’intervento del rivenditore autorizzato o di un centro di assistenza tecnica, controllare i punti indicati di seguito ancora una volta. 1. Assicurarsi di aver collegato il proiettore alla propria apparecchiatura, come descritto nel capitolo “COLLEGAMENTO DEL PROIETTORE” da pagina 10 a 13. 2. Controllare i collegamenti dei cavi. Verificare che tutto, computer, video e cavo di alimentazione sia stato collegato correttamente.
APPENDICE Problema: Rimedi consigliati I telecomandi non funzionano. ● Controllare le pile. ● Controllare che l’interruttore ALL-OFF, sul telecomando, sia impostato su “ON”. ● Assicurarsi che niente ostruisca la traiettoria tra il ricevitore del telecomando e i telecomandi. ● Assicurarsi di non essere troppo lontani dal proiettore quando si utilizzano i telecomandi. Il raggio d’azione massimo è di 5 m. La funzione di mouse via radio non funziona.
APPENDICE DATI CARATTERISTICI Tipo di Proiettore Dimensioni (L x A x P) Peso netto Sistema del pannello a cristalli liquidi Risoluzione pannello Numero di pixel Sistema del colore Frequenza di scansione Formato immagine di proiezione (Diagonale) Risoluzione orizzontale Obiettivo di proiezione Distanza di proiezione Lampada di proiezione Prese di ingresso AudioVideo Prese ingresso computer Presa porta di controllo Presa uscita monitor Presa di Ingresso Audio per Computer Presa uscita audio Amplificatore aud
APPENDICE PARTI OPZIONALI Le parti elencate di seguito sono da acquistare a parte. Al momento di ordinarle, fornire nome e modello al rivenditore.
AL PROPIETARIO Como propietario de un nuevo Proyector multimedia, estará ansioso de probar su nuevo proyector. Antes de que lo haga, le sugerimos que dedique un poco de tiempo a la lectura de este manual para familiarizarse con los procedimientos de uso, de esta manera usted recibirá la máxima satisfacción de todas las características incluidas en su nuevo proyector. Este manual del usuario le informará de las características del proyector. Su lectura también nos ayudará.
INSTRUCCIONES IMPORTANTES DE SEGURIDAD Todas las instrucciones de mantenimiento y de seguridad deben ser leídas antes de hacer funcionar el producto. Lea todas las instrucciones dadas aquí y reténgalas para uso posterior. Desconecte este proyector del suministro de alimentación de CA antes de limpiarlo. No use limpiadores líquidos o en aerosol. Para limpiar use un paño húmedo. No use accesorios no recomendados por el fabricante ya que pueden causar daños.
INDICE CARACTERÍSTICAS Y DISEÑO PREPARACIÓN 5 6 NOMBRE DE CADA PARTE DEL PROYECTOR 6 INSTALACIÓN DEL PROYECTOR 7 UBICACIÓN DEL PROYECTOR PATAS AJUSTABLES CONEXIÓN DEL CABLE DE ALIMENTACIÓN DE CA VENTILACIÓN TRANSPORTE DEL PROYECTOR CONEXIÓN DEL PROYECTOR TERMINALES DEL PROYECTOR CONEXIÓN AL EQUIPO DE VÍDEO CONEXIÓN AL ORDENADOR ANTES DE USAR 7 7 8 8 9 10 10 11 12 14 FUNCIONAMIENTO DEL CONTROL REMOTO 14 FUNCIÓN DE PUNTERO LÁSER COLOCACIÓN DE LAS PILAS DEL CONTROL REMOTO 14 15 CONTROLES E INDICADO
CARACTERÍSTICAS Y DISEÑO Este proyector multimedia está diseñado con la tecnología más avanzada para obtener portabilidad, durabilidad y facilidad de uso. Este proyector utiliza características multimedia integradas, una paleta de 16,77 millones de colores, y tecnología de exhibición de matriz de cristal líquido (LCD).
PREPARACIÓN NOMBRE DE CADA PARTE DEL PROYECTOR PARTE DELANTERA DEL PROYECTOR LENTE DE PROYECCIÓN RANURA PARA TARJETA PC CUBIERTA DE LA LENTE MANGO DE TRANSPORTE RECEPTOR DE INFRARROJOS DEL CONTROL REMOTO ALTAVOCES (Monoaural) PARTE TRASERA DEL PROYECTOR SALIDA DE VENTILACIÓN ¡SALE AIRE CALIENTE! El aire que sale por la salida de ventilación está caliente. Cuando use o instale el proyector, debería prestar atención a lo siguiente: ● No ponga un objeto inflamable cerca de esta parte.
PREPARACIÓN INSTALACIÓN DEL PROYECTOR UBICACIÓN DEL PROYECTOR ● Este proyector fue diseñado para proyectar sobre una superficie plana. ● Este proyector puede enfocarse entre una distancia de 1,4 m - 10,8 m. ● Consulte la figura a continuación para ajustar el tamaño de la pantalla.
PREPARACIÓN CONEXIÓN DEL CABLE DE ALIMENTACIÓN DE CA Su proyector utiliza voltajes de entrada nominal de 200 240 volts de CA. El proyector selecciona automáticamente el voltaje de entrada correcto. El proyector está diseñado para trabajar con sistemas de alimentación de fase simple que tengan toma de tierra. Para reducir el riesgo de descargas eléctricas, no lo enchufe en ningún otro tipo de sistema de alimentación.
PREPARACIÓN TRANSPORTE DEL PROYECTOR Utilice el mango de transporte para llevar el proyector. Cuando transporte el proyector, cambie la cubierta del objetivo y gire las patas completamente hacia la derecha (para acortarlas) de manera de evitar dañar el objetivo y el exterior. Cuando no use este proyector durante un largo período de tiempo, vuelva a colocar la cubierta del objetivo, meta hacia adentro de las patas ajustables y coloque la cubierta contrapolvo suministrada con el proyector.
CONEXIÓN DEL PROYECTOR TERMINALES DEL PROYECTOR TOMA DE ENTRADA DE VÍDEO TOMA DE ENTRADA S-VIDEO Conecte la salida de vídeo del equipo de vídeo a esta toma. (Consulte la página 11.) Conecte la salida de S-VIDEO del equipo de vídeo a este terminal. (Consulte la página 11.) TOMA DE ENTRADA DE AUDIO DEL ORDENADOR S-VIDEO TOMAS DE ENTRADA DE AUDIO Conecte las salidas de audio del equipo de vídeo a estos terminales. (Consulte la página 11.
CONEXIÓN DEL PROYECTOR CONEXIÓN AL EQUIPO DE VÍDEO Fuente de vídeo (ejemplo) Videograbador Use cables para la conexión Tocadiscos de videodiscos Salida de vídeo/audio Salida S-VIDEO • CABLE DE VIDEO* • CABLE S-VIDEO* • CABLE DE AUDIO (estéreo)* * Estos cables no fueron suministrados con este proyector. Cable de audio/vídeo* Cable S-VIDEO* Use la toma VIDEO o SVIDEO. Cuando ambas tomas estén conectadas, la toma S-VIDEO tiene prioridad sobre la toma VIDEO.
CONEXIÓN DEL PROYECTOR CONEXIÓN AL ORDENADOR Para conectar con el ordenador, consulte el dibujo a continuación. Use cables para la conexión · CABLE VGA · CABLE DE CONTROL PARA PUERT PS/2 · CABLE DE CONTROL PARA PUERT SERIAL o PUERT ADB* · ADAPTADOR MAC* · CABLE DEL MONITOR* · CABLE DE AUDIO DE PC (estéreo)* * Estos cables no fueron suministrados con este proyector.
CONEXIÓN DEL PROYECTOR S-VIDEO R-AUDIO-L(MONO) VIDEO AUDIO IN OUT COMPUTER IN MONITOR OUT CONTROL PORT COMPUTER IN MONITOR OUT CONTROL PORT AUDIO IN AUDIO OUT ◆ ADAPTADOR MAC (no suministrado) Use uno de estos cables de control correspondientes al terminal de su ordenador. Ajuste los interruptores como se muestra a continuación ON dependiendo del modo de resolución que quiere usar antes de encender el proyector OFF y el ordenador 1 MODO DE 13 PULG. (640 x 480) ON MODO DE 16 PULG.
ANTES DE USAR FUNCIONAMIENTO DEL CONTROL REMOTO Lado izquierdo BOTÓN DE VÍDEO (VIDEO) Se usa para seleccionar la fuente de vídeo. (Consulte la página 30.) COMPUTER/ VIDEO MCI ON BOTÓN DE ORDENADOR/MCI (COMPUTER/MCI) F ALL OF Se usa para seleccionar el modo de ordenador o el modo MCI. (Consulte las páginas 23, 33.) BOTÓN DE MENÚ (MENU) ZOOM ON-OFF FOCUS VOLUME MUTE D.
ANTES DE USAR BOTÓN VOLUME (VOLUMEN) COMPUTER/ VIDEO MCI ON-OFF Se usa para ajustar el volumen. (Consulte la página 22.) BOTÓN ZOOM (ZOOM) Se usa para ajustar el zoom. (Consulte la página 21.) BOTÓN FOCUS (ENFOQUE) ZOOM FOCUS VOLUME MUTE D.ZOOM Se usa para ajustar el enfoque. (Consulte la página 21.) PAGE BOTÓN D.ZOOM (ZOOM DIGITAL) Se usa para activar el modo de zoom digital del proyector. (Consulte las páginas 29, 37.
ANTES DE USAR CONTROLES E INDICADORES DE LA PARTE SUPERIOR BOTÓN NORMAL (NORMAL) Se usa para reponer el ajuste de imagen normal preestablecido por la fábrica. (Consulte las páginas 27, 31, 36.) BOTÓN AUTO IMAGE (IMAGEN AUTOMÁTICA) Se usan para hacer funcionar la función de imagen automática. (Consulte la página 28.) BOTONES DE PÁGINA (PAGE) BOTÓN ON-OFF (ENCENDIDO/APAGADO) Se usan para moverse a la página siguiente/anterior de los datos de la tarjeta de memoria dentro de la ranura para tarjeta PC.
ANTES DE USAR USO DEL MENÚ EN LA PANTALLA COMO USAR EL MENÚ EN LA PANTALLA Podrá controlar y ajustar el proyector usando el menú en la pantalla. Consulte las siguientes páginas para hacer funcionar cada ajuste en el menú en la pantalla. CONTROL REMOTO INALÁMBRICO BOTÓN DE APUNTAR Se usa para mover el puntero hacia arriba/abajo/izquierda/ derecha.
ANTES DE USAR BARRA DE MENÚ BARRA DE MENÚ EN MODO DE ORDENADOR Presione el botón MENU mientras se encuentra en el modo de ordenador. MENÚ DE MODO MENU DE SISTEMA MENÚ DE POSICIÓN Se usa para seleccionar el modo de entrada del ordenador. (Consulte la página 23.) Se usa para seleccionar un sistema de ordenador. (Consulte la página 23.) Se usa para ajustar la posición de la imagen. (Consulte la página 28.
ANTES DE USAR BARRA DE MENÚ EN EL MODO MCI Presione el botón MENU mientras se encuentra en el modo MCI. MENÚ DE MODO MENÚ DE POSICIÓN Se usa para seleccionar el modo de entrada MCI. (Consulte la página 33.) Se usa para ajustar la posición de la imagen. (Consulte la página 36.) Estos iconos tienen la misma función que el modo de ordenador.
FUNCIONES BÁSICAS ENCENDIENDO/APAGANDO EL PROYECTOR ENCENDIENDO EL PROYECTOR 1 Complete las conexiones periféricas (con el ordenador, VCR, etc.) antes de encender el proyector. (Consulte “CONEXIÓN DEL PROYECTOR” en las páginas 10-13 por detalles sobre la conexión a esos equipos. 2 Conecte el cable de alimentación de CA del proyector al tomacorrientes de la pared. El indicador LAMP se ilumina de rojo y el indicador READY se ilumina de verde.
FUNCIONES BÁSICAS AJUSTE DE LA IMAGEN AJUSTE DEL ZOOM 1 Presione el botón ZOOM en los controles en la parte de arriba o el botón ZOOM ▲/▼ en el control remoto para pasar al modo zoom. 2 Presione el botón de apuntar hacia arriba o el botón ZOOM ▲ para agrandar la imagen, y presione el botón de apuntar hacia arriba o el botón ZOOM ▼ para achicarla. En el modo de ordenador, la imagen puede ser expandida, comprimida y se puede hacer panorámica con la función de zoom digital.
FUNCIONES BÁSICAS FUNCIÓN DE NO MOSTRAR IMAGEN Presione el botón NO SHOW en el control remoto para cambiar la imagen por una de color negro. Esta función se cancela cuando se vuelve a presionar el botón NO SHOW o se presiona cualquier otro botón de función. Apagar Imagen El mensaje desaparece después de 4 segundos. FUNCIÓN DE CONGELAMIENTO DE IMAGEN Presione el botón FREEZE en el control remoto para que la imagen quede congelada en la pantalla.
MODO DE ORDENADOR SELECCIÓN DEL MODO DE ORDENADOR FUNCIONAMIENTO DIRECTO Seleccione el modo de ordenador presionando el botón MODE en los controles de la parte de arriba o el botón COMPUTER/MCI en el control remoto. Botón MODE Computer Botón COMPUTER/MCI Computer MCI MCI Video FUNCIONAMIENTO DEL MENÚ Presione el botón MENU y aparecerá el menú en la pantalla. Presione el(los) botón(es) de apuntar hacia la izquierda/derecha para seleccionar Computer y presione el botón de selección (SELECT).
MODO DE ORDENADOR AJUSTE DEL PC Este proyector puede detectar automáticamente la mayoría de las señales de ordenadores personales más comunes. Sin embargo, algunos ordenadores emplean señales de formato especial diferente de los estándares normales, y no pueden ser sintonizadas por el multirastreo de este proyector. Si ocurriera esto, el proyector no podrá reproducir las imágenes correctamente, y las imágenes oscilarían, no estarían bien sincronizadas, estarían descentradas o torcidas.
MODO DE ORDENADOR Total lineas Indica el número total de líneas verticales. Ajuste el número para estar de acuerdo con su ordenador personal. Total Puntos Indica el número total de puntos en un punto horizontal. Ajuste el número para estar de acuerdo con su ordenador personal. Posicion H./Posicion V. Ajuste de la posición horizontal/vertical de la imagen. Cuando la imagen no está centrada en la pantalla, ajuste cada uno de estos items. Clamp Ajuste del nivel de la abrazadera.
MODO DE ORDENADOR ESPECIFICACIONES DE LOS ORDENADORES COMPATIBLES Básicamente este proyector puede aceptar las señales de todos los ordenadores con frecuencia horizontal y vertical menor a las mencionadas y menores de 140 MHz de reloj de puntos. E FREC. FREC.
MODO DE ORDENADOR AJUSTE DE IMAGEN AJUSTE MANUAL DE LA IMAGEN 1 Presione el botón MENU y aparecerá el menú en la pantalla. Presione el(los) botón(es) de apuntar hacia la izquierda/derecha para seleccionar IMAGEN y presione el botón de selección (SELECT). Aparecerá otro cuadro de diálogo con el menú de ajuste de imagen. 2 Presione el botón de apuntar hacia abajo y aparecerá una flecha roja. Mueva la flecha al item que desea cambiar presionando el(los) botón(es) de apuntar hacia arriba/abajo.
MODO DE ORDENADOR FUNCIÓN DE IMAGEN AUTOMÁTICA La función de imagen automática le permite ajustar automáticamente la sincronización fina, puntos totales y la posición de la imagen para la mayoría de los ordenadores. 1 Presione el botón MENU y aparecerá el menú en la pantalla. Presione el(los) botón(es) de apuntar hacia la izquierda/derecha para seleccionar AUTO IMAGEN y presione el botón de selección (SELECT). Aparecerá otra caja de diálogo del menú de imagen automática.
MODO DE ORDENADOR AJUSTE DE PANTALLA Este proyector tiene una función de ajuste del tamaño de la pantalla que le permite exhibir la imagen en el tamaño deseado. 1 Presione el botón MENU y aparecerá el menú en la pantalla. Presione el(los) botón(es) de apuntar hacia la izquierda/derecha para seleccionar PANTALLA y presione el botón de selección (SELECT). Aparecerá otro cuadro de diálogo con el menú de imagen en pantalla. 2 Presione el botón de apuntar hacia abajo y aparecerá el ícono de la flecha roja.
MODO DE VIDEO SELECCIONANDO EL MODO DE VIDEO FUNCIONAMIENTO DIRECTO Seleccione el modo VIDEO presionando el botón MODE en el control en la parte de arriba o el botón VIDEO en el control remoto. FUNCIONAMIENTO DEL MENÚ Botón MODE Computer MCI Video Presione el botón MENU y aparecerá el menú en la pantalla. Presione el(los) botón(es) de apuntar hacia la izquierda/derecha para seleccionar Vídeo y presione el botón de selección (SELECT). Aparecerá otro cuadro de diálogo con el menú de modo de vídeo.
MODO DE VIDEO AJUSTE DE IMAGEN AJUSTANDO LA IMAGEN 1 Presione el botón MENU y aparecerá el menú en la pantalla. Presione el(los) botón(es) de apuntar hacia la izquierda/derecha para seleccionar IMAGEN y presione el botón de selección (SELECT). Aparecerá otro cuadro de diálogo con el menú de ajuste de imagen. 2 Presione el botón de apuntar hacia abajo y aparecerá una flecha roja. Mueva la flecha al item que desea cambiar presionando el(los) botón(es) de apuntar hacia arriba/abajo.
MODO MCI USO DE LA RANURA DE TARJETA PC Este proyector tiene una ranura para PC y las imágenes en una tarjeta de memoria (SmartMedia con adaptador de tarjeta PC o tarjeta PC) pueden ser exhibidas insertando la tarjeta en ella. No es necesario conectar a otro equipo de entrada. El programa Media Card Imager (suministrado con el CD-ROM) puede editar los datos de imagen y grabarlos en una tarjeta de memoria para proyectarlos con el proyector.
MODO MCI DATOS DISPONIBLES Este proyector permite proyectar los siguientes datos usando la ranura para tarjeta PC. ● Los datos editados usando el programa “Media Card Imager”. ● Se pueden exhibir datos de resolución entre VGA (640 x 480) y SXGA (1280 x 1024) en el tipo Bit Map (BMP) o JPEG (JPG), como los datos de una cámara digital. (Algunos datos de imágenes en tamaño SXGA pueden no ser exhibidos correctamente. En ese caso, baje la resolución.
MODO MCI MOSTRAR LOS DATOS DE LA TARJETA DE MEMORIA FUNCIONAMIENTO BÁSICO 1 Inserte la tarjeta de memoria y cambie el proyector al modo MCI. Se exhibirán las imágenes de la tarjeta de memoria. 2 Para cambiar la imagen entre otros, presione el botón PAGE ▲ o ▼. (Cuando se ajusta “Display Timer” en la imagen con el programa Media Card Imager, se cambiará automáticamente de imagen.) Para seleccionar Indice o Página en el cuadro, siga las instrucciones para Selección de índice o Selección de página.
MODO MCI GRABANDO DATOS EN LA TARJETA DE MEMORIA Los datos editados mediante el programa Media Card Imager en el ordenador pueden ser escritos o leídos desde la tarjeta de memoria con la unidad de tarjetas PC de su ordenador personal o la ranura de tarjetas PC de este proyector. Los datos editados con el programa Media Card Imager se graban en formato Bit Map (BMP) o JPEG (JPG).
MODO MCI AJUSTE DE IMAGEN AJUSTE MANUAL DE LA IMAGEN 1 Presione el botón MENU y aparecerá el menú en la pantalla. Presione el(los) botón(es) de apuntar hacia la izquierda/derecha para seleccionar IMAGEN y presione el botón de selección (SELECT). Aparecerá otro cuadro de diálogo con el menú de ajuste de imagen. 2 Presione el botón de apuntar hacia abajo y aparecerá una flecha roja. Mueva la flecha al item presionando el(los) botón(es) de apuntar hacia arriba/abajo.
MODO MCI AJUSTE DE PANTALLA Este proyector tiene una función de ajuste del tamaño de la pantalla que le permite exhibir la imagen en el tamaño deseado. 1 Presione el botón MENU y aparecerá el menú en la pantalla. Presione el(los) botón(es) de apuntar hacia la izquierda/derecha para seleccionar PANTALLA y presione el botón de selección (SELECT). Aparecerá otro cuadro de diálogo con el menú de imagen en pantalla. 2 Presione el botón de apuntar hacia abajo y aparecerá el ícono de la flecha roja.
MODO MCI ADAPTADOR DE TARJETA PC Y SMARTMEDIA El proyector PC viene con un adaptador de tarjeta PC y SmartMedia. La SmartMedia puede ser usada como una tarjeta PC de acuerdo con el estándar PC Card-ATA usándola combinada con el adaptador de tarjeta PC. INSTALACIÓN/DESMONTAJE DE LA SMARTMEDIA INSTALACIÓN Inserte la SmartMedia completamente en el adaptador de tarjeta PC. Asegúrese que el botón de expulsión sale hacia afuera. NOTA: La parte delantera de la SmartMedia tiene el área de contacto.
MODO MCI PRECAUCIONES Y ESPECIFICACIONES DE LA SMARTMEDIA ● La SmartMedia es un dispositivo de precisión. No la doble, no la deje caer, no la someta a fuerzas extrañas ni la golpee y tampoco la coloque en lugares que quede sujeta a cargas electrostáticas fuertes. ● No toque la superficie del área de contacto con los dedos ni permite que se manche con materiales extraños. Cuando no la use, almacene la SmartMedia en el interior de su caja protectora. ● La SmartMedia es un objeto de consumo.
AJUSTE MENÚ DE AJUSTE 1 Presione el botón MENU y aparecerá el menú en la pantalla. Presione el(los) botón(es) de apuntar hacia la izquierda/derecha para seleccionar AJUSTE y presione el botón de selección (SELECT). Aparecerá otro cuadro de diálogo con el menú de ajuste. 2 Presione el botón de apuntar hacia abajo y aparecerá una flecha roja. Mueva la flecha al ítem que desea ajustar, y luego presione el botón de selección (SELECT) para ajustarlo en “On” u “Off”.
APÉNDICE FUNCIONAMIENTO DEL RATÓN INALÁMBRICO El control remoto inalámbrico no solo permite controlar el proyector sino también puede usarse como ratón inalámbrico de la mayoría de los ordenadores personales. El botón para apuntar y los dos botones de clic se usan para controlar el ratón inalámbrico. Se puede usar el ratón inalámbrico cuando el puntero del ratón del PC se exhibe en la pantalla.
APÉNDICE MANTENIMIENTO INDICADOR DE ADVERTENCIA DE TEMPERATURA El indicador WARNING TEMP. destella de rojo cuando la temperatura interna del proyector excede la temperatura normal. El indicador deja de destellar cuando la temperatura del proyector vuelve a la normalidad. Cuando el indicador de advertencia de temperatura continúa destellando, controle los siguiente puntos. 1 Los orificios de ventilación del proyector están bloqueados.
APÉNDICE INDICADOR DE CAMBIO DE LA LÁMPARA Cuando la vida útil de la lámpara de este proyector llega a su fin, el indicador LAMP REPLACE se ilumina de amarillo. Cuando la imagen se vuelve oscura o el color de la imagen pierde naturalidad, es necesario cambiar la lámpara. CAMBIO DE LA LÁMPARA PRECAUCIÓN ● Por seguridad, reemplace con un montaje de lámpara del mismo tipo. ● Deje que el proyector se enfríe al menos 45 minutos antes de abrir la cubierta de la lámpara.
APÉNDICE LOCALIZACIÓN DE AVERÍAS Antes de llamar al concesionario o centro de servicio por asistencia, revise los puntos descritos a continuación una vez más. 1. Asegúrese de haber conectado el proyector a su equipo como se describe en la sección “CONEXIÓN DEL PROYECTOR” en las páginas 10~13. 2. Revise la conexión de los cables. Verifique que estén correctamente conectados todos los cables del ordenador, del vídeo y de la alimentación. 3. Verifique que está conectada la alimentación en todos los casos. 4.
APÉNDICE Problema Pruebe esta solución los controles remotos no funcionan. ● Revise las pilas. ● Verifique que el interruptor ALL-OFF en el control remoto está en “ON”. ● Asegúrese que algo no está bloqueando entre el receptor de infrarrojos y los controles remotos. ● Asegúrese que no está demasiado lejos del proyector cuando usa los controles remotos. La distancia máxima de funcionamiento es de 5 m. La función de ratón inalámbrico no funciona.
APÉNDICE ESPECIFICACIONES TÉCNICAS Tipo de proyector Dimensiones (An. x Al. x Prof.
APÉNDICE PARTES OPCIONALES Las partes indicadas a continuación son opcionales. Al ordenar estas partes, indique el nombre y código al distribuidor.
Audio Visual/Video Products EIKI INTERNATIONAL, INC. 26794 Vista Terrace Drive, Lake Forest, CA. 92630-8113, U.S.A. TEL (949) 457-0200 FAX (949) 457-7878 EIKI CANADA 865 Heritage Drive P.O. Box 156 Midland Ontario L4R 4K8 Canada TEL (705) 527-4084 FAX (705) 527-4087 EIKI DEUTSCHLAND GMBH AM Frauwald 12 65510 Idstein Germany TEL (6126) 9371-0 FAX (6126) 9371-11 EIKI CZECH SPOL. S.R.O. Umelccka 15, 170 00 Praha 7 Holesovice Czech Republic TEL (2) 20571413 FAX (2) 20571411 EIKI INDUSTRIAL CO.