Dialogic® Diva® System Release 8.5WIN Reference Guide February 2008 206-339-23 www.dialogic.
COPYRIGHT NOTICE AND LEGAL DISCLAIMER COPYRIGHT NOTICE AND LEGAL DISCLAIMER Copyright © 2000-2008 Dialogic Corporation. All Rights Reserved. You may not reproduce this document in whole or in part without permission in writing from Dialogic Corporation at the address provided below. All contents of this document are furnished for informational use only and are subject to change without notice and do not represent a commitment on the part of Dialogic Corporation or its subsidiaries ("Dialogic").
Dialogic Corporation License Agreement For Use of Software Dialogic Corporation License Agreement For Use of Software This is an Agreement between you, the Company, and your Affiliates (referred to in some instances as "You" and in other instances as "Company") and all Your Authorized Users and Dialogic Corporation ("Dialogic"). YOU SHOULD CAREFULLY READ THE SOFTWARE LICENSE AGREEMENT ("AGREEMENT") ON THIS SEALED PACKAGE BEFORE OPENING THE PACKAGE.
Dialogic Corporation License Agreement For Use of Software • You shall not remove, and each copy of the Program shall contain, the same copyright, proprietary, patent and/or other applicable intellectual property or other ownership notices, plus any restricted rights legends that appear in the Program and/or this Agreement and, if You copy the Program onto media to which a label may be attached, You shall attach a label to the media that includes all such notices and legends that appear on the Program mas
Dialogic Corporation License Agreement For Use of Software Right to Audit If this Program is licensed for use in a Company, Your Company and You individually and collectively agree to keep all usual and proper records and books of accounts and all usual proper entries relating to each installation of the Program during the term of this Agreement and for a period of three (3) years thereafter.
Dialogic Corporation License Agreement For Use of Software Contractor/ manufacturer is: Dialogic CORPORATION. 9800 Cavendish Blvd., Montreal, Quebec, Canada H4M 2V9 This Agreement has been drafted in English at the express wish of the parties. Ce contrat a été rédigé en anglais à la demande expresse des parties.
Contents COPYRIGHT NOTICE AND LEGAL DISCLAIMER ........................................... 2 Dialogic Corporation License Agreement For Use of Software .................... 3 About This Publication ............................................................................... 9 How to use this online guide ............................................................................................... 9 Structure of this guide .................................................................................
Features................................................................................................... 50 Features of Dialogic® Diva® ISDN Media Boards ..................................................................51 Features of Dialogic® Diva® Analog Media Boards ...............................................................56 Customer Service .....................................................................................
About This Publication About This Publication How to use this online guide • To view a section, click the corresponding blue underlined phrase in the table below. • To view a topic that contains further information, click the corresponding blue underlined phrases in this guide. • You may wish to print out the pages required for installing the drivers.
About the Dialogic® Diva® System Release 8.5WIN CHAPTER 1 About the Dialogic® Diva® System Release 8.5WIN The Dialogic® Diva® System Release Software enables you to use your Dialogic® Diva® Media Boards with Windows® XP, Windows Server® 2003, Windows Vista®, or Windows Server® 2008.
About the Dialogic® Diva® System Release 8.5WIN • Resolutions fine, super fine, ultra fine • Color Fax JPEG format • T.38 FoIP (PSTN - IP Gateway mode) 3. Data modem support, up to V.90 • All modem modulations POS up to V.90 (client and server side) • V.21, V.23, V.22, V.22bis, Bell 103, Bell 212A, V.32, V.32bis, V.34, V.90, including error correction MNP, V.42, SDLC and compressions V.42bis, MNP 5 • POS modulations V.22 FC, V.22bis FC, V.29 FC • Text telephone modem: V.18, V.21, Bell 103, V.
About the Dialogic® Diva® System Release 8.5WIN • Compatible to V.22 Fast Connect terminals with V.
About the Dialogic® Diva® System Release 8.5WIN • Diva X.75 Modem (56K) • Diva PPP-Modem (64K) • Diva PPP-Modem (56K) • Diva X.
About the Dialogic® Diva® System Release 8.5WIN • Support for sending and receiving single or multi-page documents • Support for fallback to gray scale if remote side does not support color fax • Support for GSM-FR for Dialogic® Diva V-2PRI and V-4PRI Media Boards • Support for DSP-based iLBC voice codec for Diva V-2PRI and V-4PRI Media Boards Note: For the GIPS iLBC public license, refer to the gips_iLBClicense.pdf stored in the Diva program directory.
About the Dialogic® Diva® System Release 8.5WIN Supported Dialogic® Diva® Media Boards The Dialogic® Diva® System Release Software supports the following Dialogic® Diva® Media Boards (max. eight Diva Analog, BRI, 4BRI, PRI, V-2PRI or four Diva V-4PRI Media Boards in one computer): Dialogic® Diva® BRI Media Boards • Diva BRI-2FX • Diva V-BRI-2 • Diva BRI-CTI • Diva V-4BRI-8 • Diva BRI-2 • Diva 4BRI-8 Dialogic® Diva® PRI Media Boards Diva PRI 3.
About the Dialogic® Diva® System Release 8.
Software Installation CHAPTER 2 Software Installation You should not attempt to install the software for your Dialogic® Diva® Media Board at the same time as the operating system. Basic driver support for most Dialogic® Diva® Media Boards is provided by the Windows® operating systems. These Diva boards are fully detected and a basic set of drivers is installed automatically. Diva boards without basic driver support are detected as new hardware.
Software Installation Windows Vista® • The following Dialogic® Diva® Media Boards are fully detected: Diva Diva Diva Diva Diva Diva Diva Diva BRI-2FX BRI-CTI BRI-2 4BRI-8 PRI 3.
Software Installation 6. Select the switch type for your configuration in the Default Switch Type box, if you have a Dialogic® Diva® ISDN Media Board installed or in the Default Analog Switch Type box, if you have a Dialogic® Diva® Analog Media Board installed. Note: If you are changing the configuration and you want to use the same switch type as you selected during the update, select Use existing switch type configuration. Click Next. 7.
Software Installation Configuration Manager. You have the opportunity to use these services if you activate them in the Dialogic® Diva® Configuration Assistant. See Changing the configuration: on page 22. 8. In the Security Settings box, all possible services and interfaces are selected. Disable the services or interfaces you do not want to use for security reasons. You can set a password to prevent unauthorized users from changing the settings. You need to deactivate at least one service.
Software Installation 10. If you selected the service Modem based on virtual COM port and TAPI (Unimodem), the Modem Installation box appears. Select the virtual modem you want to use. If you do not want to use one modem per B-channel, select Specify the number of modems you would like to install and enter the number of modems. Click Next. 11. In the Incoming Call Policy box, select how to handle incoming calls. Click Next.
Software Installation 12. In the displayed dialog box, the selected options are listed. Click Back if you need to change the settings. Click Next to copy the appropriate files to your system. Note: If you are installing a Beta version of the Dialogic® Diva® System Release Software, a message might appear, warning you that the software has not been tested with Windows®. Continue with the installation.
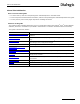
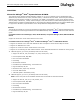
License Activation CHAPTER 3 License Activation You need to generate a license if you have installed one of the following products and purchased a license for one of the following functionalities. Free 30-day test licenses are available for the Dialogic® Diva® softIP software, the Dialogic® Diva® SIPcontrol software, and the Dialogic® Diva® softSS7 software: Product ® Functionality ® Dialogic Diva System Release WIN • Dialogic® Diva® softIP software • Dialogic® Diva® SIPcontrol v2.
License Activation To register your PPC and DUID 1. Open the following web site: http://www.dialogic.com/activate. 2. Enter your PPC and click Check. 3. If your PPC is valid, the following web site will open: Paste your Device Unique ID (DUID) that you saved earlier, and enter your email address to which the license file should be sent. 4. Click Activate to generate the license file that will be sent to the email address you have entered. 5. Save the license file and activate it.
License Activation To activate the license file Note: The date set in the system settings of your computer must be correct. Otherwise, you cannot add your license file. 1. Click Tools > License Manager in the menu bar of the Dialogic® Diva® Configuration Manager. 2. Click Add License and go to the directory where you saved the license key file. 3. Select the license file and click Open. 4. Your license file is now added to the License Manager. 5. Click Close to close the License Manager. 6.
Software Configuration CHAPTER 4 Software Configuration Configuration with installed hardware After you have installed your Dialogic® Diva® Media Board and the board drivers as described in Software Installation on page 17, you can start the Dialogic® Diva® Configuration Manager: 1. Click Start > Programs > Dialogic Diva > Configuration Manager. 2. The Diva Configuration Manager displays the configuration you chose during the software installation: • The detected Dialogic® Diva® Media Board is installed.
Software Configuration See below an example of a default installation for a Dialogic® Diva® PRI/E1/T1-CTI Media Board: 3. You can now add components to your Dialogic® Diva® System Release Software and configure them as described in "Configuring" in the Diva Configuration Manager Online Help file (DSMain.chm). Creating configuration files You can create configuration files manually, without having a Dialogic® Diva® Media Board physically installed in your computer.
Software Configuration 3. The Diva Configuration Manager is displayed with no components: 4. You can now do a complete manual configuration as described in "Configuring" in the Diva Configuration Manager Online Help file (DSMain.chm). Note: If configuration files have been created before, you can start the Diva Configuration Manager and load a configuration file. The configuration file is displayed and you can modify it according to your requirements.
Dial-Up Networking and RAS Administration CHAPTER 5 Dial-Up Networking and RAS Administration In the terminology used by the Remote Access Service, the calling station is referred to as the Client and the called station as the Server. The RAS client/server architecture allows a station to be defined simultaneously as a server and as a client, and therefore enables simultaneous initiation of outgoing and incoming ISDN or channelized T1 connections.
Dial-Up Networking and RAS Administration 5. In the Network Connection Type box, select Connect to the network at my workplace. Note: The screen might appear slightly different under Windows Server® 2003. Click Next. 6. In the Network Connection box, select Dial-up connection and click Next. 7. If you have configured more than one port for outgoing calls, you must specify a port: Select a port, for example ISDN channel - Dialogic Diva BRI-2 to dedicate a line to this outgoing connection.
Dial-Up Networking and RAS Administration 9. In the Phone Number to Dial box, enter the phone number of the server. If the server is configured to use subaddresses, you must specify the appropriate subaddresses under Phone Number:, separated by the vertical stroke "|", (the pipe symbol, or press [Alt] and the digits [0], [1], [2] and [4] on the numeric keypad). For example, if the phone number is 071594066 SUB 41, you must enter 071594066|41.
Dial-Up Networking and RAS Administration Designation Description Framing ^HDLC synchronous HDLC ^X.75 synchronous X.75 ^ASYNC additional information asynchronous ^SYNC additional information synchronous Services ^XP synchronous HDLC transparent (standard) ^V.120 asynchronous, default transfer rate is 64K, transfer rates given below can also be entered ^V.
Dial-Up Networking and RAS Administration Under Windows Vista® and Windows Server® 2008: Before you can set up the RAS client, you need to enable the RAS service. To do so: 1. Click Start > Settings > Control Panel > Administrative Tools > Services. 2. Double-click Remote Access Connection Manager. 3. On the General tab under Startup type select Automatic. 4. Click OK. To set up the RAS client: 1. Click Start > Settings > Control Panel > Network and Sharing Center. 2.
Dial-Up Networking and RAS Administration 7. In the displayed box enter the user name and password with that you connect to the RAS server. Your IT administrator can give you the necessary information. Click Connect to establish a connection to the RAS server. Assign multiple phone numbers to a connection You can assign several phone numbers to a connection. These phone numbers will be used as alternative numbers if the first number fails, for example, when the line is busy. 1.
Dial-Up Networking and RAS Administration To specify the network protocol(s) for every set-up connection 1. Click Start > Settings > Network Connections and right-click the connection. 2. Select Properties. 3. In the properties dialog box of your connection, click the Networking tab. You can now activate the desired network protocol(s) for your connection. For more detailed information on the RAS client, see the Windows RAS documentation.
Dial-Up Networking and RAS Administration 6. In the IP Address Assignment box, specify whether IP addresses will be assigned to remote clients automatically or from a specified range. Click Next. Note: If you select to assign the IP addresses from a specified range, enter the address ranges in the following dialog boxes. 7. If your computer is part of a network, the Managing Multiple Remote Access Servers box is displayed. Specify if you want to set up your RAS server to use an existing RADIUS server.
Dial-Up Networking and RAS Administration • Control access through Remote Access Policy Depending on the Remote Access Policy, dial-in permission is granted or denied to the user. For further information on Remote Access Policies, see your Windows® documentation. The following callback options can be configured: • No Callback The client establishes the connection to the server and maintains the connection. The user of the RAS client assumes all charges.
Dial-Up Networking and RAS Administration To monitor the status of RAS server ports: 1. To monitor the status of a RAS server port, click Start > Programs > Administrative Tools > Routing and Remote Access. 2. In the Routing and Remote Access window, click the + next to your RAS server to expand the tree. 3. Click Ports to display the available ports in the right window pane. 4. Double-click the port for which you want to display the Port Status.
SNMP Support For A Dialogic® Diva® Media Board CHAPTER 6 SNMP Support For A Dialogic® Diva® Media Board The Windows® implementation of the Simple Network Management Protocol (SNMP) is used to configure remote devices or to monitor network performance, to audit network usage, and to detect network faults or inappropriate access. The SNMP support is only available if the service is installed for your operating system. The output formats are defined in the MIB specification.
SNMP Support For A Dialogic® Diva® Media Board You can now add the SNMP service to the Dialogic® Diva® Configuration Manager as described below. Under Windows Vista® and Windows Server® 2008 1. Click Start > Control Panel > Programs > Programs and Features. 2. Click Turn Windows features on or off in the left window pane. If your are ask for permission to continue, click Continue. 3. In the Windows Features dialog box, click the + sign next to SNMP feature, select this feature, and WMI SNMP Provider.
SNMP Support For A Dialogic® Diva® Media Board To verify the service status 1. Click Start > Control Panel > Administrative Tools to open the Administrative Tools window. 2. In the Administrative Tools window, double-click Services. 3. In the Services window, right-click SNMP Service and select Properties from the list. 4. In the Properties dialog box, click the Security tab and under Accepted community names, click Add.
SNMP Support For A Dialogic® Diva® Media Board 6. Under Traps destinations, click Add, enter the name or IP address of the host computer, and click Add. 7. The host name is added to the list of Trap destinations. 8. Click OK to close the dialog box. 9. Restart the SNMP service. To do so, right-click SNMP Service in the Services window and select Restart from the list. 10. Close the Services window. To verify the function of the SNMP service 1. Click Start > Run and type cmd to open a DOS box. 2.
SNMP Support For A Dialogic® Diva® Media Board Supported MIBs, OIDs, and traps This section provides information about supported MIBs, OIDs, and traps by the Dialogic® Diva® SNMP service and about the relationship between supported OIDs and Dialogic® Diva® Media Board management interface variables. MIB-II (RFC Path 1213/2233) MIB-II Description interfaces.ifTable.ifEntry. ifIndex Unique index of Dialogic® Diva® interfaces starting with ifIndex-offset + 1 (see option -oN).
SNMP Support For A Dialogic® Diva® Media Board ISDN-MIB transmission.isdnMib.isdnMibObjects.isdnBear B-channels erGroup.isdnBearerTable.isdnBearerEntry isdnBearerChannelType dialup or leased isdnBearerOperStatus idle, active, unknown isdnBearerChannelIndex Index of B-channel per Diva Media Board isdnBearerPeerAddress Remote address isdnBearerPeerSubAddress Remote sub address isdnBearerCallOrigin Answer or originate isdnBearerInfoType Info type as per Q.
SNMP Support For A Dialogic® Diva® Media Board callHistoryDisconnectTime Timeticks measured from start of divasnmpx. callHistoryCallOrigin Direction of call: Answer or originate. The definition for the ISDN-, DIAL-CONTROL-, and DS1-MIB can be imported in any management application to decode the OIDs reported by divasnmpx.
Uninstalling CHAPTER 7 Uninstalling If you want to uninstall all installed Dialogic® Diva® Media Boards and related software, use Dialogic® Diva® Uninstall as described below. If you do not want to uninstall all Diva boards, then use the Device Manager as described on page 47. Dialogic® Diva® Media Board uninstallation with Uninstall 1. Click Start > Programs > Dialogic Diva > Uninstall. 2. The welcome dialog box is displayed. Follow the instructions on the screen and click Next to continue. 3.
Uninstalling Dialogic® Diva® Media Boards uninstallation with Device Manager Note: The uninstallation with the Device Manager is not recommended for Windows Vista®. 1. Click Start > Control Panel, and select System in the Control Panel window. 2. In the System Properties box, click the Hardware tab and then Device Manager. 3. In the Device Manager box, click the + sign next to Network adapters. 4. Right-click the entry of the Diva Media Board that you want to uninstall and select Uninstall from the list.
Maintenance Tools CHAPTER 8 Maintenance Tools The Dialogic® Diva® System Release Software offers the following tools for testing your connection and controller on your board, and for diagnosing and helping solve problems that might occur with your Dialogic® Diva® Media Board or the connection: Dialogic® Diva® Line Test see below Dialogic® Diva® Diagnostics on page 48 Dialogic® Diva® Line Test To use the Dialogic® Diva® Line Test utility, you must have installed your Dialogic® Diva® Media Boards and Diva Sy
Management Tools CHAPTER 9 Management Tools Dialogic® Diva® Management Dialogic® Diva® Management software is integrated into the Microsoft® Management Console (MMC) via a snap-in. You may create your own set of management, for instance the Device Manager combined with the Diva Management software. Diva Management is a tool that displays the current status of the connected lines, the active connections, and the history of connections.
Features CHAPTER 10 Features Dialogic® Diva® Media Boards provide different features and capabilities with the Dialogic® Diva® System Release Software. The interfaces supported by Dialogic® Diva® Media Boards are as follows; however, not all features may be available on all the supported interfaces. IDI ISDN Direct Interface. Supports all features and capabilities of Dialogic® Diva® ISDN Media Boards.
Features Features of Dialogic® Diva® ISDN Media Boards Features via interface: IDI WAN MiniPort COM Port CAPI 2.0 TAPI Transparent HDLC, 64/567) kbps • • • • •6) Transparent (Voice) • • • X.75 64/567) kbps • • • •6) T.70/T.90 (T-Online)9) • • • •6) V.110 (GSM)1)9) • • • • •6) V.120 64/56 kbps (CompuServe) • • • • •6) V.34+, V.90 analog modem1)7)9) • • • • •6) V.42, V.42bis1)7)9) • • • • •6) X.75/V.
Features Features via interface: IDI Echo cancellation WAN MiniPort COM Port 1)7) Real time protocol (RTP) TAPI • 1)7) • (CNG)1)7) Comfort noise generation • 1)7) Voice activity detection (VAD) • 1)7) • Dynamic anti-jitter buffer Audio CAPI 2.0 tap1)7) • GSM and G.
Features 6) Features are available with TAPI via Unimodem support. 7) Features are not available with the Dialogic® Diva® BRI-2FX Media Board. 8) For an overview on switching and conferencing support by the various Dialogic® Diva® Media Boards, see On-board switching and conferencing on page 53.
Features Supplementary services The Dialogic® Diva® System Release Software supports basic call services for the switch types that are available in the Dialogic® Diva® Configuration Manager. Additionally, it offers supplementary services for the following switch types: • Euro-ISDN (ETSI) BRI and PRI • 5ESS Custom (AT&T) • 5ESS NI (Lucent/Avaya) • DMS 100 (Nortel) • Q.SIG Q.SIG support is available for the derivatives ECMA-QSIG, and ISO-QSIG. Thus, the Q.
Features Supplementary services with switch type Euro-ISDN (ETSI) PRI Euro-ISDN (ETSI) BRI Q.SIG 5ESS Custom (AT&T), 5ESS NI (Lucent/Avaya), DMS 100 Three-party conference • • Large conference • • Drop conference • • Name identification services • (presented by switch) Generic functional procedures (basis for supplementary services in Q-Sig environment) • Common information • Redirected number translation from Q-Sig to Q.
Features Features of Dialogic® Diva® Analog Media Boards Call control features • Dial tone detection • Dial pulse detection • Pulse dialing • Tone (DTMF/MF) dialing • Busy tone detection • Ring back tone detection • Special Information Tone (SIT) detection • Fax/modem detection • Hold/Retrieve (via Hook Flash) and keypad protocol • Analog caller identification (via FSK and DTMF signaling) • Collection of DTMF post-dial digits • DTMF parsing • Call transfer • Specify call direction • Configurable PBX parame
Features Voice over IP support • G.711 voice codec (64 kbps, µ-law, A-law) • G.726 voice codec (32 kbps) • GSM voice codec (13 kbps) • G.
Customer Service CHAPTER 11 Customer Service Dialogic provides various options and arrangements for obtaining technical support for your Dialogic® product. We recommend that you use the Dialogic® Diva® Support Tools first before contacting your Dialogic supplier. Also we suggest that you visit the Dialogic help web, which includes detailed information about a variety of topics.