
User`s guide


Chapter Nine: Advanced Installations Installing on an existing LAN
105
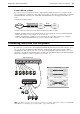
Manual installation
Follow these steps to install the DIVA LAN ISDN Modem on a LAN if you are unable to run Modem Monitor
on a computer on your network.
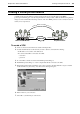
1.
Determine how IP addresses are assigned on the LAN.
•
Static:
Each computer on your LAN has a fixed address. If this is the case, then determine the IP
address and subnet mask that will be assigned to the DIVA LAN ISDN Modem.
•
Dynamic:
Addresses are assigned by a DHCP server (such as a Windows NT server).
It is recommended that before you install the DIVA LAN ISDN Modem on your LAN, you should install
and configure it for use with a single non-networked computer. This lets you verify that your ISDN line is
functioning and that you are able to successfully communicate with the DIVA LAN ISDN Modem.
2.
Disconnect a computer from your LAN.
3.
Follow the instructions in Chapter Two to install and configure the DIVA LAN ISDN Modem. Pay
particular attention to section “Verify the configuration of your computers” on page 18. If you need to
change the settings of your computer, make sure you record the existing settings before you change them.
4.
Once installation and configuration are complete, confirm that your ISDN line works and that you have
access to the Internet.
5.
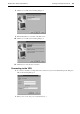
Start the Web-based configuration interface.
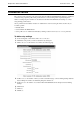
6.
Click LAN on the Manual Configuration menu. The DIVA LAN ISDN Modem displays the LAN
parameters page.
7.
Set the IP address to a free address on your LAN. If your LAN uses dynamic addressing (DHCP server)
make sure that the address you choose is outside the range of dynamically assigned ones, or that you
reserve the address. For background information on IP addresses, see “About IP addresses” on page 111.
8.
Set the Subnet mask according to the requirements of your LAN.
9.
Click Save.
Do not
reset the DIVA LAN ISDN Modem.
By default, the DIVA LAN ISDN Modem is configured to act as a DHCP server. If a computer on the LAN
is already providing this function (such as a Windows NT server), you need to disable this feature on the
DIVA LAN ISDN Modem.
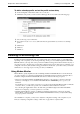
10.
Click IP on the Manual Configuration menu.