
Instruction manual


INTUITY Messaging Solutions Release 4
MAP/5P Maintenance
585-310-186
Issue 3
October 1997
Replacing the Hard Disk Drive
Page 6-25Adding a Hard Disk Drive
6
7. Rotate the peripheral frame into the MAP/5P chassis until it is locked in
place.
8. Check the cable connections to both the diskette drive and Hard Disk
Drive 1.
Adding a Hard Disk Drive
This section details the procedures for adding Hard Disk Drive 1 to a Lucent
I
NTUITY system. If you are replacing an existing drive, see ‘‘Recovering from a
Hard Disk Drive 0 Failure’’ above or ‘‘Recovering from a Hard Disk Drive 1
Failure’’ above for the procedure.
To add a hard disk drive, do the following:
NOTE:
This procedure only applies to adding a second hard disk drive to a system
which originally had only one hard disk drive.
1. Verify that the new hard disk drive is on site and appears to be in usable
condition, with no obvious shipping damage.
2. Prepare the new hard disk drive for installation. See ‘‘Setting the Hard Disk
Drive 1 Jumper Settings’’ above for the procedure.
3. Install the hard disk drive. See ‘‘Inserting Hard Disk Drive 1’’
above for the
procedure.
4. Reboot the Lucent I
NTUITY system. See ‘‘Rebooting the System’’ in Chapter
3, ‘‘Common System Procedures’’, for the procedure.
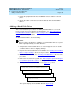
5. Starting at the Lucent I
NTUITY Main menu (Figure 6-1), select
.
The system displays the Install Disk window (Figure 6-15).
>Install Disk
> Disk Management
>
System
Management
> Customer/Services Administration