
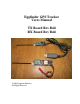
User`s guide


Important points to note are:
• The mounting holes are sized for a 4-40 screw. Since the Eggfinder TX is relatively
lightweight, you can use a self-tapping or wood screw into a plywood sled, if you do that we
recommend that you put a drop of epoxy in the hole on the sled first so it won’t come loose.
• You can also use double-stick foam tape, “servo tape” is the best because the adhesive is
very strong and it won’t come loose accidentally. If you cover the entire bottom side of the
Eggfinder TX with servo tape, it isn’t going to go anywhere, no matter how many G’s you pull.
• Use zip ties or wire clips to strain-relieve the battery lead, you don’t want it to flop around in
flight and have the solder joint get pulled out.
• Ditto for the battery connector, and it won’t hurt to wrap some masking tape around the
connector to prevent it from coming apart, too.
• The Eggfinder TX board requires about 70 mA, with a start-up peak of up to 200 mA for a
few seconds or so. We recommend that whatever battery you use provide at least 200 mAH of
capacity, which will keep it going for about 3 hours. If you’re flying somewhere that may take
a little more hunting (i.e. a field of tall grass), you should bump the capacity up so that it
doesn’t run down before you can find it. Since the Eggfinder should tell you within a
relatively small distance where your rocket landed, it shouldn’t take you very long to find it,
but an extra hour or so of power is a good thing.
• There really isn’t any reason for having a battery switch, a simple connector such as a JST
will work fine; you can turn it on by connecting the battery. Since you have to hold the button
down to turn on the GPS and start transmitting, you can simply wait until shortly before your
flight to press the button, and save about 60 mA of power draw while you wait since the GPS
is in “standby” mode and the transmitter isn’t sending out any data and therefore isn’t drawing
much power.