
User`s manual


- 16 -
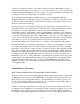
This screen is where you would enter your Flight Settings (Drogue mode and Main deployment
altitude). It is also where you go to save your settings and ARM your Eggtimer TRS to start the
flight sequence. Note that you MUST at least display the flight settings before you are allowed
to ARM the unit and start a flight. This is done so that you KNOW what the settings are… you
don’t have to “remember” what you think they might have been when you flew a month ago.
To enter the Display/Change Settings menu, PRESS the button for about 1 second.
To go to the NEXT menu item, TAP the button… you will see this menu.
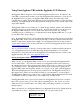
This is the Flight Display menu. It allows you to get “flight milestone” data for all 32 flights,
starting from the most recent one and working backwards to the oldest. You can review
information such as the apogee altitude, maximum velocity, etc. Note that it is not as
comprehensive as the download that you can get with the USB data cable, it’s designed to be a
quick review of your flights.
PRESS the button to review your flights, and see the second on the Flight Display for more
details.
TAP the button to go to the next menu… you’ll see this menu.
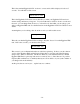
This is the deployment test menu. One of the nice things about using the Eggfinder LCD
receiver is that you can do a full deployment test with your deployment charges remotely from a
safe distance. There are a number of safety features in this menu to keep you from accidentally
starting a deployment test, it’s pretty much impossible for it to happen accidentally. To select
the Deployment Test, PRESS the button for one second or so.
If you TAP the button from here, there are no more menus, so it goes back to the first menu (the
Check Status menu).
Main Menu
Display Flights
Main Menu
Deploy Test