
User's Manual

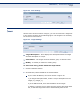
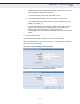

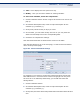

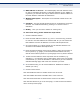

Table Of Contents
C
HAPTER
11
| Access Control Settings
Schedule
– 91 –
◆ Time - Here displays the time period in a day.
◆ Modify - Here you can edit or delete an existing schedule.
To add a new schedule, follow the steps below.
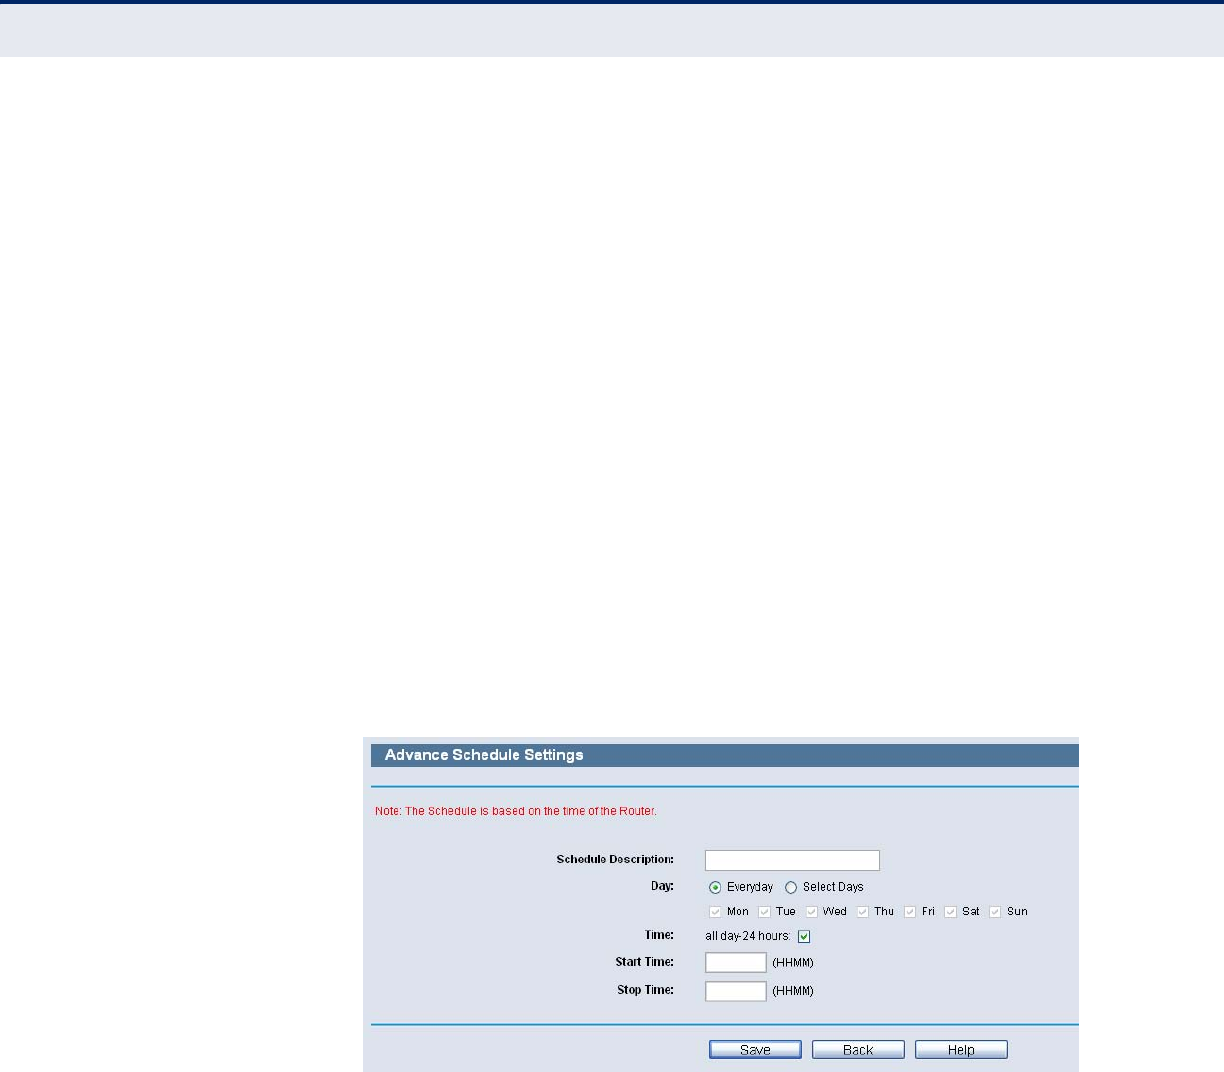
1. Click the Add New button shown in Figure 82 and the next screen will
pop-up.
2. In Schedule Description field, create a unique description for the
schedule (e.g. Schedule_1).
3. In Day field, select the day or days you need.
4. In Time field, you can select all day-24 hours or you may enter the
Start Time and Stop Time in the corresponding field.
5. Click Save to complete the settings.
Click the Delete All button to delete all the entries in the table.
Click the Next button to go to the next page, or click the Previous button
return to the previous page.
Figure 84: Advanced Schedule Settings
For example: If you desire to restrict the internet activities of host with
MAC address 00-11-22-33-44-AA to access www.google.com only from
18:00 to 20:00 on Saturday and Sunday, you should first follow the
settings below:
1. Click the Add New button.
2. In Schedule Description field, create a unique description for the
schedule (e.g. Schedule_1).
3. In Day field, check the Select Days radio button and then select Sat and
Sun.