
User's Manual


Acclarix AX8 Diagnostic Ultrasound System User Manual System Setup
- 86 -
8.2 Selecting a Preset
There are two ways to select a preset
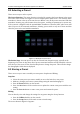
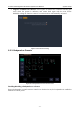
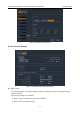
The Preset Function: The preset function is invoked by pressing the Preset button in the upper
left corner of the console. See figure 8-2 for an example preset touch screen. The currently active
transducer is shown at the top of the touch screen. Below it are all the presets associated with that
transducer. Pressing any preset button selects that preset, recalling its parameters for system use.
If the system is configured with the optional Multi-Transducer Connector (MTC) this screen will
show a top row of all connected transducers, allowing you to switch to any one of these and then
select the preset to be used with that transducer.
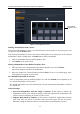
Figure 8-2 Example Preset Screen
The Patient Page: An exam preset can also be selected from the patient page, typically at the
beginning of an exam. A drop-down list of presets associated with the current transducer is shown
near the top of the screen. Select from that drop down to change the preset. This will also change
the demographic fields that are displayed.
8.3 Storing a Preset
There are two ways to store or modify an exam preset: Snapshot and Editing.
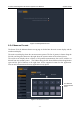
Snapshot:
Select the exam preset you want to modify or use as the basis for a new preset.
Make any changes you want to system settings using the standard imaging UI.
Press the Preset hard key on the console.
Press the Save button on the touch screen to update the current exam preset with the new
setting.
Press the Save As button to create a new preset and rename the preset.
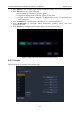
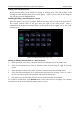
Editing:
You can directly view and change the settings for any preset using the Set-up function.
Press the Utilities hard key on the console.
Press the Set-up button on the touch screen to invoke setup.
The screen shown in Figure 8-3 appears.