Non-Incendive Cell Phone Ex-CDMA 02 Safety instructions
Table of Contents 1. 2. 3. 4. 5. 6. 7. 8. 9. 10. 11. 12. 13. 14. 15. 16.
17. 18. 19. 20. 21. 22.
1. Application The EX-CDMA 02 is a mobile phone based on the CDMA standard for industrial application in areas with an increased risk of explosion in Class I Div 2. 2. Safety information These safety instructions contain information and safety regulations which are to be observed without fail for safe operation in the described conditions. Non-observance of this information and these instructions can have serious consequences or may violate regulations.
- The battery may only be changed or charged outside the hazardous area. - It is not allowed to carry additional battery packs in the hazardous area. - Only AM CDMA 00036 batteries specified by the manufacturer may be used. - The use of other batteries is strictly prohibited and will result in the nullification of explosion protection. - The battery may only be charged outside the hazardous area using the appropriate travel charger Kyocera Travel Charger Model: TXTVL10072.
8.
9. Warranty and Liability For this product, ecom Instruments GmbH warrants the function and material for a period of two years beginning the date of the purchase under normal operating and maintenance conditions. Wearing parts, rechargeable and non-rechargeable batteries are exempt from this. A six-month warranty applies to rechargeable batteries. The warranty does not apply to products which are improperly used, modified, neglected, damaged in accidents or exposed to abnormal operating conditions.
10. User Guide for the ecom Ex-CDMA 02 Phone This manual is based on the production version of the Kyocera KX 444 S phone. Software changes may have occurred after this printing. Kyocera reserves the right to make changes in technical and product specifications without prior notice. The products and equipment described in this documentation are manufactured under license from QUALCOMM Incorporated under one or more of the following U.S.
Other accessories used with this device for body-worn operations must not contain any metallic components and must provide at least 25 mm separation distance, including the antenna, and the user‘s body. THIS MODEL PHONE MEETS THE GOVERNMENT‘S REQUIREMENTS FOR EXPOSURE TO RADIO WAVES. Your wireless phone is a radio transmitter and receiver. It is designed and manufactured not to exceed the emission limits for exposure to radio frequency (RF) energy set by the Federal Communications Commission of the U.S.
The FCC has granted an Equipment Authorization for this model phone with all reported SAR levels evaluatedas in compliance with the FCC RF emission guidelines. SAR information on this model phone is on file with the FCC and can be found under the Display Grant section http://www.fcc.gov/oet/fccid after searching on FCCID OVFKWC-KX444. Additional information on SAR can be found on the Cellular Telecommunications and Internet Association (CTIA) web-site at http://www.wow-com.com.
• Always keep the phone at least six inches (15 centimeters) away from your pacemaker when the phone is turned on. • Do not carry your phone near your heart. • Use the ear opposite the pacemaker. • If you have any reason to suspect that interference is taking place, turn off your phone immediately. Hearing aids-Some digital wireless phones mayinterfere with hearing aids. In the event of such interference, you may want to consult Verizon or call the customer service line to discuss alternatives.
• below deck on boats • transfer or storage facilities for fuel or chemicals • vehicles using liquefied petroleum gas, such as propane or butane • areas where the air contains chemicals or particles such as grain, dust, or metal powders • any other area where you would normally be advised to turn off your vehicle engine Expection: This device is allowed to use in areas according the following Norm: Hazardous areas Class I Div. 2 A-D T6 Ta = -22°F ...
adopted RF exposure guidelines with safety levels for hand-held wireless phones. These guidelines are consistent with the safety standards previously set by both U.S. and international standards bodies in the following reports: • ANSI C95.
11. GETTING STARTED Important: It is not allowed to install and charge the battery in hazardous areas. Don‘t use the battery door from the Ex-CDMA 02 on a normal Kyocera phone there is a danger of confusdion. The battery door is a part of the protection only use it one the Ex-CDMA 02. Your phone comes with a removable lithium ion (LiIon) battery. Fully charge the battery before using the phone. Installing the battery 1. Hold the phone facing away from you. 2.
Recharging the battery: You can safely recharge the battery at any time, even if it has a partial charge. Caring for the battery General safety guidelines • Do not take apart, puncture, or short-circuit the battery. • If you have not used the battery for more than a month, recharge it before using your phone. • Avoid exposing the battery to extreme temperatures, direct sunlight, or high humidity. • Never dispose of any battery in or near a fire. It could explode.
• Silence all sounds: Select Menu ‡ Settings ‡ Silent Mode and select an option. • Lock the keypad: Press and hold . • Access your personal shortcut: Press up. Getting to know your phone Speakerphone button turns the speakerphone on or off.The loudspeaker is located behind the keypad (item 9). Jack for Hands-free headset (no in hazardous area) only. Volume control button adjusts the volume. Home screen. Press (item 6) to select Menu. Contacts button accesses the Contacts list from the home screen.
Using menus The contents of the main menu are as follows: Recent Calls Incoming Calls Outgoing Calls Missed Calls Erase Lists Contacts View All Add New Find Name Add Voice Dial Speed Dial List Voice Dial List Business List Personal List Information Messages Voicemail Send New InBox Net Alerts OutBox Saved Group Lists Erase Msgs Msg Settings Settings (Continued) Security Call Information Network Convenience Msg Settings Accessories Media Gallery My Sounds My Pictures Doodler Settings Silent Mode Keyguard
Understanding screen icons These icons may appear on your phone‘s screen. The phone is operating in IS2000 (1X) digital mode. The phone is operating in IS2000 digitalmode. The phone is operating in IS95digital mode. The phone is operating in Analog (FM) mode. The phone is receiving a signal. You can make and receive phone calls. Fewer bars indicate a weaker signal. A call is in progress. The phone is not receiving a signal. You cannot make or receive any calls.
High-speed data service is available, but the phone is dormant. The phone is at the home screen. To access the menus, press Keyguard is on. The keypad is locked. The phone is set to light up instead of ring. The phone is set to vibrate or to vibrate and then ring. The speakerphone is on. The speakerphone is off. Position location is set to Verizon Wireless and to emergency services. Position location is set to emergency services only. 12.
Calling a saved number If you have already saved a phone number, youcan use the contacts list to find it quickly. 1. Select Menu ‡ Contacts ‡ View All. This brings up a list of all saved contacts. Note: From the home screen, use the Contacts button to access the Contacts list. 2. Scroll through the list, find the contact you want, and press to dial the number. For more about finding contact information, see page 32.
To exit Emergency mode When you have completed the emergency call: 1. Press to select Exit. 2. Press again to confirm your choice. Note: To determine who has access to your location, see „Setting position location“ on page 36. Using your phone in an airplane Note: Please check with uniformed crew personnel before operating your phone in Airplane mode. While in an airplane, it is normally required that you turn off your mobile phone, because it emits RF signals that interfere with air traffic control.
Viewing recent call details Details on the last 29 calls you made or received are stored in the lists under the Recent Calls menu. You can get details on the caller‘s name and phone number, along with the time and length of the call. Icons indicate the types of calls in the list. Outgoing call Incoming call Forwarded call Three-way call Missed call (flashing) Viewing recent calls 1. Select Menu ‡ Recent Calls. 2. Select a list: Incoming Calls, Outgoing Calls, Missed Calls, or Erase Lists. 3.
Speed dialing Speed dialing allows you to quickly dial a stored phone number by entering a one- or two-digit speed dialing location number and pressing . Note: Before you can use speed dialing, you must save a phone number as a contact and assign a speed dial location to it. • To save a phone number as a new contact and add a speed dial location, see „Saving a contact entry“ on page 32. • To add a speed dial location to a saved contact, see „Editing or erasing a contact“ on page 33.
1. From the home screen, enter . 2. Press to interrupt the notification. 3. Follow the system prompts to create a password and record a greeting. Note: If you are having trouble accessing your voicemail, contact Verizon Wireless. Checking voicemail messages When a voice message is received, your screen will display a notification: „New Message [x]Voicemail.“ This text will remain for about five minutes. After that, look for the symbol at the top of your screen. The symbol flashes if the message is urgent.
Tracking calls You can track the number and duration of calls made and received on your phone. 1. Select Menu ‡ Settings ‡ Call Information. 2. Select a timer: - Recent Calls-Tracks all calls made and received by your phone since this timer was last reset. To reset this timer, highlight Reset and press . - All Calls Timer-Tracks all calls made and received by your phone. This timer cannot be reset. - Kbyte Counter-Tracks the kilobytes of data sent and received by your phone.
Setting the roam ringer You can set a ringer to indicate when an incoming call will be subject to roaming charges. 1. Select Menu ‡ Settings ‡ Sounds ‡ Roam Ringer. 2. Highlight Enabled and press . You‘ll hear a sample of the ringer. 3. Press to set the ringer. Setting Call Guard to avoid roaming calls You can set your phone to warn you before you answer or place a call while roaming. • Select Menu ‡ Settings ‡ Convenience ‡ Call Guard ‡ Call prompt.
13. ENTERING LETTERS, NUMBERS, AND SYMBOLS You can enter letters, numbers, and symbols in contacts, text messages, and your banner. Understanding text entry screens The current text entry mode (and capitalization setting, when applicable) are indicated by icons. Text entry modes There are four text entry modes: Number mode Normal text mode Rapid text entry mode Symbol mode Note: The mode you start in depends on the task you are doing. For example, when entering a phone number, you‘re in number mode.
Entering words quickly When you press a series of keys using mode, checks its dictionary of common words and guesses at the word you are trying to spell. 1. For each letter of the word you want, press the key once. For example, to enter the word„any“ press: ‡ ‡ . 2. If the word doesn‘t match what you want, press to look at other word matches. 3. When you see the word you want, press . Entering symbols While entering text, you can enter symbols by pressing until you see the symbol you want.
To change capitalization settings: • Press until the icon for the setting you want appears. Quick reference to text entry This table gives general instructions for entering letters, numbers, and symbols. To... Enter a letter Enter a number Enter a symbol Enter a space Erase a character Erase all characters Move the cursor right or left Change text entry modes Capitalize the next letter Do this... Use mode and press a key until you see the letter you want. For more information, see page 29.
14. STORING CONTACTS Use your phone‘s Contacts directory to store information about a person or company. Your phone can hold, on average, about 200 phone numbers. Saving a contact entry To save a contact, take these steps. 1. From the home screen, enter the phone number you want to save.Tip: Enter the area code with the phone number so that you can dial it from any service area. Note: To save a contact without entering a phone number, select Menu ‡ Contacts ‡ Add New, select an option, and skip to step 3.
Adding a code or extension When you save the phone number of an automated service, you may include a pause where your phone would stop dialing; for example, where you would wait to dial an extension. 1. Enter the first portion of the phone number. 2. Press right to scroll through the options at the bottom of the screen. 3. Press to select a type of pause. A Time Pause - Stops dialing for two seconds, then continues to dial. A Hard Pause - Stops dialing until you select Release. 4.
- Send Text Msg - Send a text message to the phone number you selected. - View Number - See the phone numberyou selected. - Add Voice Dial- Speak the name of the contact person for this number so that you can dial it using voice recognition (VR). For more information, see page 53. - Speed Dialing- Assign or remove the location you use to speed dial the number. - Edit Type- Assign a type: work, home, mobile, pager, or fax. The type icon appears next to the phone number in the Contacts list.
Setting Fast Find With Fast Find, you press one or two keys to view close matches of the number you are looking for. • From the home screen, select Menu ‡ Settings ‡ Convenience ‡ Fast Find ‡ Enabled. Using Fast Find 1. From the home screen, press the key‘s corresponding to the letters of the name you want to find. A matching contact or speed dial entry appears. Press down to scroll through matching entries. 2. View the name you want, then press to call the number or press to view contact details.
3. Choose a method to enter the recipient‘s phone number or email address: - Select a saved number from the Recent List or Contacts List, or select a Group List you have created. For more about group lists, see page 41. -E nter a New Address manually. (To learn how to enter text, see page 29.) 4. To add another recipient to this message, choose a method: - Press right to select Options.Then select Recent List, Contacts, or Group Lists. - Enter a space or comma after the first number.
4. When you have completed the message, you can send it immediately or set sending options. To send it immediately, press to select Send. To set sending options, see the following procedure. Setting sending options When you are ready to send a message, you have several options for how and when you want the message to be received. 1. Once you have completed the message, press right to highlight Options and press .
If you cannot send messages You may not be able to send or receive messages if your phone‘s memory is nearly full, or if digital service is not available at the time. To free up memory, erase old messages. See „Erasing messages“ on page 41. Understanding appended messages If you go over the character limit for a single message, the phone may automatically append a nempty segment to your message to make space. Important: You will be charged for each message segment.
2. Select OutBox. 3. Press up or down through the list of messages. One of the following symbols appears next to each message: The message is pending and will be sent when possible. You can cancel delivery oft he message. The scheduled message will be sent at the scheduled time. You cannot cancel deliveryof the message. The message cannot be sent because service is not available. An alert appears on your phone if the message cannot be sent.
If you see the body of the message (Direct View) The body of an incoming message will appear on your home screen only if your phone is set to Direct View. You can choose to: • Ignore the message - Press . • Read the message. See „Reading the message“on page 40. Note: If you receive a new message while you are reading a message, the one you are reading will be replaced by the new one. You can find the older message in the InBox: Press down to open the Messages menu and select Inbox.
Note: The symbol indicates: • A graphic did not come through. It may be too large or incorrectly formatted. • An appended message is missing. (For more about appended messages, see page 38.) Setting message alerts You can set your phone to alert you of incoming text messages or pages. For more information, see „Setting message alerts“ on page 50. Erasing messages Your phone is designed to store 99 text messages and pages. It is a good idea to erase old messages, as messages take up memory in your phone.
1. Press down to open the Messages menu. 2. Select Msg Settings ‡ Auto-Erase Text. 3. Press to select Old InBox Msgs. Customizing message settings To make messaging easier, you can customize settings for sending and receiving messages. Creating group lists You can create and save a list of multiple recipients. Your Ex-CDMA 02 phone will store five group lists with up to 10 recipients per list. 1. Press down to open the Messages menu. 2. Select Group Lists ‡ Create New. 3. Enter a name for the list.
Note: You can also save a message you are writing or an incoming message as AutoText. For directions, see „Setting sending options“on page 37 or „Reading the message“ on page 40. Switching default text entry mode You can set the default text entry mode to appear in message text entry screens. 1. Press down to select the Messages menu. 2. Select Msg Settings ‡ Default Text. 3. Select Normal Alpha or Rapid Mode. For more information on text entry modes, see page 29. 16.
Silencing all sounds Your phone is set to make sounds when you receive calls, press keys, navigate through menus, and receive alerts (such as new messages). You can silence all sounds and set the phone to vibrate or light up when you receive calls and alerts. Setting the phone to vibrate or light up 1. Select Menu ‡ Settings ‡ Silent Mode. 2. Choose an option and press : - Vibrate Only- Causes the phone to vibratef or the duration of the incoming call or other alert. appears.
a. Select Menu ‡ Settings ‡ Sounds. b. Highlight Business Ring or Personal Ring and press . c. Select a ringer and press . Note: To classify a contact as Business or Personal, see page 32. Importing additional ringers You may be able to download ringers over the air. Check with Verizon Wireless. Adjusting volume You can adjust the volume of the earpiece, the speakerphone, the ringer, or the tones you hear when the keys are pressed.
Using shortcuts From the home screen, you can access shortcuts by pressing the navigation key in different directions. Three shortcuts are automatically programmed into your phone: Left launches Mobile Web. Right launches Get It Now. Down launches Contacts. For the fourth direction (up), you can set a shortcut to one of the features of your phone. Defining the feature shortcut (up) 1. Select Menu ‡ Settings ‡ Convenience ‡ Shortcut Key. 2.
1. Select Menu ‡ Settings ‡ Display ‡ Backlighting. 2. Select an option from the list: - 5 seconds, 10 seconds,or 30 seconds - (Default) Turn backlighting on for 5, 10,or 30 seconds after your last keypress. - 5 sec/in call, 10 sec/in call,or 30 sec/in call - Turn backlighting on for the duration of a call, and for 5, 10, or 30 seconds after your last keypress. Note: These three settings drain the battery more quickly and reduce talk and standby times.
For example, 1-222-333-4444. • Select Menu ‡ Settings ‡ Display ‡ Auto-Hyphen ‡ Enabled. Selecting a screen saver Screen savers work only from the home screen, and they are activated 10 seconds after the last keypress. Incoming calls and alerts override screen savers. 1. Select Menu ‡ Settings ‡ Display ‡ Screen Saver. 2. Highlight a screen saver and press . 3. Press to return to the home screen and wait 10 seconds to view the screen saver you chose.
Locking your phone When your phone is locked, you can call only emergency numbers or a Verizon Wireless number. 1. Select Menu ‡ Settings ‡ Security. 2. Enter your four-digit lock code. 3. Select Lock Phone. 4. Highlight an option: - Never - Does not lock the phone. - On power up - Locks the phone every time you turn it on. - Now - Locks the phone immediately. 5. Press . Unlocking the phone 1. From the home screen, press 2. Enter your four-digit lock code. to select Unlock.
Erasing all contacts 1. Select Menu ‡ Settings ‡ Security. 2. Enter your four-digit lock code. 3. Select Erase Contacts. 4. Select Yes to erase all contacts. A message appears: „Erase ALL contacts?“ 5. Select Yes to erase all contacts. Setting message alerts You can choose how you want to be alerted of incoming voicemail, pages, or text messages. 1. Select Menu ‡ Settings ‡ Msg Settings ‡ Alerts. 2. Select the type of alert: Message Alert, Net Alert, Page Alert, or Voicemail Alert. 3.
Data settings Setting Com port speed The Com Speed sets the data rate at which your phone connects to a laptop or PC, or at which it sends and receives over-the-air text messages. 1. Select Menu ‡ Settings ‡ Accessories ‡ Com Speed. 2. Select the speed. The options are: 19.2 kbps,115.2 kbps (default), 230.4 kbps. Note: There may be a higher charge for making calls using high-speed data in areas where 1X service is available.
1. Select Menu ‡ Settings ‡ Network ‡ Location. 2. If you see a message prompt, press to continue. 3. Select 911 Only or Location On. - 911 Only(default) shares your position information only with emergency services when you call your 3-digit emergency code (911, 000, 111, 999, etc.). - Location Onshares your position information with the service providernetwork, in addition to emergency services. For information on emergency calls, see „Calling emergency services“ on page 22. 17.
Using voice tags to place calls 1. If you haven‘t already done so, record a voicetag for the person you wish to call. 2. From the home screen, press . The phone responds: „Say a name.“ 3. Say the name of the person you want to call. 4. If the name you said matches a contact in the Voice Dial List, the phone responds: „Calling (Name).“ Remain silent to make the call, or say „No“ to cancel.
Answering automatically To set your phone to answer automatically: Note: This setting also works with the portable hands-free car kit. • Select Menu ‡ Settings ‡ Accessories ‡ Auto-Answer ‡ After 5 secs. Answering using voice commands If Auto-Answer is turned off, you can use a voice command to answer an incoming call using the hands-free car kit. To turn off Auto-Answer: • Select Menu ‡ Settings ‡ Accessories ‡ Auto-Answer ‡ Disabled. To activate the Voice Answer setting: 1.
18. USING TOOLS Scheduler The Scheduler allows you to schedule events and set reminder alerts. Note: You cannot access Scheduler if your phone does not have a signal. Adding an event 1. Select Menu ‡ Tools ‡ Scheduler. - For a day in this month, select View Day. Press left and right to scroll through days. - For a day in a different month, select View Month. Press up or down to scroll through months, and right or left to scroll through days. 2. Press to add an event to a selected date. 3.
Tip Calculator The Tip Calculator helps you calculate how much tip to include on a bill. 1. Select Menu ‡ Tools ‡ Tip Calculator. 2. Enter the amount of your bill and press . 3. Select the amount you want to include as a tip (10%, 15%, 18%, 20%, Other) and press . Your total bill appears, including tip. 4. If you want to split the bill, press right and press to select Split. 5. Press to clear the default of 2 guests. 6. Enter the number of guests and press .The amount each guest pays is calculated.
Stopwatch 1. Select Menu ‡ Tools ‡ Stopwatch. 2. Select Start to have the stopwatch begin counting. 3. Select Stop to stop counting. 4. Select Reset to set the counter back to zero and begin counting again. Press when finished. 19. MEDIA GALLERY My Sounds Your phone contains preset sounds, which you can add to outgoing text messages. To access stored sounds: 1. Select Menu _ Media Gallery _ My Sounds. 2. Press up or down to scroll through the sounds. 3.
Saving memory It is a good idea to erase old sounds and pictures, as they take up memory in your phone. To erase a sound or picture, select it and then select Delete. Doodler You can create and save graphics on your phone. 1. Select Menu ‡ Media Gallery ‡ Doodler. 2. Wait 5 seconds for the intro screen to disappear, or press 3. Select New Doodle to open the drawing screen. to clear it. 4. Use keys 1-9 to move the cursor around the screen as indicated. Note: Press to bring the cursor back to center.
Add a shape 1. Press left or right to select Add Shape. 2. Press . 3. Select a shape and press . 4. To modify the shape, press right or left to highlight an option and press . Options are Size, Rotate, and Move. (To move the shape, use keys 1-9.) 5. Select Done. Saving the doodle It is a good idea to save the doodle while you are working on it. If you receive a call while creating an unsaved doodle, it will be lost. • Highlight Save and press . The image will be saved in the My Pictures folder.
Downloading an application 1. Press and hold right. 2. Select the Get it Now shopping cart icon. 3. Select a category. A full list of applications of the type you selected appears. New apps are indicated by an arrow on the left. Note: Long titles scroll left as you highlight them. 4. Select an application. A list of usages appears.There may be one or more usages available. The costs are specified for each. 5. Select a usage. You are then prompted by a message asking you to confirm your choice. 6.
Disabling an application If you are running out of memory and would liketo download more applications, but do not want to completely remove those you have paid for, you can simply disable them. This means you have to re-download an application in order to use it again, but don‘t have to pay for it again. 1. Press and hold right. 2. Select Settings ‡ Manage Apps. 3. Select the application and then select Lock App. 4. Select Yes to confirm your choice. Note: The app is still listed in the Get It Now menu.
• Mark Site saves the current location as a bookmark for easy access. • Setup gives you options for changing how information is displayed. - Show URL displays the entire URL. - About Openwave displays information about your Mobile Web version. - Encryption should not be used unless you are instructed to do so by Verizon Wireless. - UP.Link selects a different browser server. You can use this option if you have morethan one Mobile Web account. - Restart restarts Mobile Web.
Qualified service If the problem with your phone persists, returnthe phone with all accessories and packaging to the dealer for qualified service.
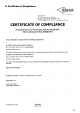
Communication Torches/Flashlights Mobile Computing Measuring & Calibration Copyright© 2008 ecom instruments GmbH. The contents of this document, either in part or in their entirety, may not be reproduced, forwarded, distributed or saved in any way without ecom instruments GmbH prior written consent. The contents of this document are presented as they currently exist.