
User Manual


Enroll Door/window sensors
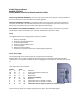
Unpack your sensors, including the magnet.
Slide the top cover to disengage it from the bottom.
Remove the top cover to reveal the battery.
Remove the plastic tab that is installed underneath the battery.
Ensure the battery is firmly in place.
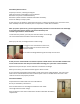
At this point you can decide to replace the white cover or switch to the brown cover. The brown cover,
when installed, will cover the bottom piece so only brown is visible after installation.
After you power up the sensor, you have approximately 2 minutes to enroll the sensor into the bridge.
If more than 2 minutes has elapsed, just remove the battery and
reinstall to get another 2 minute window.
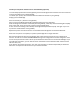
To start the learn process, you must press the learn button on the bridge.
This is the bottom button located on the side of the bridge
When you press this, the bridge will start to flash orange.
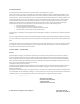
To trigger a learn command from the sensor,
touch the magnet to the sensor three times
within 2 seconds.
If successful the bridge will flash green and beep once for 2sec.
At this point it is recommended to record the sequence in which sensors were enrolled and where this
sensor will be mounted. This will prove useful when including your system into a Zwave network.
Repeat this step until all your sensors have been enrolled into the bridge.
When you are done, press the learn button again to exit this mode.
As you move the magnet back and forth within range of the sensor bridge will beep. This is the chime
feature and is useful to determine when someone opens a door or window within the home. It also
confirms the sensor was properly enrolled.
Enroll Status Module
Unpack the status module and insert the 2 AA batteries.
Do not put the battery cover back on.
Press the learn button on the bridge to activate the learn mode.
The bridge will start to flash orange.
Press the button on the status module that is located underneath the battery
compartment