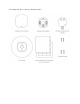
First things first. Here’s what you’ll find in the box.
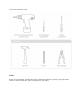
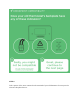
You’ll also need these tools: STEP 1 Power off your Heating, Ventilation and Air Conditioning (HVAC) system by using the master switch or circuit breaker box. This is important for your safety.
STEP 2 Confirm your system is off by turning on your heat (during winter) or your AC (during summer). Wait a few minutes - you should not feel air coming from your vents.
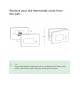
STEP 3 Remove your old thermostat cover from the wall.
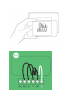
STEP 4 Take a picture of the wires connected to the terminals of your old thermostat. You may need to reference this photo later on.
STEP 5 Carefully disconnect and label the wires from your old thermostat one at a time, using the labels provided. STEP 6 Unscrew the mounting plate of your old thermostat to remove it from the wall.
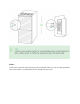
STEP 7 Decide if you want to use the trim plate with your ecobee. The trim plate is useful if you want to hide marks or holes left on the wall by your old thermostat.
STEP 8 : OPTIONAL If using the trim plate, align the mounting holes on the trim plate and backplate and press them into place together.
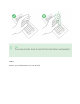
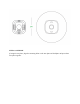
STEP 9 Pull the wires through the hole in the middle of the backplate and then attach the backplate to the wall using the drywall anchors and screws provided.
STEP 10 Insert your remaining wires into the side (not the front) of their corresponding terminal blocks.
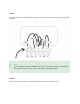
STEP 11 Tug on the wires gently to ensure they are securely connected.
STEP 12 Carefully push any excess wire back into the hole and ensure there are no drafts coming from the hole(s) in the wall
STEP 13 Gently press your ecobee thermostat into the backplate until it ‘clicks’ into place.
STEP 14 Turn the power to your HVAC system back on using the master switch or at the circuit breaker box.
STEP 15 Say hi to your new ecobee! The screen will power on and guide you through the set-up and registration.