
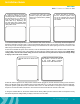
Installation Guide

1
email - support@aampglobal.com (US)
tel - 1-866-931-8021
Installation Guide
HWK-TW01
OBD II T-Harness for Thinkware DVR
1. Locate the OBD II connector in
the vehicle and release it from the
mounting surface. This may require
the removal of two 7 or 8mm nuts
from the studs securing it to the
under dash or by depressing the
two side clips, with a plastic dash
trim tool, securing it behind the drop
down plastic cover.
2. Connect the male end of the
included plug-n-play HWK-TW01-
HAR to the vehicles factory ODB II
connector.
3. Secure the OBD II connector
and the harness together using
one of the included wire ties and
cut off any excess wire tie that is
not needed.
4. For the Nut and Bolt style mounting system: Place the ears of the connectors over the factory studs and replace and
tighten the fasteners removed in step 1. Use the included self tapping screws to secure if this connector is not a factory t.
For the clip in style mounting system: Feed the body of the harness into the dash opening and secure connector to the
dash using the included self tapping screws.
5. Remove the A-Pillar trim panel. Once removed, route the Thinkware power cable over to the driver side of the vehicle,
up the A-Pillar and across the front of the headliner so that it exits the headliner above the rearview mirror. NOTE: When
routing cables near the side curtain airbag, be sure to route them in a way that will not impact the airbags’ ability
to deploy in the event of an accident.
6. Bundle and secure all left over
cable.
7. With the vehicle’s ignition in the
OFF position, connect the IGN-3F
to the 10-Pin Molex connector
located on the HWK-TW01-HAR.
8. With the vehicle’s ignition in the OFF position and the IGN-3F plugged in, the LED should be emitting a slow consistent
ash. The LED will change from a ashing state to being ON solid once you start the vehicle. When the LED is ON solid,
a phantom ignition signal will be sent to the dash cam to turn it on and will remain on during the event of a start/stop
sequence. The LED and dash cam will turn off 2 minutes and 30 seconds after the vehicle is shut down.
9. Using the included wire tie, secure the module and the factory OBD II junction under the dash or kick panel in a way
that will not impact the airbags’ ability to deploy in the event of an accident.