
Pole Saw User Manual


Table Of Contents
- Introduction
- Table of Contents
- Safety
- Emission Control (exhaust & evaporative)
- Description
- Contents
- Assembly
- cutting attachment to drive shaft installation
- saw chain tension adjustment
- Operation
- fuel
- lubricating the guide bar and saw chain
- adjusting automatic oiler
- starting cold engine
- starting warm engine
- stopping engine
- pruning techniques
- Maintenance
- air filter
- fuel filter
- spark plug
- cooling system cleaning
- exhaust system
- carburetor adjustment
- guide bar and saw chain replacement
- filing saw chain
- Troubleshooting
- Storage
- Specifications
- Warranty Statements
- Servicing Information
Power Pruner
TM
oPeraTor's Manual
27
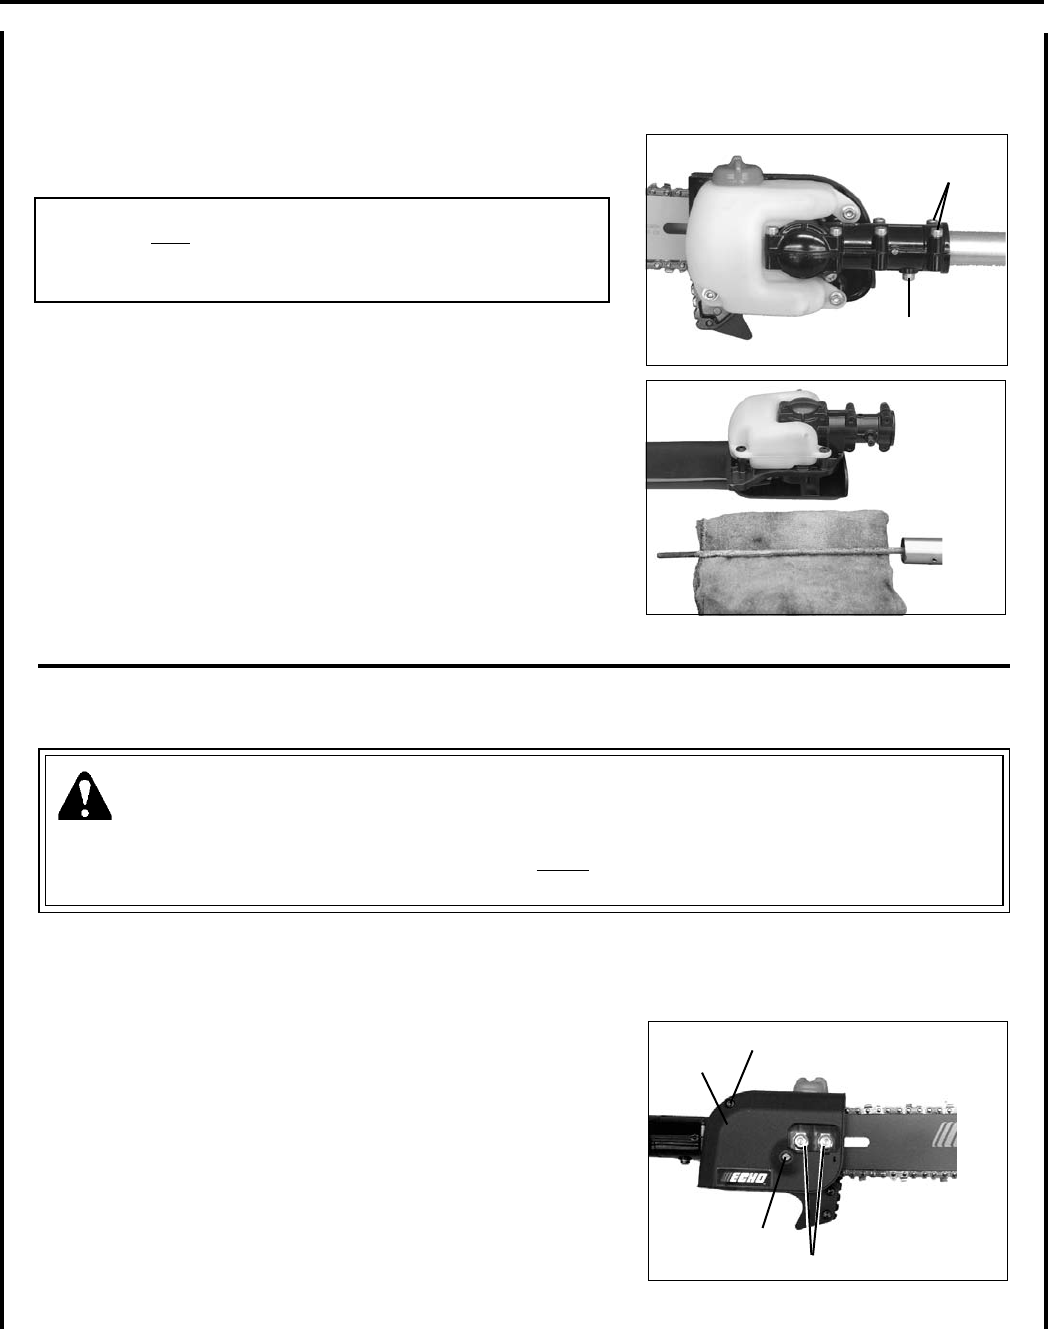
guIde bar and saw chaIn replacement
WARNING
Never try to replace or adjust guide bar and saw chain with engine running. Always disconnect spark plug wire
before servicing guide bar and saw chain. This saw chain is VERY sharp, wear heavy gloves to protect your hands
when handling it. Wear eye protection meeting CE or ANSI specication Z87.1.
Guide Bar Replacement / Installation
Level 2
1. Remove two (2) 6 mm guide bar nuts (A) and guide bar cover
screw (B), and turn saw chain tension adjustment screw (C) coun-
terclockwise to release tension.
2. Remove guide bar cover (D).
3. Remove guide bar and saw chain from gear case and sprocket.
4. Remove chain from guide bar and check guide bar for damage and
excessive or uneven wear. Replace guide bar if necessary.
A
C
D
B
lubrIcatIon
Drive Shaft
Level 2
Parts Required: Lithium Base Grease.
IMPORTANT
Drive shaft must be lubricated with high temperature automotive
grease every 25 hours of operation, otherwise drive shaft assembly
overheating and failure can result.
1. Remove cutting attachment locator screw (A).
2. Loosen two (2) bolts (B).
3. Remove cutting attachment assembly.
4. Remove ex cable, wipe clean and apply a thin coating (15 ml) of
high temperature grease.
5. Slide the exible cable back in the drive housing. DO NOT get
dirt on the ex cable.
6. Install and secure cutting attachment assembly.
B
A