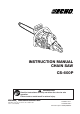
INSTRUCTION MANUAL CHAIN SAW CS-600P WARNING Read the instructions carefully and follow the rules for safe operation. Failure to do so could result in serious injury.
WARNING The engine exhaust from this product contains chemicals known to the State of California to cause cancer, birth defects or other reproductive harm. Copyright © 2009 All Rights Reserved.
RULES FOR SAFE OPERATION A. Kickback Safety Precautions for Chain Saw Users WARNING! KICKBACK may occur when the nose or tip of the guide bar touches an object, or when the wood closes in and pinches the saw chain in the cut. 1.With a basic understanding of kickback, you can reduce or eliminate the element of surprise. Sudden surprise contributes to accidents. Tip contact in some cases may cause a lightning fast reverse REACTION, Kicking the guide bar up and back towards the operator.
B. Other Safety Precautions 1.Do not operate a chain saw with one hand! Serious injury to the operator, helpers, bystanders, or any combination of these persons may result from one-handed operation. A chain saw is intended for twohanded use. 11.Shut off the engine before setting the chain saw down. 2.Do not operate a chain saw when you are fatigued. 13.When cutting a limb that is under tension, be alert for spring-back so that you will not be struck when the tension in the wood fibers is released. 12.
CONTENTS RULES FOR SAFE OPERATION ............................................................................. SYMBOLS AND SIGNS ........................................................................................... PACKING LIST ......................................................................................................... NOMENCLATURE OF PARTS ................................................................................. OPERATOR SAFETY ...................................................
SYMBOL FORM Symbol form/shape Symbol description/application Symbol form/shape Symbol description/application WARNING!! Read and follow all safety precaution in the instruction manual Chain oil fill Wear eyes, ears and head protection Chain oiler adjustment Chain brake operation Decompression device Emergency stop Carburetor adjustment - Low speed mixture Choke control “Cold Start” position (choke closed) Carburetor adjustment - High speed mixture Oil and gasoline mixture Carburetor adjustment -
PACKING LIST The ECHO product you purchased has been factory pre-assembled for your convenience. Due to packaging restrictions, guide bar and saw chain installation and other assembly may be necessary. After opening the carton, check for damage. Immediately notify your retailer or ECHO dealer of damaged or missing parts. Use the packing list to check for missing parts.
NOMENCLATURE OF PARTS 6 5 1 7 4 3 8 9 10 11 12 13 2 24 23 Part Number X524-002250 X524-002250 REPLACEMENT BAR AND CHAIN 16” 20” 24” 27” GUIDE BAR* PART NO. 16D0PS3860 20D0PS3870 24D0PS3881 27D0PS3893 OREGON OREGON OREGON OREGON 22 CHAIN* TYPE LINKS 72LPX, 72V 60 72LPX, 72V 70 72LPX, 72V 81 72LPX, 72V 93 X503-009810 21 20 *Or equivalent Note: There may be other replacement components for achieving kickback protection.
NOMENCLATURE OF PARTS 1. Instruction manual - Included with unit. Read before operation and keep for future reference to learn proper, safe operating techniques. 11. Chain catcher - A projection designed to reduce the risk of the operator’s right hand from being hit by a chain which has broken or derailed from the guide bar during cutting. 2. Safety manual - Describe operating and safety instructions for this chain saw. 12. Guide bar - The part that supports and guides the saw chain. 3.
OPERATOR SAFETY VIBRATION AND COLD EYE AND HEARING PROTECTION • It is believed that a condition called Raynaud’s Phenomenon, which affects the fingers of certain individuals, may be brought about by exposure to vibration and cold. Exposure to vibration and cold may cause tingling and burning followed by loss of color and numbness in the fingers. The following precautions are strongly recommended because the minimum exposure which might trigger the ailment is unknown.
SPARK ARRESTOR MUFFLER • The spark arrestor muffler controls the exhaust noise and prevents hot, glowing particles of carbon from leaving the muffler. Make sure the spark arrestor screen is in good repair and properly seated in the muffler. • Certain internal combustion engines operated on forest, brush, and/or grass-covered areas in the states of Washington, Oregon, Idaho, California, Minnesota, New Jersey and Maine, are required to be equipped with a spark arrestor.
PREPARATION FOR USE WARNING Saw chain is sharp! Always wear gloves when handling assembly, otherwise serious personal injury may result. GUIDE BAR AND SAW CHAIN INSTALLATION/REMOVAL 1. Remove spark plug lead. (See page 25) 2. Remove two clutch cover nuts and remove clutch cover. Unlock chain brake 3. Remove bar and saw chain if necessary. See “Maintenance and Care” section for guide bar/ saw chain maintenance procedures. Brake lever (Front hand guard) Spiked bumper Two nuts Clutch cover Clutch 4.
ADJUSTING CHAIN TENSION IMPORTANT Unlock chain brake Always loosen clutch cover nuts before turning the chain tension adjuster, otherwise the clutch cover and tensioner will be damaged. 1. Remove spark plug lead. (See page 25) 2. Unlock the chain brake and loosen two clutch cover nuts, if necessary. 3. Hold the bar nose up, and turn the adjuster screw clockwise until chain fits snugly against underside of the bar. Proper tension Improper tension Direction to tension the chain Adjusting screw 4.
FUEL AND LUBRICANT FUEL STATEMENT GASOLINE - Use 89 Octane [(R+M)/2] (mid grade or higher) gasoline or gasohol known to be good quality. Gasohol may contain up to 10 % Ethyl (grain) alcohol or 15 % MTBE (methyl teriary-butyl ether). Gasohol containing methyl (wood) alcohol is NOT approved. WARNING Alternative fuels, such as E-20 (20 % ethanol), E-85 (85 % ethanol) or any fuels not meeting above requirements are NOT approved for use in ECHO 2-stroke gasoline engines.
HANDLING FUEL MIXING INSTRUCTIONS 1. Fill an approved fuel container with half of the required amount of gasoline. DANGER Fuel is VERY flammable. Use extreme care when mixing, storing or handling or serious personal injury may result. • Use an approved fuel container. • DO NOT smoke near fuel. • DO NOT allow flames or sparks near fuel. • Fuel tanks/cans may be under pressure. Always loosen fuel caps slowly allowing pressure to equalize.
CHAIN LUBRICANT Proper lubrication of the chain while in operation reduces the friction between the chain and the guide bar to a minimum and assures a longer service life. Cap indication Oil/fuel tanks are indicated by the following illustrations on the caps. Oil tank cap • Use bar and chain oil of high quality for this purpose. • Do not use used or reclaimed oil to avoid various oiler problems. • Use ECHO bar and chain oil. • When ECHO bar and chain oil is not available: Use motor oil, etc.
WHEN THE ENGINE IS COLD Chain brake CAUTION Make sure the bar and chain are free from any obstruction when starting the chain saw. Ignition switch • Move chain brake lever fully forward to lock chain brake before starting. Decompression device • Fill the fuel tank with fuel mixture. It is not permitted to fill fuel above the shoulder level of fuel tank. Start / Run • Fill the chain oil tank with lubricant. Do not over fill. Choke Throttle trigger lockout • Move ignition switch to “RUN” position.
RUNNING • When engine starts, keep idling for a few minutes. • Set the brake lever in the unlocked position before starting to cut. Unlock chain brake • Pull throttle trigger gradually and increase revolution of the engine. • The chain starts running when the engine reaches 4000 r/min approximately. • Confirm proper acceleration and lubrication of chain and bar. • Do not run the engine at high speed unnecessarily. • Be sure that saw chain stops moving when throttle trigger is released.
CUTTING INSTRUCTION GENERAL CAUTION • Read the ECHO “CHAIN SAW SAFETY MANUAL” included with your chain saw for additional cutting and safety instructions. • Wear suitable hearing protection such as earmuffs or earplugs to protect against objectionable or uncomfortable loud noises. • Do not let the tip of the bar touch anything while the engine is running. At cutting speed the chain is moving at a high rate of speed.
FELLING THE TREE A falling tree can seriously damage anything it may hit - a car, a house, a fence, a power-line, or another tree. There are ways to make a tree fall where you want it, so first decide where that is! Before cutting, clear the area around the tree. You will need good footing while working and you should be able to work the saw without hitting any obstacles. Next, select a path of retreat.
LIMBING Limbing a fallen tree is much the same as bucking. Never stand on the tree that you are limbing. When limbing, caution is the word. Be careful of the tip touching other limbs. Always use both hands. Don’t cut with the saw overhead or aligned vertically with your body. If the saw should kickback, you may not have enough control to prevent possible injury. BUCKING Bucking is the sawing of a log or fallen tree into smaller pieces. There are a few basic rules which apply to all bucking operations.
CHAIN BRAKE OPERATION Kickback motion • Set the lever in the unlocked position before starting to cut. • If the brake is tripped by kickback reaction, the chain will stop immediately. Release the throttle to avoid possible damage to the engine or clutch. • Do not attempt to operate the engine with the brake locked. Improper thrust cutting Kickback motion When the bar nose hits another tree, etc.
AUTOMATIC CHAIN BRAKE End of the guide bar may be placed at the height of about 40 cm (16 in.). Kickback produced from the tip of the guide bar will trip the automatic chain brake. To make sure that the automatic chain brake operates properly, follow these steps: 1. Stop the engine. 2. Hold the saw with the guide bar approximately 40 cm (16 in.) above a wooden surface. Right hand should hold the rear handle, and left hand should hold the front handle. 3.
CHAIN AND GUIDE BAR COMBINATION The following combinations are recommended for model CS-600P. Guide Bar ECHO Part No. Double Guard Symmetrical 16D0PD3860 16D0PS3860 Pitch mm (in.) 9.53 (3/8) Saw chain Type OREGON 72LPX,72V 508 (20) 20D0PD3870 20D0PS3870 9.53 (3/8) 72LPX,72V 70 610 (24) 24D0PD3881 24D0PS3881 9.53 (3/8) 72LPX,72V 81 686 (27) —————— 27D0PS3893 9.53 (3/8) 72LPX,72V 93 Length mm (in.) 406 (16) Links 60 GUIDE BAR (Low-kickback) Replacement guide bars.
MAINTENANCE AND CARE Your ECHO chain saw is designed to provide many hours of trouble free service. Regular scheduled maintenance will help your chain saw achieve that goal. If you are unsure or are not equipped with the necessary tools, you may want to take your unit to an ECHO Service Dealer for maintenance. To help you decide whether you want to DO-IT-YOURSELF or have the ECHO Dealer do it, each maintenance task has been graded. If the task is not listed ask your ECHO dealer for repairs.
CARBURETOR ADJUSTMENT Every unit is run at the factory and the carburetor is set in compliance with Emission Regulations. In addition, the carburetor is equipped with “H” (High Speed) and “L” (Low Speed) needle adjustment limiters that prevent settings outside acceptable limits. Idle adjusting screw High speed needle (H) 1. Before adjusting carburetor clean or replace air filter and muffler “Spark Arrestor Screen”. 2. Make sure the bar and chain are properly adjusted. 3.
Cylinder cover Spark plug Air filter Air cleaner cover Cleaner cover knob AIR FILTER • Check before every use. • Close choke. • Loosen cleaner cover knob, and remove air cleaner cover and air filter. • Brush off dust lightly, or clean with compressed air, or replace the air filter. • Reinstall air filter and cover. CHECK FUEL SYSTEM • Check before every use. • After refueling, make sure fuel does not leak from around fuel pipe, fuel grommet or fuel tank cap.
GUIDE BAR • Clean before using. - Clean the groove of the guide bar with a small screwdriver. - Clean oil holes with a wire. • Reverse guide bar periodically. • Check sprocket and the clutch and clean the bar mount area before installation of the bar. Replace either or both if worn. Groove Clutch (Sprocket) Oil hole SPROCKET Worn : 0.5 mm (0.020 in.) • A damaged sprocket will cause premature damage or wear of saw chain. - When the sprocket has worn out 0.5 mm (0.020 in.) or more, replace it.
SETTING THE SAW CHAIN Preset tie strap Left hand cutter Drive link Top plate Tie strap Side plate Guard link Depth guage Right hand cutter Important points for proper maintenance of saw chain: • Keep the cutters sharp at all times. • Keep the left and the right cutters properly aligned. - Note that blunt or irregular cutters will result in poor cutting performance, increased vibration of chains and premature breakage of the saw chain.
1/5 One fifth of file diameter remains above cutter edge • Place the depth gauge tool firmly on guide bar so that depth gauge protrudes. Then file top of depth gauge with the flat file until flat with top of the depth gauge tool. Depth gauge tool Remove until flat with tool - Be sure to round off the front edge of the depth gauge. Round off the edge Properly filed cutters are shown in illustration. When setting of the chain is finished, soak it in oil and wash away filings completely before using.
TROUBLESHOOTING Problem Engine — hard to start — does not start Engine cranks Fuel at carburetor No fuel at carburetor • Fuel filter clogged • Fuel line clogged • Carburetor • Clean or replace • Clean • Ask your ECHO dealer Fuel at cylinder No fuel at cylinder • Carburetor • Ask your ECHO dealer Muffler wet with fuel • Fuel mixture is too rich • Open choke • Clean/replace air filter • Adjust carburetor • Ask your ECHO dealer Spark at end of plug wire No spark at end of plug wire • Ignition s
STORAGE AFTER USE • Inspect and adjust every part of the chain saw. - Completely clean every part and repair if necessary. - Apply thin coating of oil on metal parts to prevent rust. • Remove chain and guide bar. • Drain fuel tank, pull starter slowly a few times to drain fuel from carburetor. • Pour a small amount of clean motor oil into spark plug hole, pull starter and crank the engine until piston reaches: TOP DEAD CENTER. • Store in a dry area, free from dust.
WARRANTY STATEMENTS ECHO LIMITED WARRANTY STATEMENT FOR PRODUCT SOLD IN USA AND CANADA BEGINNING 01/01/2010 ECHO’S RESPONSIBILITY ECHO Incorporated’s Limited Warranty, provides to the original purchaser that this ECHO product is free from defects in material and workmanship.
PURCHASED REPAIR PARTS, SHORT BLOCKS AND ACCESSORIES • 90-day residential, or non-income producing warranty • 30-day commercial, institutional, agricultural, industrial, income producing, or rental application warranty ATTENTION TWO-STROKE ENGINE POWER PRODUCT OWNERS This ECHO two-stroke engine power product is a quality-engineered unit which has been manufactured to exact tolerances to provide superior performance.
ECHO INCORPORATED EMISSION CONTROL WARRANTY STATEMENT FOR ECHO BRAND The Environmental Protection Agency (EPA) and the California Air Resources Board (C.A.R.B.) and ECHO Incorporated (ECHO Inc.) are pleased to explain the emission control system warranty on your 2010 and later equipment/small off-road engine (SORE). New equipment/SORE must be designed, built and equipped to meet stringent EPA and C.A.R.B. anti-smog standards. ECHO Inc.