
Manual


Instruction Sheet
2
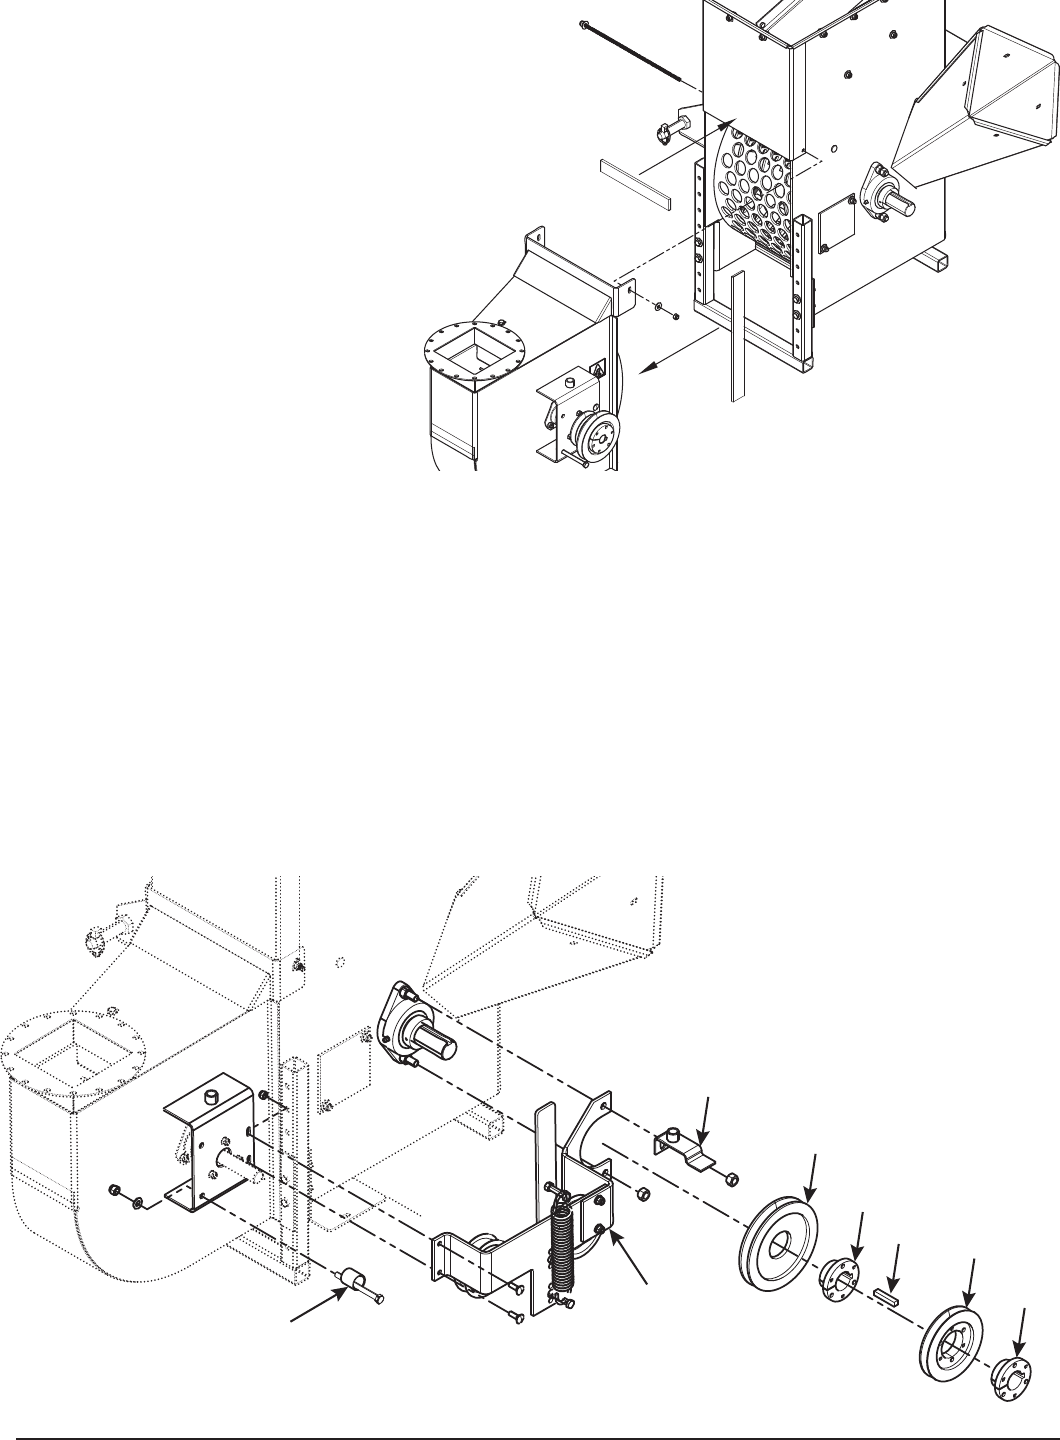
ATTACh BLOWER TO ChIppER/ShREDDER
Attach foam seals to the top of the chipper/shredder 1.
opening and side lips of the blower as shown.
Hold the blower up to the chipper/shredder frame, 2.
install the new rod, and secure with a 5/16" lock nut
on each end. The blower should rest firmly on the
chipper/shredder frame and mounting plate previously
installed.
INSTALL IDLER ASSEMBLy
Do not remove the two remaining nuts that secure the bearing.1.
Place the idler assembly over the rotor shaft bolts. Secure the assembly with the 2. bottom 1/2" nut that was removed
when the rotor shaft end cap was removed. The top nut will be screwed on later.
Align the opposite end of the assembly with the mounting holes on the blower mounting plate. Secure with two (2) 3.
5/16" x 1-1/4" bolts, nuts and washers.
Attach the split bushing to the 6.6" pulley. Follow the Reverse Mount instructions provided with the bushing and 4.
torque to 9 ft-lbs (108 in/lbs). Slide the pulley onto the rotor shaft.
Mount the inside belt on the 6.6" pulley and connect this belt to the inside (3.6") blower shaft pulley.5.
Align the 6.6" pulley with the inside (3.6") blower pulley using a straightedge. Make any necessary adjustments by 6.
sliding the 6.6" pulley on the rotor shaft. Tighten the 6.6" pulley bushing securely.
Attach the split bushing to the 5.2" pulley. Follow the Reverse Mount instructions provided with the bushing and 7.
torque to 9 ft-lbs (108 in/lbs).
IDLER
ASSEMBLY
6.6” PULLEY
BUSHING
KEY
5.2” PULLEY
BUSHING
FRONT
BELT GUIDE
REAR BELT GUIDE