
Manual


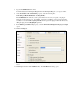
Table Of Contents
- Table of Contents
- Preface
- 1 Introduction
- 2 Creating and Redistributing LNS Device Plug ins
- 3 How Plug ins Work with Directors
- How Plug ins Are Represented in the LNS Object Server
- How Plug ins are Installed and Made Visible to LNS
- How Plug ins Implement the Registration Command
- How Plug ins Respond to Commands from a Director Other than Registration
- How Directors Launch and Manipulate Plug ins
- What Plug ins Do When They Run in Standalone Mode
- Responding to Property Reads and Writes
- Uninstallation Issues
- Appendix A Standard Plug in Commands
- Appendix B Standard Plug in Properties
- Appendix C Standard Plug in Object Classes
- Appendix D Standard Plug in Exceptions
• In the Default namespace property, change the namespace to
<YourCompany>.<YourProject>.
• In the Assembly name property, enter a unique and descriptive assembly name that matches
your selected namespace (for example, <YourCompany>.<YourProject>.<YourPlugin>).
• In the Output type property, verify that Windows Application is specified.
• In the Icon property under the Resources box, specify an icon.
4. Click Assembly Information. The Assembly Information dialog opens.
5. Enter the information describing your plug-in assembly, and then click OK to save the
information and return to the Application tab.
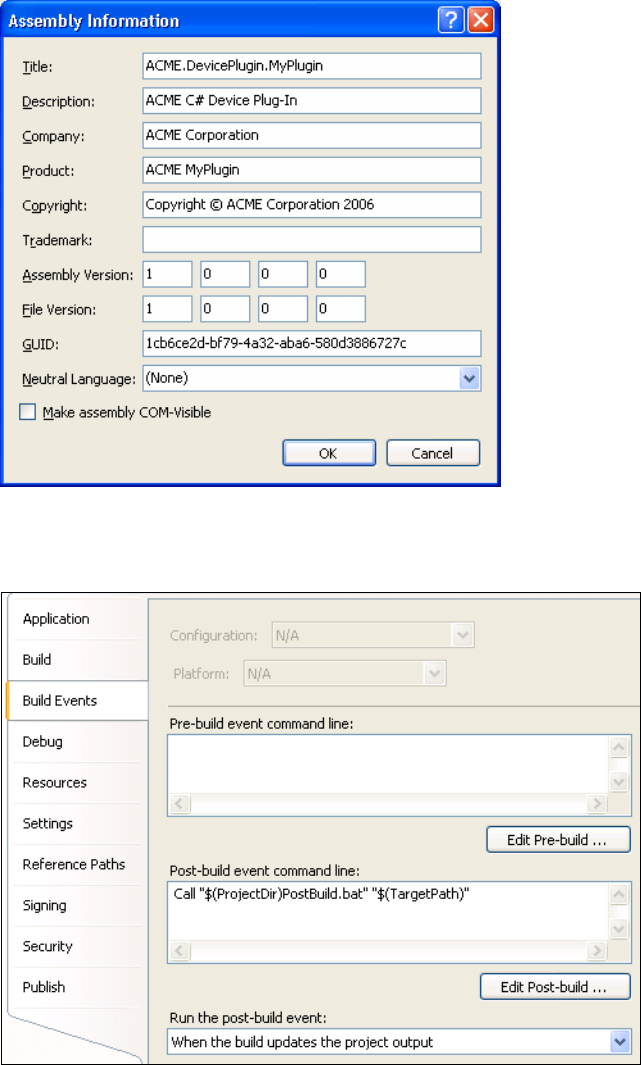
6. Click the Build Events tab.