
User`s guide


60 Controlling a Street Lighting Network with the Scheduler Application
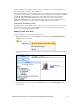
• Create or open an Event Scheduler application following the steps described in Creating
Event Schedulers later in this chapter, and then click the Real-Time Clock / Astronomic
Position Sensor icon in the Scheduler: Configure Web page.
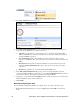
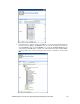
2. The Real Time Clock: Configure Web page opens.
3. Configure the following properties for the real-time clock and astronomical position sensor on the
SmartServer:
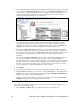
4. In the Latitude property, enter the north-south location of the SmartServer relative to the equator.
Select the first radio button to enter the latitude in sexagesimal notation (degrees, minutes, and
seconds); select the second radio button to enter the latitude as a decimal fraction. If the
SmartServer is located south of the equator, enter a negative value between 0 and –90. If it is
located north of the equator, enter a positive value between 0 and 90.
5. In the Longitude property, enter the east-west location of the SmartServer relative to the Prime
Meridian. Select the first radio button to enter the longitude in sexagesimal notation (degrees,
minutes, and seconds); select the second radio button to enter the longitude as a decimal fraction.
If the SmartServer is located west of the Prime Meridian, enter a negative value between 0 and –
180. If it is located is located east of the Prime Meridian, enter a positive value between 0 and
180.
6. Click Submit.
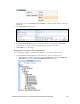
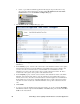
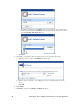
7. You can now view the calculated sunrise and sundown times. To do this, expand the Real-Time
Clock functional block, right-click the nvoSunrise or nvoSunset data point, and then click Show
Value on the shortcut menu.