
System information


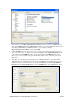


Table Of Contents
- Table of Contents
- 1 Introduction to the SmartServer SOAP/XML Interface
- 2 SOAP Messages and the SmartServer WSDL File
- 2.1 SmartServer Naming Structure
- 2.2 SmartServer WSDL File
- 2.3 Security
- 2.4 SOAP Request and Response Message Structure
- 2.5 SOAP Messages Formats
- 2.6 Data Point References
- 2.7 UCPTcurrentConfig
- 2.8 Fault Structure
- 2.9 LonString type
- 2.10 SOAP Message Examples
- 3 SmartServer Applications and the SOAP/XML Interface
- 3.1 Overview of SmartServer Applications
- 3.2 SmartServer XML Configuration Files
- 3.3 SmartServer Resource Files
- 3.3.1 Standard Network Variable Type (SNVT) Device Resource Files
- 3.3.2 Standard Configuration Property Type (SCPT) Device Resource Files
- 3.3.3 User Defined Network Variable Type (UNVT) Device Resource Files
- 3.3.4 User Defined Configuration Property Type (UCPT) Device Resource Files
- 3.3.5 Data Point Templates
- 3.3.6 Data Formatting
- 3.4 SOAP Functions
- 3.5 Performance Issues
- 4 Using the SmartServer Data Server
- 4.1 Creating and Modifying the Data Point XML Files
- 4.2 Overview of the Data Point XML File
- 4.3 Data Server SOAP Interface
- 4.3.1 Using the List Function on the Data Server
- 4.3.2 Using the Get Function on the Data Server
- 4.3.3 Using the Set Function on the Data Server
- 4.3.4 Using the Read Function on the Data Server
- 4.3.5 Using the Write Function on the Data Server
- 4.3.6 Using the Invoke Function to Reset Data Point Priorities
- 4.3.7 Data Point Values and Priority Levels
- 4.3.8 Using the Delete Function on the Data Server
- 4.4 Using the Web Binder Application
- 5 Data Loggers
- 5.1 Overview of the Data Logger XML File
- 5.2 Creating and Modifying the Data Logger XML File
- 5.3 Data Logger SOAP Interface
- 6 Alarm Generator
- 6.1 Overview of the Alarm Generator XML File
- 6.2 Creating and Modifying the Alarm Generator XML File
- 6.3 Alarm Generator SOAP Interface
- 7 Alarm Notifier
- 7.1 Overview of the AlarmNotifier XML File
- 7.2 Creating and Modifying the Alarm Notifier XML File
- 7.3 Alarm Notifier SOAP Interface
- 7.3.1 Using the List Function on an Alarm Notifier
- 7.3.2 Using the Get Function on an Alarm Notifier
- 7.3.3 Using the Set Function on an Alarm Notifier
- 7.3.4 Using the Read Function on an Alarm Notifier
- 7.3.5 Using the Write Function on an Alarm Notifier Log File
- 7.3.6 Using the Clear Function on an Alarm Notifier Log File
- 7.3.7 Using the Delete Function on an Alarm Notifier
- 8 Analog Function Block
- 9 Scheduler
- 9.1 Overview of the Scheduler XML File
- 9.2 Creating and Modifying the Scheduler XML File
- 9.3 Scheduler SOAP Interface
- 10 Calendar
- 10.1 Overview of the Calendar XML File
- 10.2 Creating and Modifying the Calendar XML File
- 10.3 Calendar SOAP Interface
- 11 Real Time Clock
- 12 Type Translator
- 12.1 Overview of the Type Translator XML File
- 12.2 Creating and Modifying the Type Translator XML File
- 12.3 Type Translator SOAP Interface
- 12.3.1 Using the List Function on a Type Translator
- 12.3.2 Using the Get Function on a Type Translator
- 12.3.3 Using the Set Function on a Type Translator
- 12.3.4 Pre Defined Type Translator Rules
- 12.3.4.1 16xSNVT_switch_TO_SNVT_state
- 12.3.4.2 SNVT_lev_disc_TO_SNVT_occupancy
- 12.3.4.3 SNVT_lev_disc_TO_SNVT_switch
- 12.3.4.4 SNVT_occupancy_TO_SNVT_setting
- 12.3.4.5 SNVT_scene_TO_SNVT_setting
- 12.3.4.6 SNVT_scene_TO_SNVT_switch
- 12.3.4.7 SNVT_setting_TO_SNVT_switch
- 12.3.4.8 SNVT_state_TO_16xSNVT_switch
- 12.3.4.9 SNVT_switch_TO_SNVT_lev_disc
- 13 Type Translator Rules
- 14 LonWorks Driver
- 14.1 LonWorks Networks
- 14.2 LonWorks Channels
- 14.3 LonWorks Devices
- 14.4 Routers
- 14.5 Remote Network Interface
- 14.6 LonWorks Functional Blocks
- 14.7 Network Variables (LonWorks Data Points)
- 14.8 Configuration Properties (LonWorks Data Points)
- 14.9 LonWorks Connections
- 15 Modbus Driver
- 16 M Bus Driver
- 17 Virtual Driver
- 18 File System Data
- 19 System Information Methods
- 20 Using the SOAP Interface as a Web Service
- 21 Programming Examples
- 21.1 Visual C#.NET Examples
- 21.1.1 Reading and Writing Data Point Values in Visual C# .NET
- 21.1.2 Creating and Reading a Data Logger in Visual C# .NET
- 21.1.3 Creating a Scheduler and Calendar in Visual C# .NET
- 21.1.4 Creating and Installing a LonWorks Device in Visual C# .NET
- 21.1.5 Commissioning External Devices in Visual C# .NET
- 21.1.6 Discovering and Installing External Devices in Visual C# .NET
- 21.1.7 Configuring the SmartServer in Visual C# .NET
- 21.2 Visual Basic.NET Examples
- 21.2.1 Reading and Writing Data Point Values in Visual Basic.NET
- 21.2.2 Creating and Reading a Data Logger in Visual Basic. NET
- 21.2.3 Creating a Scheduler and Calendar in Visual Basic.NET
- 21.2.4 Creating and Installing a LonWorks Device in Visual Basic.NET
- 21.2.5 Commissioning External Devices in Visual Basic.NET
- 21.2.6 Discovering and Installing External Devices in Visual Basic.NET
- 21.2.7 Configuring the SmartServer in Visual Basic.NET
- 21.1 Visual C#.NET Examples
- 22 Programming the SmartServer with Java
- Appendix A: SOAP Tester Example

i.LON SmartServer 2.0 Programmer’s Reference
20-20
SmartServer._iLON.InvokeCmd(itemCollInvoke)
' set the DP priority to 200 (see section 4.3.7 for more information)
DirectCast(dataColl.Item(0), iLON_SmartServer.Dp_Data).UCPTpriority = 200
DirectCast(dataColl.Item(0), iLON_SmartServer.Dp_Data).UCPTprioritySpecified = True
' set 100.0 1 as the value
DirectCast(dataColl.Item(0), iLON_SmartServer.Dp_Data).UCPTvalue = New iLON_SmartServer.E_LonString(0) {}
DirectCast(dataColl.Item(0), iLON_SmartServer.Dp_Data).UCPTvalue(0) = New iLON_SmartServer.E_LonString()
DirectCast(dataColl.Item(0), iLON_SmartServer.Dp_Data).UCPTvalue(0).Value = "100.0 1"
' to write a preset, do this (see section 4.3.5.2 for more information)
' DirectCast(dataColl.Item(0), iLON_SmartServer.Dp_Data).UCPTvalue(0).LonFormat = "UCPTvalueDef"
' DirectCast(dataColl.Item(0), iLON_SmartServer.Dp_Data).UCPTvalue(0).Value = "ON"
' call the write function
Dim writeResp As iLON_SmartServer.Item_Coll = SmartServer._iLON.Write(dataColl)
If writeResp.Item Is Nothing Then
' sanity check. this should not happen
Console.Out.WriteLine("No items were returned")
ElseIf writeResp.Item(0).fault IsNot Nothing Then
' error
Console.Out.WriteLine(("An error occurred. Fault code = " +
writeResp.Item(0).fault.faultcode.Value + ". Fault text = %s.") +
writeResp.Item(0).fault.faultstring)
Else
' success
Console.Out.WriteLine("Write is successful")
Console.Out.WriteLine((DirectCast(dataColl.Item(0), iLON_SmartServer.Dp_Data).UCPTname
& " = ") + DirectCast(dataColl.Item(0), iLON_SmartServer.Dp_Data).UCPTvalue(0).Value)
End If
Console.ReadLine()
Finally
SmartServer.CloseBindingToSmartServer()
End Try
End Sub
End
Module
20.4
Accepting a Web Binding From a SmartServer
To create a Web connection between the SmartServer and your Web server, you need to expose a Web
service on your server. This section describes how to do so with Microsoft Visual Studio 2008 and
.NET Framework 3.5. You need to configure IIS (Web server) on your computer so that it can serve
the Web service that you are going to write in the following section. This section assumes you are
familiar with IIS configuration and Web server administration.
Notes:
• In order for your .NET application to support Web connection file attachment, you must download
the Web Services Enhancements 2.0 Add-On from Microsoft’s Web site at
msdn.microsoft.com
and install it on your computer.
• If you are not running the .NET Framework 3.5, you can download the wsdl.exe file from
Microsoft’s Web site at
msdn.microsoft.com to use this example with another development
environment.
To create a Web Binding, follow these steps:
1. Create a proxy class with the wsdl.exe Web services description language tool. To do this follow
these steps: