
System information


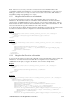


Table Of Contents
- Table of Contents
- 1 Introduction to the SmartServer SOAP/XML Interface
- 2 SOAP Messages and the SmartServer WSDL File
- 2.1 SmartServer Naming Structure
- 2.2 SmartServer WSDL File
- 2.3 Security
- 2.4 SOAP Request and Response Message Structure
- 2.5 SOAP Messages Formats
- 2.6 Data Point References
- 2.7 UCPTcurrentConfig
- 2.8 Fault Structure
- 2.9 LonString type
- 2.10 SOAP Message Examples
- 3 SmartServer Applications and the SOAP/XML Interface
- 3.1 Overview of SmartServer Applications
- 3.2 SmartServer XML Configuration Files
- 3.3 SmartServer Resource Files
- 3.3.1 Standard Network Variable Type (SNVT) Device Resource Files
- 3.3.2 Standard Configuration Property Type (SCPT) Device Resource Files
- 3.3.3 User Defined Network Variable Type (UNVT) Device Resource Files
- 3.3.4 User Defined Configuration Property Type (UCPT) Device Resource Files
- 3.3.5 Data Point Templates
- 3.3.6 Data Formatting
- 3.4 SOAP Functions
- 3.5 Performance Issues
- 4 Using the SmartServer Data Server
- 4.1 Creating and Modifying the Data Point XML Files
- 4.2 Overview of the Data Point XML File
- 4.3 Data Server SOAP Interface
- 4.3.1 Using the List Function on the Data Server
- 4.3.2 Using the Get Function on the Data Server
- 4.3.3 Using the Set Function on the Data Server
- 4.3.4 Using the Read Function on the Data Server
- 4.3.5 Using the Write Function on the Data Server
- 4.3.6 Using the Invoke Function to Reset Data Point Priorities
- 4.3.7 Data Point Values and Priority Levels
- 4.3.8 Using the Delete Function on the Data Server
- 4.4 Using the Web Binder Application
- 5 Data Loggers
- 5.1 Overview of the Data Logger XML File
- 5.2 Creating and Modifying the Data Logger XML File
- 5.3 Data Logger SOAP Interface
- 6 Alarm Generator
- 6.1 Overview of the Alarm Generator XML File
- 6.2 Creating and Modifying the Alarm Generator XML File
- 6.3 Alarm Generator SOAP Interface
- 7 Alarm Notifier
- 7.1 Overview of the AlarmNotifier XML File
- 7.2 Creating and Modifying the Alarm Notifier XML File
- 7.3 Alarm Notifier SOAP Interface
- 7.3.1 Using the List Function on an Alarm Notifier
- 7.3.2 Using the Get Function on an Alarm Notifier
- 7.3.3 Using the Set Function on an Alarm Notifier
- 7.3.4 Using the Read Function on an Alarm Notifier
- 7.3.5 Using the Write Function on an Alarm Notifier Log File
- 7.3.6 Using the Clear Function on an Alarm Notifier Log File
- 7.3.7 Using the Delete Function on an Alarm Notifier
- 8 Analog Function Block
- 9 Scheduler
- 9.1 Overview of the Scheduler XML File
- 9.2 Creating and Modifying the Scheduler XML File
- 9.3 Scheduler SOAP Interface
- 10 Calendar
- 10.1 Overview of the Calendar XML File
- 10.2 Creating and Modifying the Calendar XML File
- 10.3 Calendar SOAP Interface
- 11 Real Time Clock
- 12 Type Translator
- 12.1 Overview of the Type Translator XML File
- 12.2 Creating and Modifying the Type Translator XML File
- 12.3 Type Translator SOAP Interface
- 12.3.1 Using the List Function on a Type Translator
- 12.3.2 Using the Get Function on a Type Translator
- 12.3.3 Using the Set Function on a Type Translator
- 12.3.4 Pre Defined Type Translator Rules
- 12.3.4.1 16xSNVT_switch_TO_SNVT_state
- 12.3.4.2 SNVT_lev_disc_TO_SNVT_occupancy
- 12.3.4.3 SNVT_lev_disc_TO_SNVT_switch
- 12.3.4.4 SNVT_occupancy_TO_SNVT_setting
- 12.3.4.5 SNVT_scene_TO_SNVT_setting
- 12.3.4.6 SNVT_scene_TO_SNVT_switch
- 12.3.4.7 SNVT_setting_TO_SNVT_switch
- 12.3.4.8 SNVT_state_TO_16xSNVT_switch
- 12.3.4.9 SNVT_switch_TO_SNVT_lev_disc
- 13 Type Translator Rules
- 14 LonWorks Driver
- 14.1 LonWorks Networks
- 14.2 LonWorks Channels
- 14.3 LonWorks Devices
- 14.4 Routers
- 14.5 Remote Network Interface
- 14.6 LonWorks Functional Blocks
- 14.7 Network Variables (LonWorks Data Points)
- 14.8 Configuration Properties (LonWorks Data Points)
- 14.9 LonWorks Connections
- 15 Modbus Driver
- 16 M Bus Driver
- 17 Virtual Driver
- 18 File System Data
- 19 System Information Methods
- 20 Using the SOAP Interface as a Web Service
- 21 Programming Examples
- 21.1 Visual C#.NET Examples
- 21.1.1 Reading and Writing Data Point Values in Visual C# .NET
- 21.1.2 Creating and Reading a Data Logger in Visual C# .NET
- 21.1.3 Creating a Scheduler and Calendar in Visual C# .NET
- 21.1.4 Creating and Installing a LonWorks Device in Visual C# .NET
- 21.1.5 Commissioning External Devices in Visual C# .NET
- 21.1.6 Discovering and Installing External Devices in Visual C# .NET
- 21.1.7 Configuring the SmartServer in Visual C# .NET
- 21.2 Visual Basic.NET Examples
- 21.2.1 Reading and Writing Data Point Values in Visual Basic.NET
- 21.2.2 Creating and Reading a Data Logger in Visual Basic. NET
- 21.2.3 Creating a Scheduler and Calendar in Visual Basic.NET
- 21.2.4 Creating and Installing a LonWorks Device in Visual Basic.NET
- 21.2.5 Commissioning External Devices in Visual Basic.NET
- 21.2.6 Discovering and Installing External Devices in Visual Basic.NET
- 21.2.7 Configuring the SmartServer in Visual Basic.NET
- 21.1 Visual C#.NET Examples
- 22 Programming the SmartServer with Java
- Appendix A: SOAP Tester Example

i.LON SmartServer 2.0 Programmer’s Reference
9-2
comes from the local Calendar object via an internal binding between the nvoEcDateEvent output of
the Calendar, and the nviDateEvent input of the NodeObject.
After a restart, the Scheduler recalculates the last Scheduler operation. It also sets the data point
nvoDateResync to “100.0 1”, which updates the SmartServer’s exception list. You can set the value
of nvoDateResync to “100.0 1” and then return it back to “0.0 0” with the Write function at any time to
refresh the exception list manually. The data point nviEcResync of the Calendar will be internally
bound to nvoDateResync if no external binding is created. However, the Scheduler pulses the
NodeObject NV to ensure that the NodeObject always has an up-to-date Exception list, so this should
not be necessary.
9.1
Overview of the Scheduler XML File
The #8000010128000000[4].UFPTscheduler.xml file stores the configuration of the Schedulers that
you have added to the SmartServer. You can create new Schedulers using the Set function, or by
manually editing the #8000010128000000[4].UFPTscheduler.xml file, and rebooting the SmartServer.
You can create up to 40 Schedulers per SmartServer. You can add more than 40 Schedulers if you
load the dynamic v40 XIF on your SmartServer and you operate your SmartServer in Standalone
mode. Note that using the v40 XIF with the SmartServer operating in LNS mode (LNS Auto or LNS
Manual) is not supported.
The following represents a sample #8000010128000000[4].UFPTscheduler.xml file for a SmartServer
with one Scheduler.
<Item xsi:type="UFPTscheduler_Cfg" >
<UCPTname>Net/LON/iLON App/Scheduler[0]</UCPTname>
<UCPTannotation>8000010128000000[4].UFPTscheduler</UCPTannotation>
<UCPThidden>0</UCPThidden>
<UCPTlastUpdate>2008-03-03T14:50:04.680-08:00</UCPTlastUpdate>
<UCPTuri>#8000010128000000[4].UFPTscheduler_Cfg.htm</UCPTuri>
<DataPoint dpType="nviEnable" discrim="dir_in" >
<UCPTname>Net/LON/iLON App/Scheduler[0]/nviEsEnable[0]</UCPTname>
</DataPoint>
<DataPoint xsi:type="UFPTscheduler_DpRef" dpType="Output" discrim="dir_out" >
<UCPTname>Net/LON/iLON App/Digital Output 1/nviClaValue_1</UCPTname>
<SCPTdelayTime>0</SCPTdelayTime>
</DataPoint>
<DataPoint xsi:type="UFPTscheduler_DpRef" dpType="Output" discrim="dir_out" >
<UCPTname>Net/LON/iLON App/Digital Output 2/nviClaValue_2</UCPTname>
<SCPTdelayTime>0</SCPTdelayTime>
</DataPoint>
<ScheduleEffectivePeriod>
<StartDate>2000-01-01</StartDate>
<EndDate>2037-12-31</EndDate>
</ScheduleEffectivePeriod>
<DayBased>
<UCPTindex>0</UCPTindex>
<UCPTdescription>Weekday</UCPTdescription>
<UCPTpriority>255</UCPTpriority>
<Event>
<UCPTindex>0</UCPTindex>
<UCPTtime>00:00:00</UCPTtime>
<UCPTeventType LonFormat="UCPTeventType">ET_LOCK</UCPTeventType>
</Event>
<Event>
<UCPTindex>1</UCPTindex>
<UCPTtime>09:00:00</UCPTtime>
<UCPTvalue LonFormat="">ON</UCPTvalue>
<UCPTvalue LonFormat="UCPTvalueDef">ON</UCPTvalue>
<UCPTtimeDirection LonFormat="UCPTtimeDirection">TD_POSITIVE</UCPTtimeDirection>
<UCPTeventType LonFormat="UCPTeventType">ET_NUL</UCPTeventType>
</Event>
<Weekdays>
<UCPTsunday>0</UCPTsunday>
<UCPTmonday>1</UCPTmonday>
<UCPTtuesday>1</UCPTtuesday>