
Installation Guide
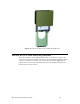
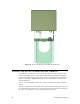
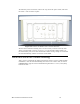
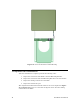
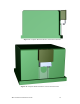
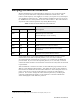
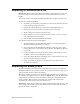
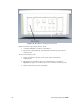
Table Of Contents
- Welcome
- Audience
- Related Documentation
- FCC Notice
- RF Statements
- EMC and Safety Statements
- 1. Introduction
- 2. Installing Components and Troubleshooting
- 3. Pole Mount Installation
- 4. Pad Mount Installation
- Introduction
- Required Tools
- Installation Location
- Preparing the Transformer Pad
- Preparing for Installation
- Performing the Installation
- Extend Pad Mounting Bracket
- Attach Pad Mounting Bracket to Lifting Nut
- Attach Conduit Housing to Pad Mounting Bracket
- Insert Conduit Thread into Conduit Housing
- Attach ECN to Pad Mounting Bracket
- Secure ECN to Pad Mounting Bracket
- Connect the ECN to Power and the Network
- Close and Lock the Conduit Housing
- Complete the Installation
- Verifying Successful Installation
- 5. Field Replacement for an ECN 7000 Series Device
- A. ECN 7000 Series Specifications
- B. Safety and High-Voltage Warnings
- C. ESD and Battery Warnings

52 Installing Components and
Figure 26. ECN Battery Compartment Location
Required tools for replacing the battery pack:
• A standard Phillips screwdriver, Point Size 2
• The battery replacement kit, which includes the battery pack and four
sealing screws
To remove the battery pack:
1. Loosen and remove the four screws at the edges of the battery
compartment.
2. The battery pack is held in place by a restraining tab, as shown in
Figure 27 on page 53. Gently press the tab to release the battery pack.
3. Remove the battery pack from the ECN.