
User guide


16-8-2010 19 033000=15090C
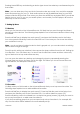
Renaming Favourite Groups
The ‘Rename’ option lets you change the names of the groups that
you save your favourites in. For example you may wish to rename HIS
to Dave. Press the Side Key next to the Rename icon.
Pick the group you want to rename from the group selection screen
(screen [19]).
None of the groups have been greyed out, so you can even rename
groups that don’t yet have any favourites in them.
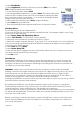
You can now enter the new name for the favourites group using the
numeric keys on the Universal Remote in a similar fashion to writing a
text message on a mobile phone. [19]
When you have entered the name, press OK to save the new name for
the favourites group.
8. Setting Up X10 Devices
The TAKE 10 - coupled with other X10 Home Automation Modules - gives you the ability to
control everything electrical in your home. Once you set up your remote, you can control
most any electrical device from the remote, using the keys that have been configured for
X10 Home Automation Modules.
Description
X10 Home Automation systems use three types of signals - Infrared (IR), Radio Frequency (RF),
and Power Line Carrier (PLC). The TAKE 10 can send either IR, RF signals, or both, depending
on how you’ve set up the remote to control different equipment.
Setting Up Your Remote to Send RF commands
When the TAKE 10 is in X10 mode, it transmits RF commands to X10 devices that respond to
RF signals. The following example describes how to use RF to control a TV (so you can control
it from anywhere in your home). Keep in mind that when you set up a non RF device to be
controlled by RF signals, you need to use any of our video sender
transmitters or powermid receivers, which converts the RF signals it
receives back in to IR signals to turn the TV on or off.
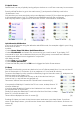
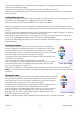
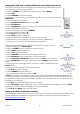
• Press Home [20].
• Select Setup using the Side Key.
• Select More using the Side Key.
• At the following select Wireless.
• The Mode [21] screen appears; select the device you want to set for
RF by pressing its Side Key. (In this example, it’s TV.) The RF symbol
appears on the TV icon. Press OK to Save.
Note: After following the above steps, when you make selections in TV [20]
Mode, you will notice that the transmit signals at the bottom of the
screen are now Green.
This indicates that the remote is sending RF and IR to the TV. If the signals
are in red, it means that the remote is transmitting IR only.
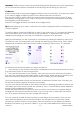
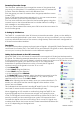
When triggering an X10 module or wall switch using the TAKE 10, the
signal is typically sent from the remote using RF on a specific house
code. The RF signal is received by the transceiver (either TM13, CM15, or
security console) on the matching house code. The transceiver then
forwards the signal onto the house wiring. This is now a PLC signal. Any
modules that match the house and unit code transmitted will either turn [21]
on or off, depending on the signal sent.