
User guide


16-8-2010 11 033000=15090C
X10 RF Devices
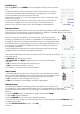
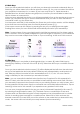
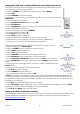
Selecting X10 from the MODE key screen displays the Pick Group screen
[6].
• Press the side key for the room that has the device that you want to
control. (For example, press the Side Key for “Basement.”) The screen
shows the device icons according to the way
“Basement” was set up. (If a Group is grayed-out, then no devices were
set up in that room.)
• Press the Side Key to send a command to the device. The status of
the device changes. You can see the status of the device at the
bottom of the screen; and the icon also changes in appearance.
Extended Features
Any Side Key associated with an icon that has extended features follow with additional
screen(s) that can be used to control the device. In addition, the Main Keys on the TAKE 10
can be used to control X10 devices in unique ways.
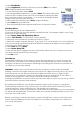
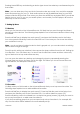
Some icons will only provide On or Off functions, some may provide
dimming. It depends on the device’s capabilities. The example shown at
the right [7] has two X10 Home Automation devices, a camera base and
a module that turns outside lights on and off. Pressing the Side Key next to
the camera icon displays an additional screen to control the actions of
the camera (screen 8).
Use the Side Keys to operate the camera by pressing the Side Key and
holding it down for actions that require movement.
The remote’s Main Keys can also be used to control a camera, according
to the following:
• OK/Select will centre the camera.
• UP, Down, Left, and Right navigation keys control the camera pan
features.
• CH up and down changes the camera focus.
• VOL up and down will zoom the lens.
• Numbers 1- 5 can be use for camera presets.
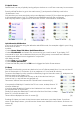
Other Controls
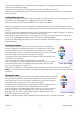
In this example [9], the House icon has a LM12 Lamp Module associated
with it. Pressing the Side Key next to the House icon turns the lights on and
off. Lights can be controlled by using certain Main Keys as follows:
• CH up and down turns the light On and Off.
• VOL up and down controls bright and dim if applicable.
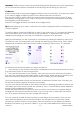
Labeling Feature
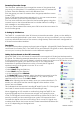
Two lines are available for labeling when you label an icon. Screen 10 is
an example of a TM13 labeled with a bath icon. The labels Bath and “Extra Bath”
were associated with the icon. The following is an example of how to use the Label
feature.
• Press the HOME button to display the setup screen. Select Setup.
• Select X10 using the Side Key.
• Select Add/Edit at the next screen using the Side Key.
• Choose the room where you will locate the TM13. For this example choose Basement. Press
the side key to select.
• At the add an X10 device screen, press OK.
[6]
[7]
[8]
[9]