
User guide


C
HAPTER
4: U
SING THE
W
EB
I
NTERFACE
41
'$
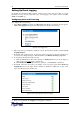
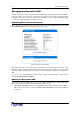
To modify a policy:
1. Select
Alerts
, and then select
Alert Policy Editor
. The Alert Policy Editor appears.
2. Select the policy to be modified from the drop-down list in the Existing Policies field.
3. Make any necessary changes to the policy’s name or destinations.
4. Click Modify. The policy is modified.
-'$
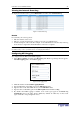
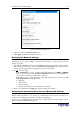
To delete a policy:
1. Select Alerts, and then select Alert Policy Editor. The Alert Policy Editor appears.
2. Select the policy to be deleted from the drop-down list in the Existing Policies field.
3. Click Delete. The policy is deleted.
%$ #-
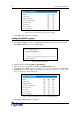
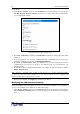
The alert destination can be an email address or an SNMP trap. To specify the destination:
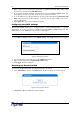
1. Select Alerts, and then select Alert Destinations. The Alert Destinations window appears.
Figure 44 Alert Destinations Window
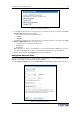
Note: If you have not configured the Revelation PDU’s SMTP, a note will appear on this page
prompting you to do so now. You cannot enter an email address until you have configured the
SMTP server. Either click the SMTP server here link that appears this page, or select Devices
Settings
SMTP Settings. Refer to “Configuring the SMTP Settings” below for details.
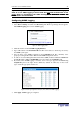
2. Select the destination from the drop-down list in the Destination type field. Your choices are
eMail and SNMP.
3. Do one of the following:
− Email If you selected email, type the receiver’s email address.
− SNMP If you selected SNMP, enter the IP address of the trap and the community
string.
4. Click Add. The destination is added.
Note: To delete an alert destination, click the appropriate Delete button.