
Setup guide

18 EATON LifeSense Wireless System Quick Setup Guide E-HOOV-II002-E August 2014
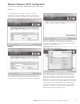
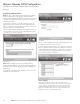
A popup screen will appear listing the setting selections
you’ve made for the gateway. If you are satisfied with the
selections you’ve made click the Configure button.
If you need to make changes, click the Cancel button, then
use the back button to navigate to the applicable screen(s)
where you need to make your modifications.
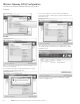
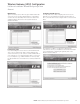
When you are completely satisfied with your selections click
on the Configure Gateway button.
If your configuration is successful you will receive the
following message screen. If you would like to save a file
of your account configuration click on the Save Wizard
Configuration button, doing so will bring up a Windows
Explorer screen where you can chose to save the .ini file on
your computer or external storage device.
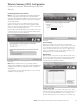
To verify the wireless gateway (HDU) you have just configured
is successfully communicating to the Eaton server open your
Internet browser and navigate to the LifeSense web portal by
typing the following address (http://portal.lifesensehose.
com) into the address or URL field.
This will take you to the main login page of the LifeSense web
portal. Login using your username (your email address) and
password as provided by Eaton customer service.
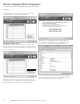
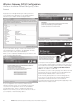
If the wireless gateway (HDU) is communicating properly
to the server you should see the wireless gateway (HDU)
identification number and all of the sensors that are
associated with that wireless gateway (HDU) appearing in the
Alert and Sensor Status screens.
Click finish to exit the Lifesense installation wizard application.
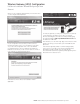
Wireless Gateway (HDU) Configuration
LifeSense Installation Wizard/Configuring a New
Account