
Instructions


EN 18
Video Recordings and Photos
PLEASE NOTE
■ Make sure that the video camera is aligned correctly. The top side (15) must be at the
top so that the recordings are made at the correct angle.
As the camera (1) has infrared LEDs, it is also possible to make recordings in the dark.
The infrared LEDs do not emit visible light (Picture C).
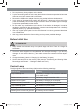
Memory Card
For video recordings or photos, a microSD memory card (6) must be inserted in the
camera (1).
It is inserted with the chip facing down into the slot (8) (Picture D).
To pull it out again, push it in slightly. This will eject it a little from the slot and it can then
be removed.
If a memory card is inserted in the camera, the control lamp (14) fl ashes green 8
times after the camera is switched on and then goes out.
Switching On / Off
For both switching on and switching off, hold down the Record button (13) for 4 seconds
(Picture A).
Video Recording
Hold down the Record button (13) for 4 seconds to switch on the camera (1) in video
mode.
Following this, the video recording is activated and the control lamp (14) lights up con-
stantly red. If the camera does not register any movement for one minute, it stops record-
ing but remains switched on. If there is any new movement, it starts to fi lm again.
Photography
1. Hold down the Record button (13) for 4 seconds to switch on the camera (1) in video
mode.
2. In video mode, hold down the Record button for 2 seconds to switch to photo mode.
In photo mode, the control lamp (14) lights up constantly green.
3. To take a photo, press the Record button briefl y.
After each photo is taken, the control lamp fl ashes green once to indicate that a photo
has been taken.
4. To switch to video mode, hold down the Record button for 2 seconds.
04809_de-en-fr-nl_A5_V1.indb 1804809_de-en-fr-nl_A5_V1.indb 18 18.01.2019 14:14:3918.01.2019 14:14:39