
User Manual

USER GUIDE
68
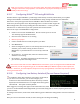
6.15 Configuring the OSD
The MicroVector’s built-in color OSD has many advanced features and
display options. Even so, it can be easily configured to display basic
information that is sufficient for most pilots.
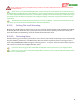
The MicroVector’s OSD will automatically continue to show
information on the screen (in grayscale) if your camera should stop
functioning in flight. Note: EagleEyes tracking and telemetry is NOT
available without a functioning camera connected to the OSD.
All OSD settings are made in the “OSD Setup” menu, from the main
menu.
The steps for configuring the OSD are:
Adjusting the display so that it is easily readable through
your goggles or monitor
Setting your preferred display units
Deciding which items you want to display on the OSD
screen
Setting desired alarms and alerts
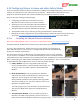
6.15.1 Adjusting the Display
If you are happy with the appearance of the display, no further
changes are needed.
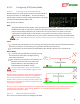
If the OSD information is not centered on your screen, change the
horizontal and vertical screen shift settings to reposition it.
If the OSD information is too wide for your screen, select
Narrow Screen Mode.
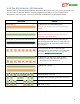
If you have trouble reading the text, try changing the black
level, or changing the colors of the text, as described below.
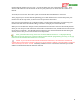
To change color settings, select the “Color Setup” menu.
You can change the color brightness, intensity, and hue in
this menu. Also, you can select which colors to use for text
and graphics.
If you prefer an entirely black and white display,
select “white” for the colors of each item, and “black” for
the highlight of each.
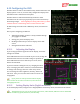
6.15.2 Setting Display Units (English or Metric)
To set the displayed units, navigate to the “English/Metric Units Setup” menu, from the main stick menu.
The MicroVector lets you set the overall system units, and if desired, different units for individual
classes of readouts (speeds, distances, and altitudes).