
User Manual


USER GUIDE
25
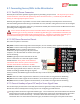
4.6.3.3 After Binding is Initiated
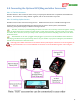
After initiating binding via one of the above methods, your bind LED should now be blinking. Now, bind your
transmitter as you normally would.
If binding fails for some reason, wait for the MicroVector to boot up, then simply cycle power. The MicroVector
will automatically try the next bind method, and will cycle through all bind methods on each power cycle until
you find one that works.
Note : The bind method being presently attempted will display in the OSD notification area.
4.6.3.4 After Successful Binding
Once the MicroVector detects that binding has been successful (LED on your satellite will be on solid), it will
disable the “Bind on next power cycle?” checkbox, if the software binding method was used.
Don’t forget to disconnect the “bind plug” after binding is successful, if you used it.
Also, when successful binding is detected, the on-screen “Serial Rx Learn Wizard” will automatically be run,
which will learn your radio channel mappings. See section 6.5 - 'Configuring the MicroVector via Stick Menus
or InfoPanel’. If you have not yet completed MicroVector installation, just remove power, as the wizard will
automatically run again the next time you power cycle.
4.6.3.5 What if Binding Fails?
Due to myriad versions of satellites, radios, bind modes, and radio bind settings, not all combinations may be
bind-able through the MicroVector. Consult your radio or satellite instruction manual if binding fails.
Also, it may be necessary to bind via a standalone Spektrum™ receiver if MicroVector binding fails repeatedly,
and you’re not able to resolve the issue by changing radio settings.
Note that if binding does fail, and you used the software bind initiation method, you will need to uncheck the
“Bind on next power cycle?” checkbox, or binding will be re-initiated on each power cycle.