
User Manual


USER GUIDE
24
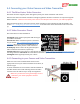
4.6 Using a Spektrum™ Satellite Receiver with the MicroVector
Using a Spektrum™ compatible satellite receiver is quite simple with the MicroVector.
The MicroVector will power the satellite, and has built-in “bind plug” and GUI binding capability, so you
normally don’t need a standalone Spektrum™ receiver to bind the satellite. See section 4.6.3 – ‘Satellite
Binding’.
Also, built in wizards make it easy to teach the MicroVector about your satellite channel assignments.
Satellites are considered to have low latency compared to parrallel-type standalone receiver
configurations, which can improve performance.
4.6.1 Range Limitations with Satellites
Single satellites typically have much shorter ranges than standalone receivers. So, only use a single satellite for
short range flying. See your satellite’s manual for expected ranges.
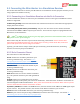
4.6.2 Satellite Connector Pinout
The Satellite Connector lets you easily connect a single satellite receiver to the MicroVector.
The connector pinout is as follows:
3.3V Pwr: Provides power for the satellite. Never power more than one satellite from this power
connection! 20mA max current draw (typical for single satellites).
Ground: This connects to the ground of your satellite
Sig In to uV: This line provides the signal input to the uV, from the satellite.
Normally the satellite will include the standard 3 pin JST “ZH” cable required for this
connection.
4.6.3 Satellite Binding
If you don’t have a standalone receiver available to bind your satellite, you can use the MicroVector’s binding
procedure. The bind procedure can either be invoked by a “bind plug” or via the software. The MicroVector
can be powered by USB for binding, if the MicroVector is not yet installed in your model.
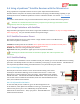
4.6.3.1 Bind Plug Bind Initiation
The ESC/Servo connector harness can be used to initiate binding. This would
normally be done before soldering servos or ESCs to the harness. Connect the
M6/Aux wire to the Ground wire, then cycle power. The bind LED on the satellite
should now blink. The default bind method is DSM2 1024. Later, the stick menus
can be used to select a different bind method, under the “Advanced Radio Control”
menu, and a rebind can be initiated.
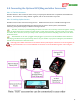
4.6.3.2 Software Bind Initiation
To start the bind process in software, go to the “RC Configuration” tab
in the software, select Spektrum™ Satellite receiver type, and check the
“Bind on next power cycle?” box. Additionally, the preferred bind
method can be selected here. Then, cycle power. The bind LED on the
satellite should now blink.