
User`s guide


Administrator’s Guide for Polycom HDX Systems
3–38 Polycom, Inc.
To view your near-site presets:
1 From the Home screen or Call screen, touch Cameras.
2 If you are in a call, touch Near or Far to select either near-site or far-site
control.
3 Touch View Presets.
Icons for presets 0-9 are shown on the screen. Solid preset icons indicate
stored camera positions. Transparent icons indicate unassigned presets.
To store a preset:
1 From the Home screen or Call screen, touch Cameras.
2 If you are in a call, touch Near or Far to choose a near-end or far-end
camera.
3 Touch Select Camera to choose a camera or other video source.
4 Touch Control Camera to move the camera to the desired position.
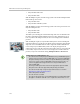
5 Touch View Presets, then touch and hold a number for 5 seconds to store
the preset position. Any existing preset stored at the number you select is
replaced.
Experiencing High-Definition Video Conferencing
Polycom HDX 9002, Polycom HDX 9004, Polycom HDX 9006, Polycom HDX
8000 series, Polycom HDX 7000 HD, Polycom HDX 6000 HD, Polycom HDX
4000 HD, and Polycom HDX 4500 systems offer the following high-definition
(HD) capabilities:
• Send people or content video to the far site in HD
• Receive and display video from the far site in HD
• Display near-site video in HD
Sending Video in High Definition
Polycom HDX systems with HD capability can send video in wide-screen, HD
format. For information about the resolution and frame rate for video
configured as People, refer to Appendix C, Call Speeds and Resolutions. For
information about frame rates for content, refer to Chapter 5, Content and
Closed Captions.
A far-end camera preset can be stored only if the ability to control the far-end
camera is enabled.