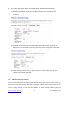
2. Encryption- WPA (WPA, WPA2, and WPA2 Mixed), WPA Authentication Mode (1) Enterprise (RADIUS): Please fill in the RADIUS server Port, IP Address, and Password (2) Personal (Pre-Shared Key): Pre-Shared Key type is ASCII Code; the length is between 8 to 63 characters. If the key type is Hex, the key length is 64 characters. (3) Apply Change & Reset: Click on ‘Apply Changes’ to save setting data. Or click ‘Reset’ to reset all the input data. 4.
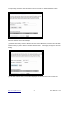
corresponding checkbox under the Select column and click on “Delete Selected” button. Take the wireless card as the example. (1) Please select Deny Listed in Wireless Access Control Mode first, and then fill in the MAC address what you plan to block in the MAC Address field. Click Apply Changes to save the setting. (2) The MAC address what you set will be displayed on the Current Access Control List. http://www.sapido.com.tw/ 52 User Manual v1.0.
(3) The wireless client will be denied by the wireless router. http://www.sapido.com.tw/ 53 User Manual v1.0.
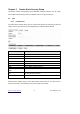
Chapter 5 Router Mode Security Setup This section contains configurations for the BR485D’s advanced functions such as: virtual server, DMZ, and Firewall to provide your network under a security environment. 5.1 NAT 5.1.1 Virtual Server The Virtual Server feature allows users to create Virtual Servers by re-directing a particular range of service port numbers (from the WAN port) to a particular LAN IP address. Item Description Enable Port Forwarding Select to enable Port Forwarding service or not.
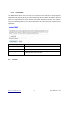
.1.2 Virtual DMZ The DMZ feature allows one local user to be exposed to the Internet for special-purpose applications like Internet gaming or videoconferencing. When enabled, this feature opens all ports to a single station and hence renders that system exposed to intrusion from outside. The port forwarding feature is more secure because it only opens the ports required by that application. Item Description Enable DMZ It will enable the DMZ service if you select it.
註解 [J1]: 111 5.2.1 Port Filtering When enabled packets are denied access to Internet/filtered based on their port address. Item Description Enable Port Filtering Select Enable Port Filtering to filter ports. Port Range Enter the port number that needs to be filtered. http://www.sapido.com.tw/ 56 User Manual v1.0.
Protocol Please select the protocol type of the port. Comment You can add comments for this regulation. Apply Changes & Reset Click on Apply Changes to save the setting data. Or you may click on Reset to clear all the input data. Current Filter Table It will display all ports that are filtering now. Delete Selected & Delete All Click Delete Selected will delete the selected item. Click Delete All will delete all items in this table. Reset You can click Reset to cancel.
Item Description Enable IP Filtering Please select Enable IP Filtering to filter IP addresses. Local IP Address Please enter the IP address that needs to be filtered. Protocol Please select the protocol type of the IP address Comment You can add comments for this regulation. Apply Changes & Reset Click on Apply Changes to save the setting data. Or you may click on Reset to clear all the input data. Current Filter Table It will display all ports that are filtering now.
Item Description Enable MAC Filtering Please select Enable MAC Filtering to filter MAC addresses. MAC Address Please enter the MAC address that needs to be filtered. Comment You can add comments for this regulation. Apply Changes & Reset Click on Apply Changes to save the setting data. Or you may click on Reset to clear all the input data. Current Filter Table It will display all ports that are filtering now. Delete Selected & Delete All Click Delete Selected will delete the selected item.
Item Description Enable URL Filtering Please select Enable MAC Filtering to filter MAC addresses URL Address Please enter the MAC address that needs to be filtered. Apply Changes & Reset Click on Apply Changes to save the setting data. Or you may click on Reset to clear all the input data. Current Filter Table It will display all ports that are filtering now. Delete Selected & Delete All Click Delete Selected will delete the selected item. Click Delete All will delete all items in this table.
Item Description Enable QoS Check “Enable QoS” to enable QoS function for the WAN port. You also can uncheck “Enable QoS” to disable QoS function for the WAN port. Automatic uplink speed / Manual Uplink Speed Set the uplink speed by manual to assign the download or upload bandwidth by the unit of Kbps or check the Automatic uplink speed.
Item Description Enable DoS Prevention Check “Enable DoS Prevention” to enable DoS function for prevention. You also can uncheck ““Enable DoS Prevention” to disable DoS function. 5.2.7 VLAN Settings http://www.sapido.com.tw/ 62 User Manual v1.0.
Item Description Tag Add VLAN tag to packet VID Set VLAN ID(1~4096) Priority It indicates the frame priority level. Values are from 0 (best effort) to 7 (highest); 1 represents the lowest priority CIF Enable or Disable CIF 5.3 Server Setup 5.3.1 FTP http://www.sapido.com.tw/ 63 User Manual v1.0.
Item Description Enable FTP Server FTP server start or stop Enable Anonymous to Login Agree anonymous account login to FTP server Enable FTP Access from WAN Allow user access device FTP server from WAN side(internet) FTP Server Port Default FTP server port is 21 Idle Connection Time-Out FTP process should have an idle timeout, which will terminate the process and close the control connection if the server is inactive (i.e.
Chapter 6 Advanced Setup You can find advanced settings in this section. Router Mode only. AP Mode only. WiFi AP Mode only. 6.1 Dynamic DNS Setting You can assign a fixed host and domain name to a dynamic Internet IP address. Each time the router boots up, it will re-register its domain-name-to-IP-address mapping with the DDNS service provider. This is the way Internet users can access the router through a domain name instead of its IP address.
User Name/Email User name is used as an identity to login Dynamic-DNS service. Password/Key Password is applied to login Dynamic-DNS service. Apply Changes & Reset Click on Apply Changes to save the setting data. Or you may click on Reset to clear all the input data. 6.2 Wireless Advanced Setup In Advanced Settings page, more 802.11 related parameters are tunable. http://www.sapido.com.tw/ 66 User Manual v1.0.
Item Description Fragment Threshold To identify the maxima length of packet, the over length packet will be fragmentized. The allowed range is 256-2346, and default length is 2346. RTS Threshold This value should remain at its default setting of 2347. The range is 0~2347. Should you encounter inconsistent data flow, only minor modifications are recommended. If a network packet is smaller than the present RTS threshold size, the RTS/CTS mechanism will not be enabled.
15%. Apply Changes & Reset 6.2.1 Click on Apply Changes to save the setting data. Or you may click on Reset to clear all the input data. Wireless Site Survey This function provides users to search existing wireless APs or wireless base stations from ISP. You can connect to a wireless AP manually in Wi-Fi AP mode. The designed AP will appear on SSID column in Wireless Basic Setup page. Please click on Refresh to refresh the list. Click Connect after select an existing AP to connect. 6.2.
(2). Fill in the PIN number from the wireless card in Client PIN Number field, and then click “Start PIN”. (3). Click PIN from Adapter Utility to complete the WPS process with the wireless router. http://www.sapido.com.tw/ 69 User Manual v1.0.
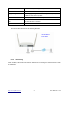
2. Start PBC: (1). Press the WPS button (A) from BR485D and wait for Wireless/WPS LED light (B) changed into orange. (2). Press the WPS button (C) from the adapter until the setup window shows up. (3). Open a web browser to check the internet connection. Please also refer to section 4.1.1 WPS setup for more details. 6.3 System Management This section including Change Password, Firmware Upgrade, Profiles Save, Time Zone Setting, UPnP Setting, VPN Passthrough Setting, and Language Setting.
6.3.1 Statistics It shows the packet counters for transmission and reception regarding to Ethernet networks http://www.sapido.com.tw/ 71 User Manual v1.0.
6.3.2 Walk on LAN Schedule Switch your computer ON through your LAN or the Internet . To support WOL you must have a computer with Motherboard that supports WOL, as well as a Network Controller (NIC) supporting this function. Most of the newer Motherboard (circa 2002 and On), have an On Board NIC that supports WOL. Otherwise you need to install a PCI NIC that is WOL capable. http://www.sapido.com.tw/ 72 User Manual v1.0.
6.3.3 Change Password Users can set or change user name and password used for accessing the web management interface in this section. Click on Apply Changes to save the setting data. Or you may click on Reset to clear all the input data. 6.3.4 Firmware Upgrade http://www.sapido.com.tw/ 73 User Manual v1.0.
This function can upgrade the firmware of the router. There is certain risk while doing firmware upgrading. Firmware upgrade is not recommended unless the significant faulty is found and published on official website. If you feel the router has unusual behaviors and is not caused by the ISP and environment. You can check the website (http://www.amigo.com.tw) to see if there is any later version of firmware. Download the firmware to your computer, click Browser and point to the new firmware file.
Users can create a backup file that contains current router settings. This backup file can be used to restore router settings. This is especially useful in the event you need to reset the router to its default settings. 1. Save Configuration (1). Click Save (2). Please click “Save” to save the configuration to your computer. (3). Select the location which you want to save file, then click Save. http://www.sapido.com.tw/ 75 User Manual v1.0.
2. Load configuration file (1). Click Choose File (2). Select configuration file then click Open (3). Click Upload to upload configuration file to BR485D. (4). After 90 seconds, BR485D will reboot automatically. 3. Reload factory default setting (1). Please click Reset http://www.sapido.com.tw/ 76 User Manual v1.0.
(2). Please click OK to start reload factory default setting to BR485D. (3). After 90 seconds, BR485D will reboot automatically. 6.3.6 Time Zone Setting Users can synchronize the local clock on the router to an available NTP server (optional). To complete this setting, enable NTP client update and select the correct Time Zone. Item Description Current Time Users can input the time manually. http://www.sapido.com.tw/ 77 User Manual v1.0.
Time Zone Select Please select the time zone. Enable NTP client update Please select to enable NTP client update or not. Automatically Adjust Please select to enable Automatically Adjust Daylight Saving or not. Daylight Saving NTP Server Please select the NTP server from the pull-down list, or you can enter the NTP server IP address manually. Apply Changes & Reset & Please click on Apply Changes to save the setting data. Or you may click on Reset to clear all the input data.
Item Description IPSec Pass-through Internet Protocol Security (IPSec) is a suite of protocols used to implement secure exchange of packets at the IP layer. To allow IPSec tunnels to pass through the router, IPSec Pass-through is enabled by default. To disable IPSec Pass-through , select Disable PPTP Pass-through Point-to-Point Tunneling Protocol is the method used to enable VPN sessions to a Windows NT 4.0 or 2000 server.
When you see the screen message change to the selected language, the setup is completed. 6.3.10 Routing Setup Dynamic routing is is a distance-vector routing protocol, which employs the hop count as a routing metric. RIP prevents routing loops by implementing a limit on the number of hops allowed in a path from the source to a destination.
Item Description Enable Dynamic Route Enable or Disable dynamic route NAT Enable or Disable NAT function Transmit There are 3 options: Receive http://www.sapido.com.tw/ 1. Disable:do not send any RIP packet out 2. Send RIP1 packet out 3. Send RIP2 packet out There are 3 options: 4. Disable:do not receive any RIP packet 5. Only receive RIP1 packet 6. Only receive RIP2 packet 81 User Manual v1.0.
Item Description Enable Static Route Enable or Disable dynamic route IP Address Destination IP address Subnet Mask Destination IP subnet mask Gateway Gateway IP address for destination Metric Metric number on router’s routing table Interface Static route rule for LAN or WAN interface 6.4 Log & Status The category provides Network Config and Event Log status for users to know the operation status. 6.4.
6.4.2 Event Log You may enable the event log feature here. http://www.sapido.com.tw/ 83 User Manual v1.0.
Item Description Enable Log You may choose to enable Event Log or not. System all, Wireless, & DoS Please select the event you want to record. Enable Remote Log You may choose to enable the remote event log or not. Log Server IP Address Please input the log server IP Address. Apply Changes & Refresh & Click on Apply Changes to save the setting data. Click on Refresh to renew the system time, or on Clear to clear all the record.
6.5 Logout This function logs out the user. http://www.sapido.com.tw/ 85 User Manual v1.0.
Chapter 7 Samba Server The BR485D is able to act as a Samba server to share the file on USB storage in local network. 7.1 How to use BR485D as a Samba server 1. Plug in the USB hard disk/Flash. 2. Star your web browser and input \\192.168.1.1. 3. Star “My Computer” and you will find a folder named “sda1”. http://www.sapido.com.tw/ 86 User Manual v1.0.
Chapter 8 DDNS Service Application DDNS is a service changes the dynamic IP to the static IP. The settings of DDNS can solve the problem of being given the different IP by router every time. After setting the Router, your host name would correspond to your dynamic IP. Moreover, via the host name application, it could be easier for you to use FTP, Webcam and Printer remotely. Dynamic DNS allows you to make an assumed name as a dynamic IP address to a static host name.
2. Fill in the form as required, and then click on Create Account button. http://www.sapido.com.tw/ 88 User Manual v1.0.
3. When you got this account created message, close it, and check your mailbox. You would get a mail from DynDNS website. 4. Click on the indicated address within your mail to confirm. http://www.sapido.com.tw/ 89 User Manual v1.0.
5. Click on login. 6. Click My Services after logging in. 7. Click Add New Hostname. 8. Put in your favorite hostname and service type, and then click Create Host after finished. http://www.sapido.com.tw/ 90 User Manual v1.0.
9. Your hostname has been created when you see the following page. http://www.sapido.com.tw/ 91 User Manual v1.0.
Chapter 9 9.1 1. Q&A Installation Q: Where is the XDSL Router installed on the network? A: In a typical environment, the Router is installed between the XDSL line and the LAN. Plug the XDSL Router into the XDSL line on the wall and Ethernet port on the Hub (switch or computer). 2. Q: Why does the throughput seem slow? A: To achieve maximum throughput, verify that your cable doesn’t exceed 100 meter.
1. Q: What is the default IP address of the router for LAN port? A: The default IP address is 192.168.1.1 with subnet mask 255.255.255.0 2. Q: I don't know my WAN IP. A: There are two ways to know. Way 1: Check with your Internet Service Provider. Way 2: Check the setting screen of BR485D. Click on Status & Log item to select Network Configuration on the Main Menu. WAN IP is shown on the WAN interface. 3.
A: Possible Solution 1: Make sure that your Ethernet connect properly and securely. Make sure that you've plugged in the power cord. Possible Solution 2: Make sure that your PC is using an IP address within the range of 192.168.1.2 to 192.168.1.254. Make sure that the address of the subnet mask is 255.255.255.0. If necessary, the Default Gateway data should be at 192.168.1.1. To verify these settings, perform the following steps: Windows 2000, or XP Users: 1.
A: Force your NIC to 10Mbps or half duplex mode, and turn off the "Auto-negotiate" feature of your NIC as a temporary measure. (Please look at the Network Control Panel, in your Ethernet Adapter's Advanced Properties tab.) 4. Q: Why can't I connect to the Web Configuration? A: you can remove the proxy server settings in your web browser. 9.5 1.
9.6 1. Wireless LAN Q: Why couldn’t my wireless notebook work on-line after checking? A: Generally, Wireless networks can sometimes be very complicated to set up, particularly if you're dealing with encryption and products from different vendors. Any number of variables can keep your workstations from talking to each other. Let's go over some of more common ones. For starters, verify that your router and your workstation are using the same SSID descriptions.
2. Q: My PC can’t locate the Wireless Access Point. A: Check the following: z Your PC is set to Infrastructure Mode. (Access Points are always in Infrastructure Mode.) z The SSID on your PC and the Wireless Access Point are the same. Remember that the SSID is case-sensitive. So, for example “Workgroup” does NOT match “workgroup”. z Both your PC and the Wireless Access Point must have the same setting for WEP.
A: The Wireless Router processes the data passing through it, so it is not transparent. Use the Special Application feature to allow the use of Internet applications which do not function correctly. If this does solve the problem, you can use the DMZ function. This should work with almost every application, but: 5. z It is a security risk, since the firewall is disabled. z Only one (1) PC can use this feature. Q: I can’t connect to the Wireless Router to configure it.
9.8 1. Others Q: Why does the router dial out for PPPoE mode very often? A: Normally some of game, music or anti-virus program will send out packets that trigger the router to dial out, you can close these programs. Or you can set the idle time to 0, then control to dial out manually. 2. Q: What can I do if there is already a DHCP server in LAN? A: If there are two DHCP servers existing on the same network, it may cause conflict and generate trouble.
Chapter 10 Appendices 10.1 Operating Systems 1. Microsoft:Windows 2000, XP, Vista, Windows 7. 2. Apple:Mac OS X 10.4.7, Leopard and the following related versions. 3. Linux:Redhat 9, Fedora 6 & 7, Ubuntu 7.04 and the following related versions. 10.2 Browsers 1. Internet Explorer ver. 6 and 7 and the following related versions. 2. FireFox ver. 2.0.0.11 and the following related versions.3. 3. Safari ver. 3.04 and the following related versions. 10.