
Installation Guide User Manual


Above Ground Model 224 Automotive Dynamometer Installation Guide
CHAPTER 2
Logo Panel Installation
2-20
. . . . . . . . . . . . . . . . . . . . . . . . . . . . . . . . . . .
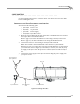
LOGO PANEL INSTALLATION
Use the following instructions to install the logo panels on your dyno.
You will need the following parts:
• 21200004 Mounting Bracket (4)
• 21200009 Lower Mounting Bracket (2)
• 36491100 Nut, 7/16-14, Hex, Grade-5 (4)
• 36561045 Screw, 1/4-20 x 5/8", Pan-Head, Torx (10)
• 36591670 Bolt, 7/16-14 x 1", Hex (4)
• 36933100 Washer, 7/16", Flat, Steel (4)
• 61100001 Logo Panel Assembly (2)
• DM150-011-002 Washer, 3/8", Flat (8)
• DM150-019-008 Bolt, 3/8-16 x 3/4", Hex (8)
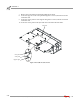
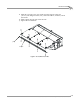
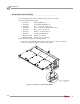
Repeat the following steps for both logo panels.
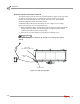
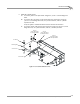
1 Secure the lower mounting bracket to the dyno using two 7/16-14 x 1-inch hex
bolts, two 7/16-inch flat washers, and two 7/16-14 nuts.
Figure 2-16: Install the Lower Mounting Bracket
lower mounting
bracket