
Installation Guide Instruction Manual


In Ground Model 224 Automotive Dynamometer Installation Guide
CHAPTER 2
Dyno Installation
2-4
. . . . . . . . . . . . . . . . . . . . . . . . . . . . . . . . . . .
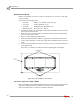
DYNO INSTALLATION
This section will walk you through removing the dyno from the crate and installing
the dyno in the pit.
REMOVING THE DYNO FROM THE CRATE
You will need to provide equipment capable of lifting a minimum of 2,722 kg.
(6,000 lb.) to move the crated dyno into position in your dyno room. You will also
need a pair of straps capable of supporting the same weight. Dynojet recommends
using two 2-inch x 6-foot single loop style straps. Refer to
“Forklift Requirements” on
page 1-8 for more information.
#
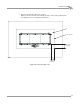
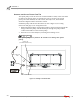
RECORD
Be sure you record the dynamometer number on the inside cover of this
manual.
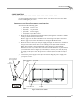
1 Remove the crate braces that support the top portion of the crate.
2 Remove the four lag bolts and washers securing the dyno to the crate base using a
9/16-inch socket, open or box end wrench.
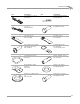
3 Route the loop strap through the opening in the dyno frame and through itself.
Pull the strap tight. Do this on each side of the dyno frame.
4 Push the forklift forks together.
5 Place each loop strap over both forks.
Note: The straps must be the same length and meet in the middle. Verify each
loop strap is over both forks to prevent the forks from being pulled apart.
6 Using the forklift, carefully lift the dyno off the crate and move it into position in
your dyno room.
Figure 2-1: Loop Strap Placement
place strap through
opening in dyno frame
dyno number