
Installation Guide User Manual


DYNO INSTALLATION AND SETUP
Dyno Hood
Version 3 Motorcycle Dynamometer Installation Guide
1-13
. . . . . . . . . . . . . . . . . . . . . . . . . . . . . . . . . . .
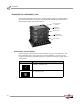
DYNO HOOD
There is a door safety switch included with the European dynos only. European dyno
owners will need to install this switch before reinstalling the hood. Installation
instructions are included with the switch.
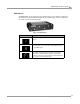
INSTALLING THE HOOD
1 Make a final inspection of your dyno and verify that all connections are tight.
2 If you have not already done so, connect the battery.
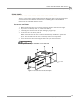
3 Carefully place the hood on the dyno leaving it propped up.
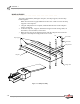
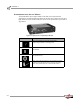
4 Secure the wires to the key switch.
Note: You must have the wires connected and the key installed to operate the
dyno. The orientation of the wires on the key switch is not important.
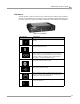
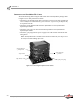
5 Lower and secure the hood using the four bolts you removed earlier.
Never operate the dyno with this cover removed.
Figure 1-16: Secure the Hood to the Dyno
key switch