
Product Manual


DYNATRON® 125™ PHYSICAL FEATURES
DYNATRON
®
125 | OPERATOR’S MANUAL REV. 3 | 8/29/2017 7
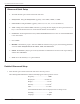
9. BRIGHTNESS / CONTRAST
As contrast and clarity of the screen graphics can be aected by the lighting in the area where the Dynatron 125 is
used, this key allows for the manual adjustment of the brightness/contrast of the displays.
10. POWER DISPLAY - W/cm
2
to WAT T S
is key shows the POWER selected for the current treatment. e Default Power is displayed in WATTS per square
centimeter (WATT/cm2). WATT/cm2 is the intensity of the Ultrasound at the head surface; it is the total Watts
divided by the eective radiating area of the head. e display may be changed to WATTS, if desired, by pressing the
POWER toggle key located on the Settings Screen.
11. LANGUAGE
e default language for the Dynatron 125 is English; however, both French and Spanish are also available. To change
the language, press the LANGUAGE toggle key until the desired language appears in the display.
12. HEAD WARMING
e HEAD WARMING feature defaults to OFF. When HEAD WARMING is ON but idle, the soundhead is warmed
automatically. Head warming may be turned OFF or ON by pressing the WARMING key located on the Settings
Screen.
13. HEAD CALIBRATION
Manually entering parameters for the Dynatron 125 SmartHeads is not necessary. is key provides the capability to
enter parameters manually in the event that parameters are lost or the user wishes to enter the parameters manually.
is key is also used to access user calibration mode for soundheads.
14. RESTORE DEFAULTS
e Dynatron 125 has the following default settings: Soundhead Warming OFF, Time 5:00 min., and Power Display
set to Watts/cm
2
. Each of these settings may be changed by the user along with other setting (instructions are
provided earlier in this section). If you have changed the settings for this device, but would like to return ALL the
default settings to those that were set at the factory, press the RESTORE DEFAULT KEY.
15. START
e green key in the upper right corner of the Operations Screen is the START key. Press the START key and the
treatment timer will begin to count down. During treatment, this same key will act as the PAUSE key.
16. STOP
Pressing the RED STOP key during a treatment immediately stops the output and sets the treatment intensity to zero.