
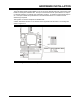
Specifications


PP 41x/03x 3-1
3 SOFTWARE INSTALLATION
In most cases, installing operating system software on the PP 41x/03x board follows the same
sequence as installing on a PC. However, there are some additional points to note. The sections
below summarize the special actions required for a few common operating systems.
3.1 Starting up for the first time
Many operating systems running on the board will want to use the standard Real-Time Clock
hardware. To maintain the date and time settings, and several other settings recorded by the PC
BIOS, the battery must be fitted. When the board is first powered up, or at the first power-up after
changing the battery, carry out the following steps to set up the board.
1) Fit a battery as shown in Section 2.6.
2) Make sure that the Console Mode switch is set to the correct state for the console device
which will be used (VGA monitor and keyboard, or serial terminal). Most operating
systems which install on the target hardware will require a monitor and keyboard during
installation, even if they can subsequently be re-configured to use only a serial terminal.
See Section 6.1 for details of how to configure the board for this option.
3) Connect any additional modules and peripherals especially any mass storage devices.
4) Connect the console device and power up the board. Wait for the PC BIOS to sign on
and run its memory test.
5) When the test finishes, the BIOS may report a setup or date/time setting error. If this
occurs, press the <F2> key as soon as possible after the error is reported, and carry out
the following:
6) Set the time and date by using the cursor keys to move aroung the screen and reading
the help information in the right hand screen panel.
When the time and date have been set, move the cursor to any other field on the same screen,
then press the <F4> key to exit.
Press the ‘y’ key to accept the changes and restart.
The BIOS will then completely restart and re-run its memory test. This time it should complete and
begin boot-loading. To proceed with software installation, check that all necessary mass storage
devices are connected before continuing with one of the sequences below.