
Manual
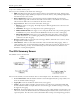
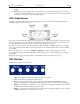
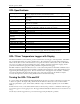
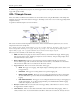

Table Of Contents
- Quick Start
- Overview
- Connecting the Logger to Your PC
- Setting Up the Logger To Record Data
- Custom Interval Setup
- Alarm Setup
- Using the Software to Check Logger Status
- Ending the Logging Session
- Powering Down the Logger
- Loading Logger Data
- Automatic Data Retrieval
- Working With the Data Graph
- Using the Zoom Feature
- Data Listing Window
- Data Summary and Statistics
- Using the Data Filter
- Hiding or Viewing Channels
- Exporting Logger Data
- Printing the Logger Data
- Calibrating the Logger
- Setting the Calibration Password
- Setting the Logger Real Time Clock
- Data Security
- Specifications
- MTL-30 Temperature Humidity Logger
- MTL-30 Logger Status LED
- Replacing the MTL-30 Battery
- MTL-30 Specifications
- MTL-20 Temperature Logger
- MTL-20 Logger Status LED
- Replacing the MTL-20 Battery
- MTL-20 Specifications
- GDL Temperature Humidity Logger with Display
- Turning the GDL On and Off
- GDL Sample Screen
- The GDL Summary Screen
- GDL Graph Screen
- GDL Buttons
- Replacing the GDL Battery
- GDL Specifications
- GDL-T Four Temperature Logger with Display
- Turning the GDL-T On and Off
- GDL-T Sample Screen
- GDL-T Difference Screen
- GDL-T Summary Screen
- GDL-T Graph Screen
- GDL-T Buttons
- Replacing the GDL-T Battery
- GDL-T Specifications
- MTL-LCD Loggers with Display
- MTL-LCD Display and Button
- Replacing the MTL-LCD Battery
- MTL-20-LCD Specifications
- MTL-30-LCD Specifications
DwyerLog User’s Guide Version 1.4x 32/33
ensure that water does not get into the unit. This is especially important in high humidity situations (90% RH and
above) where water may condense inside the logger, causing damage to the internal electronics.
Warning: Care must be taken to ensure that the logger is not operating under condensing conditions. This
means that the dew point temperature must be below the ambient temperature. Condensation will damage the
humidity sensor and the logger electronics.
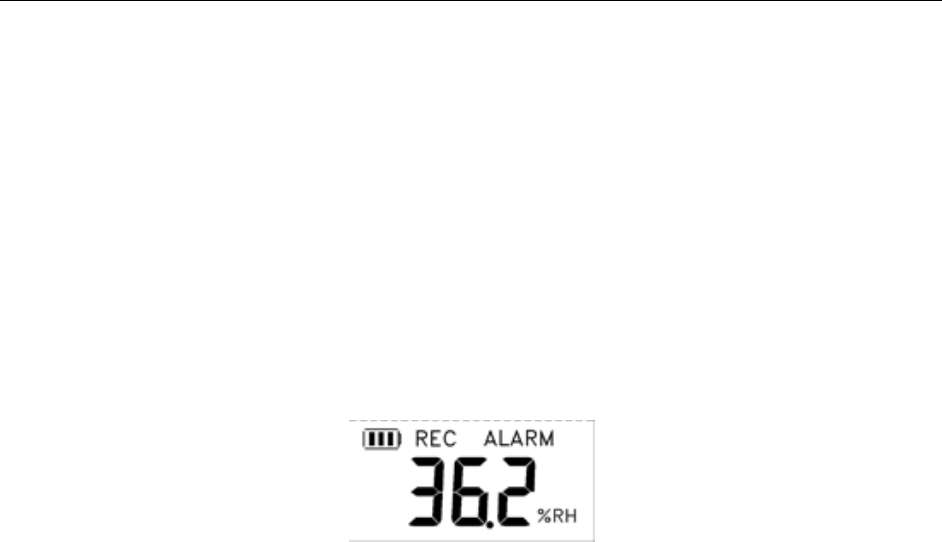
MTL-LCD Display and Button
The MTL-LCD display shows the current reading. MTL-20-LCD shows the temperature. MTL-30-LCD display
alternates between temperature and humidity. The display is updated every 2 seconds.
In addition to the current sample the display shows a solid REC icon when logging is in progress. The REC icon
flashes when the logger is waiting to log either by a button press or delayed logging. The ALARM icon is
displayed when the recorded data in logger memory exceeded one of the alarm thresholds set by the user during
logger setup.
The Start/Units button is used to:
• Start recording by holding down the button, when the logger was setup to start logging on button press.
• Change the displayed temperature units (°F or °C).
Replacing the MTL-LCD Battery
The battery level of the MTL-LCD loggers can be checked using the DwyerLog software, by opening the Logger
Status window. It is suggested that the battery is replaced when the battery level reaches yellow. When the battery
level reaches red, it is imperative that the battery is replaced as soon as possible. When the battery level is too low,
the logger will stop logging automatically, resulting in data not being recorded. The DwyerLog software will give
you a warning if you try to start a logging session while the battery is low.
To replace the battery follow these steps:
1. Disconnect the logger from the USB cable. Do not replace the battery while the USB cable is connected!
2. Using a screwdriver, remove the screw in the back of the logger.
3. Remove the logger from the case.
4. Using a pen or a pencil, push the battery out of the casing, then use your fingers to slide the battery out
Avoid using pliers as they will short the battery.
5. Press and hold the logger button for about 2 seconds. This step removes any extraneous charge from the
logger system. This step is very important. The logger may not operate correctly if this step is not
performed.
6. Slide the new CR2032 battery into the battery holder. Make sure that the + indicator on the battery
matches the + indicator on the battery holder.
7. When the battery is replaced correctly, you should see the sensor reading on the display.
8. Place the logger back in the case and replace the screw.