
Installation manual
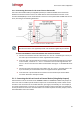


Connections and Configuration
19
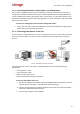
5.1.7 Connecting the Unit to the Power Supply
Connecting the electrical power to the unit is recommended as the last physical connection to be
made before connecting the encoder to the network. Before connecting to the power, please review
Indoor and Outdoor Installation Considerations (page 8) and Electrical/Power Supply Cables (page
10). Electrical safety should always be observed.
The IOI-XTRK-10D can obtain power from any of the following sources, which are available as
accessories from DVTEL:
12VDC power supply (DVT-PWR-40W or equivalent)
PoE injector (supplied with the unit)
To connect the power supply
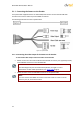
Insert a male two-pin connector from a properly rated power supply to the
power input terminal labeled “24V/12-24” on the encoder. See Figure 4 -
Power Input Terminal (page 4).
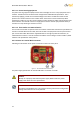
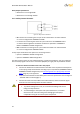
Warning:
To prevent bodily injury or damage to the unit, only use properly rate and approved
power supplies.
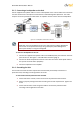
5.1.8 Connecting the Encoder to the Network
To connect the encoder to the network
1. Connect one end of a Category 5 or higher Ethernet cable to the ETHERNET 802.3af PoE
port on the encoder.
2. Connect the other end to the network switch or router. The encoder and
camera are now connected to the network.
Configuring the Encoder’s Network IP Settings 5.2
By default, the IOI-XTRK-10D is shipped with a factory-set IP and MAC addresses labeled on the
package. The automatic network IP configuration mode for DHCP connectivity is disabled.
The encoder’s network IP settings are configured by using the DVTEL Configurator application. For
instructions, refer to the XPVA-10D/100D Installation Guide.