
Installation guide


3-2
Atomix HDMI Installation Guide
3.1 Hardware Installation
How to install Atomix HDMI in a computer system is described in this
section. The installation has to be performed in several steps: First, you
have to prepare the computer system and the panels for the installa-
tion. After that the board itself must be installed, followed by the instal-
lation of the different panels. As the last step the hardware installation
has to be finished.
3.1.1 Preparations
Before installing the Atomix HDMI board the computer system and
some of the panels have to be prepared for the installation. The neces-
sary preparations will be described in the following.
Preparing the Computer System
To prepare the computer system where Atomix HDMI has to be in-
stalled perform the following:
Disconnect all cables (especially the power cords) from the com-
puter system where Atomix HDMI should be installed.
Open the computer casing. For details on how to do this please
refer to the respective manufacturer’s manual.
If you want to disconnect flat cables from the board once they
are plugged in, please read section “Unplugging Cables” on
page 1-6.
Please note that the availability of the panels depends on the
ordered feature set.
The computer system you are trying to install Atomix
HDMI in usually works with voltages that can be hazard-
ous to your health.
Never work on the system or access its interior with the
power cable(s) being plugged in. Make sure the power
supply is disconnected from the components you intend
to work on.
Computer hardware contains components that are sensitive
to electrostatic discharge. If you touch them without precau-
tionary measures, they can be destroyed.
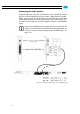
Use a wrist strap connected to ground when accessing elec-
tronic parts and take care of grounding the video system.
Avoid touching the components of the computer and Atomix
HDMI whenever possible.