
Operation Manual


Operation
20 Operating Instructions 911-210 - 01.0 - 11/2015
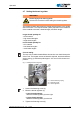
4.5 Changing the needle
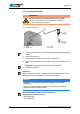
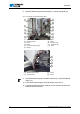
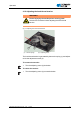
Fig. 8: Changing the needle
1. Push and turn the crank (1) until the needle bar (2) reaches the highest
position.
2. Loosen the screw (3).
3. Pull the needle downwards out of the needle bar (2).
4. Insert the new needle into the needle bar (2) until it reaches the end
stop.
Important: The groove (4) must face towards the hook.
5. Tighten the screw (3).
Sequence
After changing to a needle of a different size, adjust the clearance be-
tween the hook and the needle ( Service Instructions).
Faults caused by an incorrect hook clearance
After inserting a thinner needle
• Missing stitches
• Thread damage
Risk of injury by the needle point or moving parts.
Switch off the machine before replacing the needle.
Do not touch the needle point.
WARNING
(1) - Crank
(2) - Needle bar
(3) - Screw
(4) - Groove
①
④
②
③
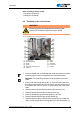
Damage to the machine and thread through incorrect hook
clearance.
After changing to a needle of a different size, adjust the clearance
between the looper and the needle.
NOTICE