
Installation Guide


10
through the ashing to the desired height.
Mark where the Storm Collar will go. Slip the
Storm Collar down over the pipe, and ax
it to the pipe with a 1/4”long stainless steel
sheet metal screw. (Figures 13 & 14). The
Storm Collar will then support the entire vent
system. Install the Cap. Seal the joint at the
Storm Collar, and any other joints or seams
which may appear suspect. Figure 15 shows
a Tall Cone Flashing modied to t a chimney
where the tile liner protrudes above the
masonry, as another alternate termination
technique. This completes the masonry
installation.
INSTALLATION THROUGH
SIDE OF MASONRY CHIMNEY
1. Set the appliance in its nal location
and mark the center of the hole where the
pipe is to penetrate the masonry chimney
(Figure 16). Insure that you comply with the
manufacturer’s specications in regards to
clearance and distances from combustible
surfaces.
2. The pellet vent system is assembled
essentially the same as previously described
for installation in an existing masonry
chimney with the exceptions listed:
A. No Flex Pipe is required, unless the
masonry chimney has an oset. If an oset
exists, then a section of Flex Pipe will be
needed to accommodate the oset.
B. A Tee is installed at the bottom end of the
vertical pipe (Figure 16).
C. A Reduction Collar or a Trim Collar is
required to go around the pipe section that
passes through the masonry to give it a
nished look (Figure 16).
3. It will be necessary to break out the
masonry around the location of the pipe
center line mark to a diameter of at least 4"
for 3" pipe, and at least 5" in diameter for 4"
pipe.
4. Install the Tee on the bottom of the vertical
pipe system and lower it down the chimney
until the center of the branch of the Tee
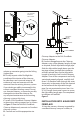
Figure 8
12 INCHES TO
END OF PIPE
B
C
A
TOP VIEW
Figure 9