
Prime Tundra Plug N Fly Instruction Manual


Step 5: Setting up the Radio and Servos.
7.When using the band-on method it is best to
use 4 bands for safety. If you only received 3
bands with your Prime Tundra then any good
quality rubber bands can be used. If bolting
the wing on then use the supplied
M2.5x16mm machine screws..
8.When assembling the wing to fly, push the
end of the strut over the metal spigot sticking
out of the wing and retain with the supplied
"R" clip. Slide the "R" clips on from the
leading edge side of the fixing as shown.
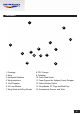
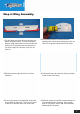
1. Connect the aileron Y lead to the gyro.
Then connect the aileron, elevator, rudder,
throttle, and gyro mode leads from the gyro
to the corresponding channels on your
receiver. The gyro mode lead needs to go to
a 3 position switched auxiliary channel.
2.The flap servo Y lead is connected directly to
the receiver, it does not pass through the
gyro. This needs to go to an auxiliary channel
that is operated with a 3 position switch.
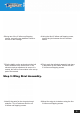
Note: The basic construction of the Prime Tundra is complete, the next step is setting up the radio
and then fitting the propeller. To proceed to the next step you will need to remove the wings. Also for
the next steps the propeller must NOT be installed on the motor.
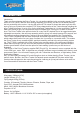
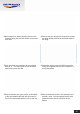
This being the Plug N Fly version of the Prime Tundra no transmitter or receiver is supplied, you will
be required to supply your own. For the ease of explanation and simplicity when setting up the radio
we have shown the Turnigy T6A-V2 transmitter and receiver in the following steps. For other radio's,
you will need to consult your manufacturers instruction booklet for binding and setting up, etc. For the
next 6 steps, please remove the wing from the fuselage.
8
Note: If your transmitter has the ability to be able to select a 2 position switch for arming/disarming the
throttle then we recommend you do this at this point. Consult your Tx manual to see if this option is
available.