
User`s guide

DataBase
Badge Templates
77
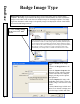
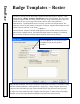
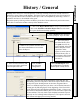
To
Edit
a text field, data field, graphic, image, or shape that has been placed on
the badge simply click on it once with the right mouse button and the format
screen will appear.
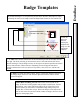
By default the badge is set for portrait style and can be altered to landscape by simply
switching the values in the badge width and height fields located on the General Tab.
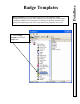
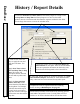
7. To
Add
,
select an item from the list on the left and drag it onto the assembly area on
the right. Do this by selecting an item with the mouse, click and hold the left mouse
button and drag it onto the badge canvass on the right to the desired position and release
the left mouse button. When released a formatting screen will appear that allows
specific characteristics to be set such as X/Y position, color, font, size, and barcode.
format.
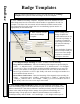
8. Click on
OK when
finished
creating the
template and
assign it to the
appropriate
company.
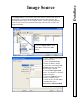
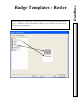
Send to Back and Bring to Front
allows items to be layered on the
badge. If there are several graphics and/or images on the layout, Send to
Back allows you to select which one will be on top. There may be an
instance where you will want a Card Holder Image sitting on top of a
Graphic like a colored box or logo. Place both images on the layout and
click on one of the two and select Send to Back or Bring to Front to set the
images in their proper place.