
User Manual


20
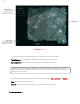
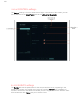
When you add Mission to the map, you will see on the flight trees appear on the left
side. You can add multiple survey areas, delete areas from Mission Tree, or change the
order of missions.
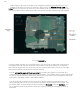
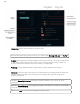
3.4 Execute a drone mission
After setting up your mission on the tablet, you simply slide “Slide to Take-Off” and the
mission will be loaded into the drone.
The Drone control surfaces (elevons) will lift. This means the drone is ready for take-off.
Gently lift the drone up, grasping each wing’s leading edge. The drone will be in front of
you as you lift it up. Be careful that your hands stay well away from the propeller.
Determine the wind direction, and facing the opposite direction, shake the drone twice
using a forward and backward motion, this starts the motor. Then, with the drone parallel
to the ground, throw it forward and up, and the drone will take off on its mission.
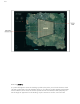
You can see the airplane flight trajectory and flight parameters real time on the tablet.
You might momentarily lose signal sometimes on turns. If the signal does not restart,
follow the instruction on page ___ to increase radio signal quality.
Maintaining Your Drone
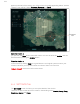
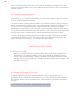
4.0 Battery Charging
Before every flight make sure that all batteries, drone’s and HUB’s batteries are
charged fully. To charge the battery, simply plug charger AC adapter to power
source. Then connect battery’s “power connector” and “balance connector” to the
charger as in the picture below. The Charger will automatically start to charge. 3 red
LED lights will turn on.
.
4.1 Repairing Fuselage Damage
Small damages in the airframe can be repaired by using a special glue which is
specifically for EPP (Expanded Polypropylene). If you have doubts about the extent of
the damage, always contact Dronee to verify if the damage can be easily repaired by
yourself.
Caution: Never fly your drone if the airframe has any cracks.