
User`s guide


19
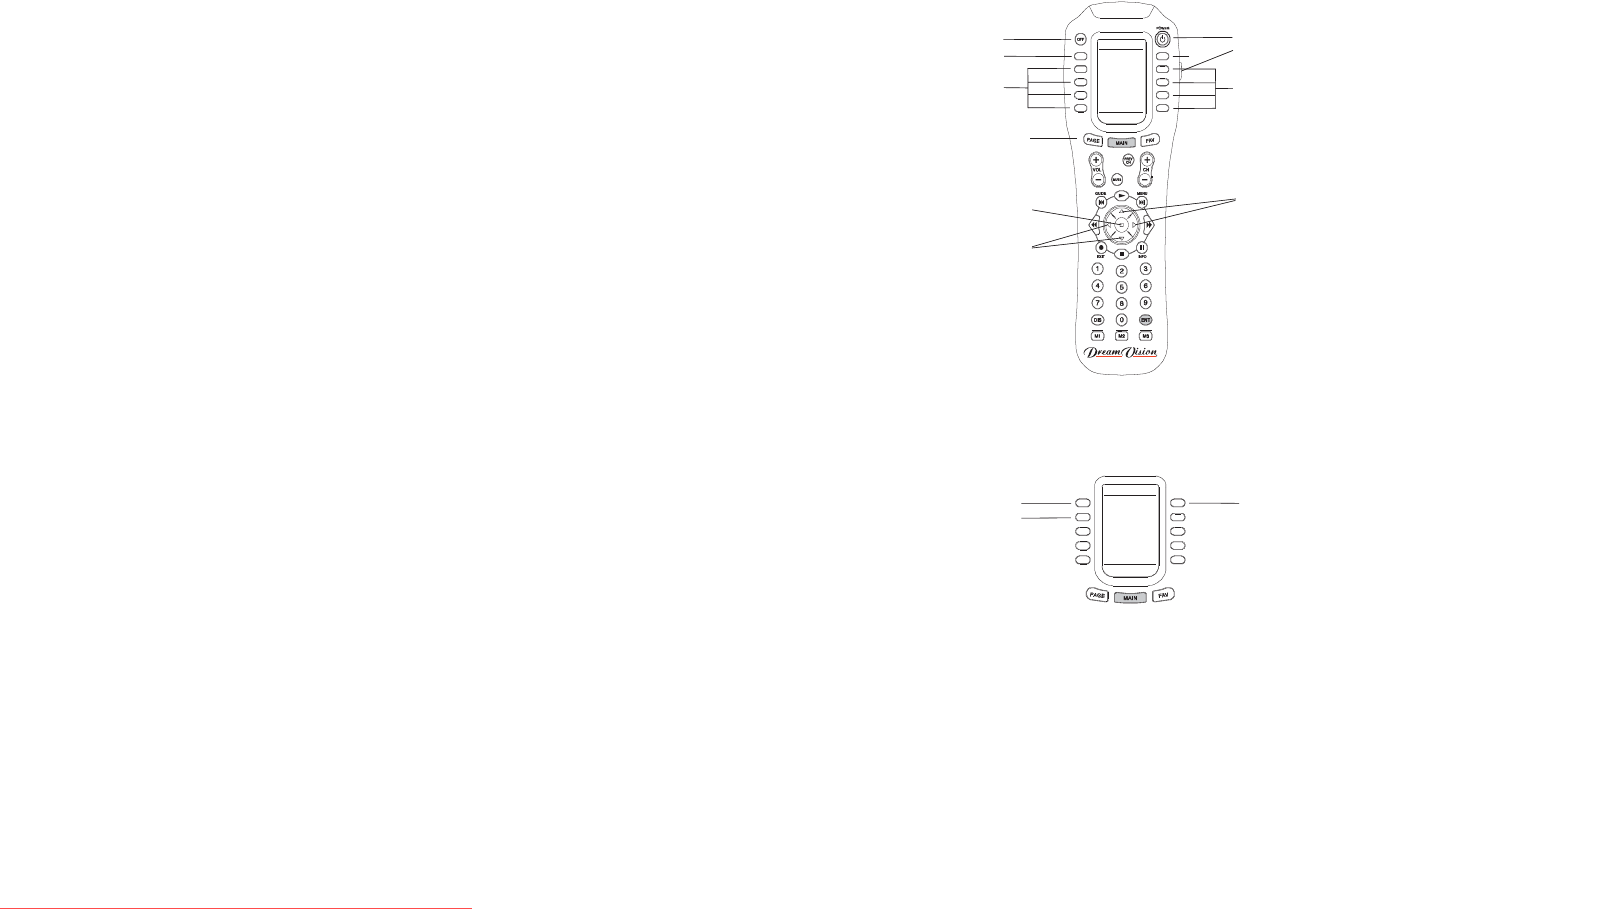
Using the remote control
Use the provided four batteries in install them in the Remote. To operate,
point the remote at the screen or at the projector. The range of optimum
operation is 0 to 9,14 m. (30 feet).
Press the remote’s
DREAM
button to have access to the DreamWeaver Plus
functions. Press then the
MENU
button (11) to enter the DreamWeavers’
menu. Use the arrow buttons (12) to navigate, and the
Select
button (13 or
8)to select features and adjust values in the menus. See page 21 for more
info on the menus.
The remote also has:
•
Power
button (1) to turn the projector on and
OFF
button (2) to tun it
off (see page 11 for shutdown info)
• backlight button (3) to light the remote’s buttons in the dark
On
Page 1
of the LCD screen you have also direct access to
•
Brightness +/-
and
Contrast +/-
(4)
buttons to adjust the image
•
4 pre-set video inputs
(5) buttons to select the source
•
Resize
(6) button to change the Aspect Ratio (see page 22)
Then, press the Page (7) button to have access to the
Page 2
of the menu:
•
Blank
(9) button to display a blank screen instead of the current image
(to change the color of the screen, see page 28)
•
Auto
(10) button to resynch the projector to the source
Troubleshooting the remote
• Make sure the batteries are installed in the proper orientation and are
not dead.
• Make sure you’re pointing the remote at the projector or the screen, not
at the video device or the computer, and are within the remote range of
30 feet (9.14m).
•
SYSTEM
PAGE 1
DREAM
MENU RESIZE
DVI 1 BRIGHT+
RGB 2 BRIGHT-
YUV 3 CONT+
SVHS4 CONT-
2
1
3
4
5
6
7
11
12
12
13
PAGE 1
DREAM
ENTER AUTO
BLANK
8
9
10
9
Downloaded From projector-manual.com Dream Vision Manuals