
User Manual

www.seagullmodels.com
9
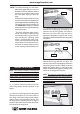
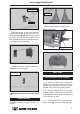
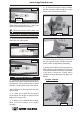
2) Install the rubber grommets and brass
collets onto the elevator servo. Test fit the
servo into the elevator servo mount.
Left side.
Remove
covering.
Because the size of servos differ, you
may need to adjust the size of the precut open-
ing in the mount. The notch in the sides of the
mount allow the servo lead to pass through.
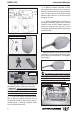
Left side.
Elevator servo.
Right side.
Elevator servo.
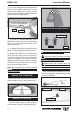
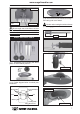
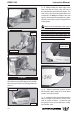
2) Place your engine onto the engine
mount. Adjust the engine is centered of the
edges of the engine case.
3) When you are satisfied with the align-
ment, mark the locations of the engine
mounting.
MOUNTING THE ENGINE.
1) Install the pushrod housing through the
predrilled hole in the firewall and into the servo
compartment. The pushrod housing should
protrude 1/4" out past the front of the firewall.
Make a Z-Bend 1/4" from one end of the plain
wire pushrod.
3) Secure the servos with the screws pro-
vided with your radio system.
4) Remove the engine. Using an drill bit,
drill the mounting holes through the engine
mount at the four locations marked.
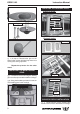
6) Attach the Z-Bend in the pushrod wire to
the throttle arm on the carburetor. You will need
to remove the throttle arm from the car- buretor
to be able to attach the Z-bend. When
complete, re-attach the throttle arm to the car-
buretor.
5) Bolt the engine to the engine mount using
the four machine screws. Double check that
all the screws are tight before proceeding.
Engine 2 stroke.
4.2mm.
150mm.
4x30mm.