
Installation Instructions


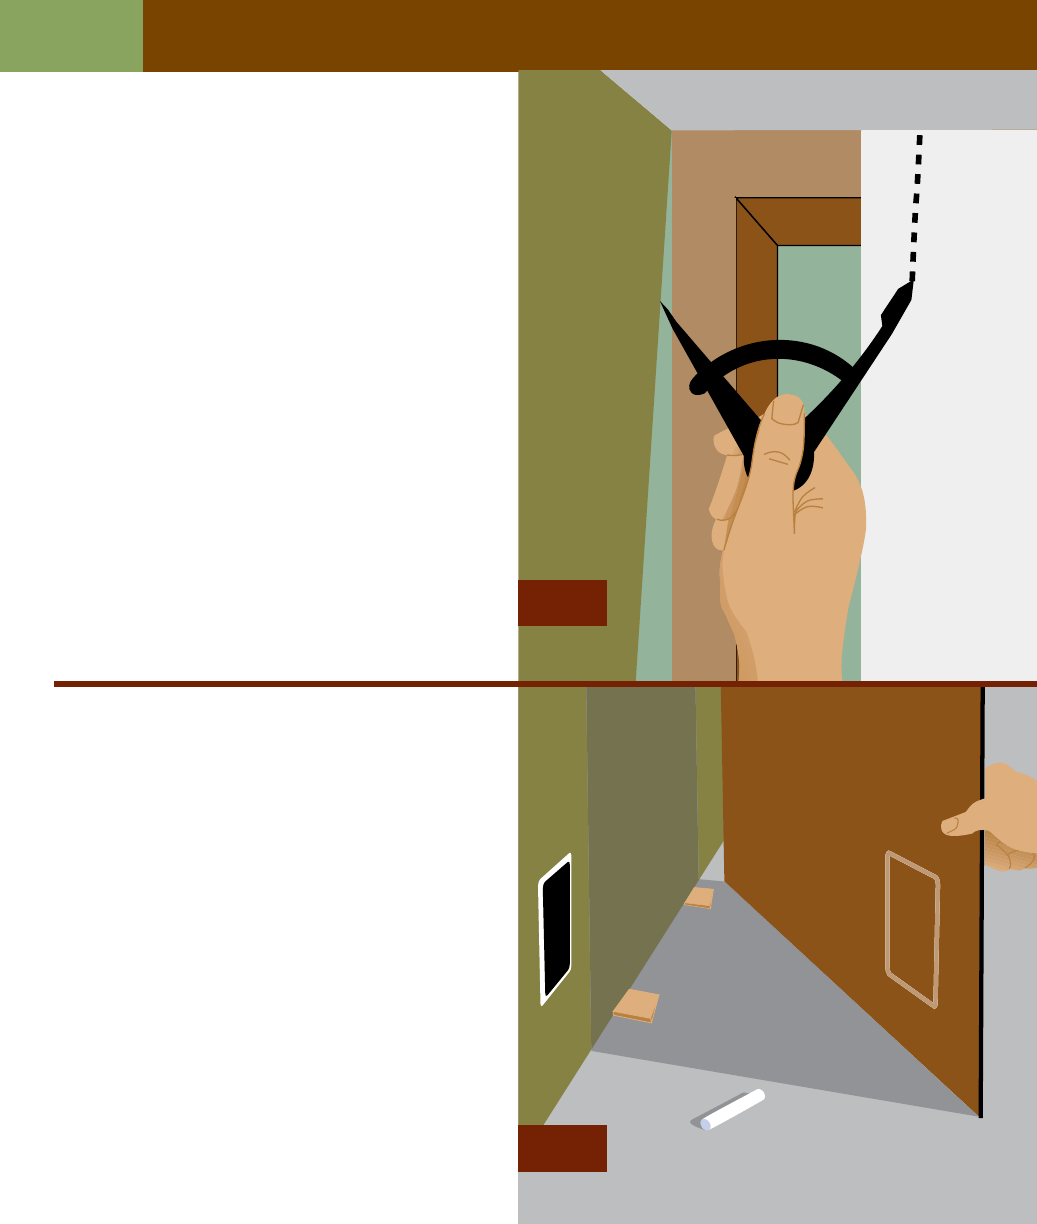
4a. Always start installation in the corner. Use
shims at floor level (to level panel and to allow
for the required space at the bottom of the
panel). Place plumb lines on the wall and scribe
and trim if needed to make panel edge fall on
the plumb line. To reduce chipping of surface,
cut panels face-up with fine-tooth handsaw,
or face-down with fine-tooth portable power
jigsaw or circular saw.
4a. Siempre inicie la instalación en una esquina. Use cu-
ñas al nivel del piso (para nivelar el panel y permitir el es-
pacio necesario en la parte inferior del panel). Coloque
líneas de plomo sobre la pared y márquelas y recorte
si es necesario para que el panel se alinee a la línea de
plomo. Para reducir el astillado de la superficie, corte
los paneles con la cara hacia arriba con una sierra de
dientes finos, o cara hacia abajo con una sierra caladora
o circular eléctrica portátil con dientes finos.
4b. To cut around electrical boxes, turn off
the power and unscrew the protective face
plate. Run chalk lines around the box edges
and carefully position the panel in its proper
space. Press panel firmly over the box area,
transferring the outline to the back of the
panel.
4b. Para cortar alrededor de las cajas eléctricas, corte la
energía y destornille la placa protectora. Marque líneas
de tiza alrededor de las orillas de las cajas y cuidadosa-
mente posicione el panel en su lugar. Presione el panel
firmemente sobre el área de la caja, transfiriendo el
trazado a la parte posterior del panel.
Cut Panels To Fit Corte A La Medida
4
4a
4b